Bio-Rad Firmware & Software Updates User Manual
Page 19
System Installation
6
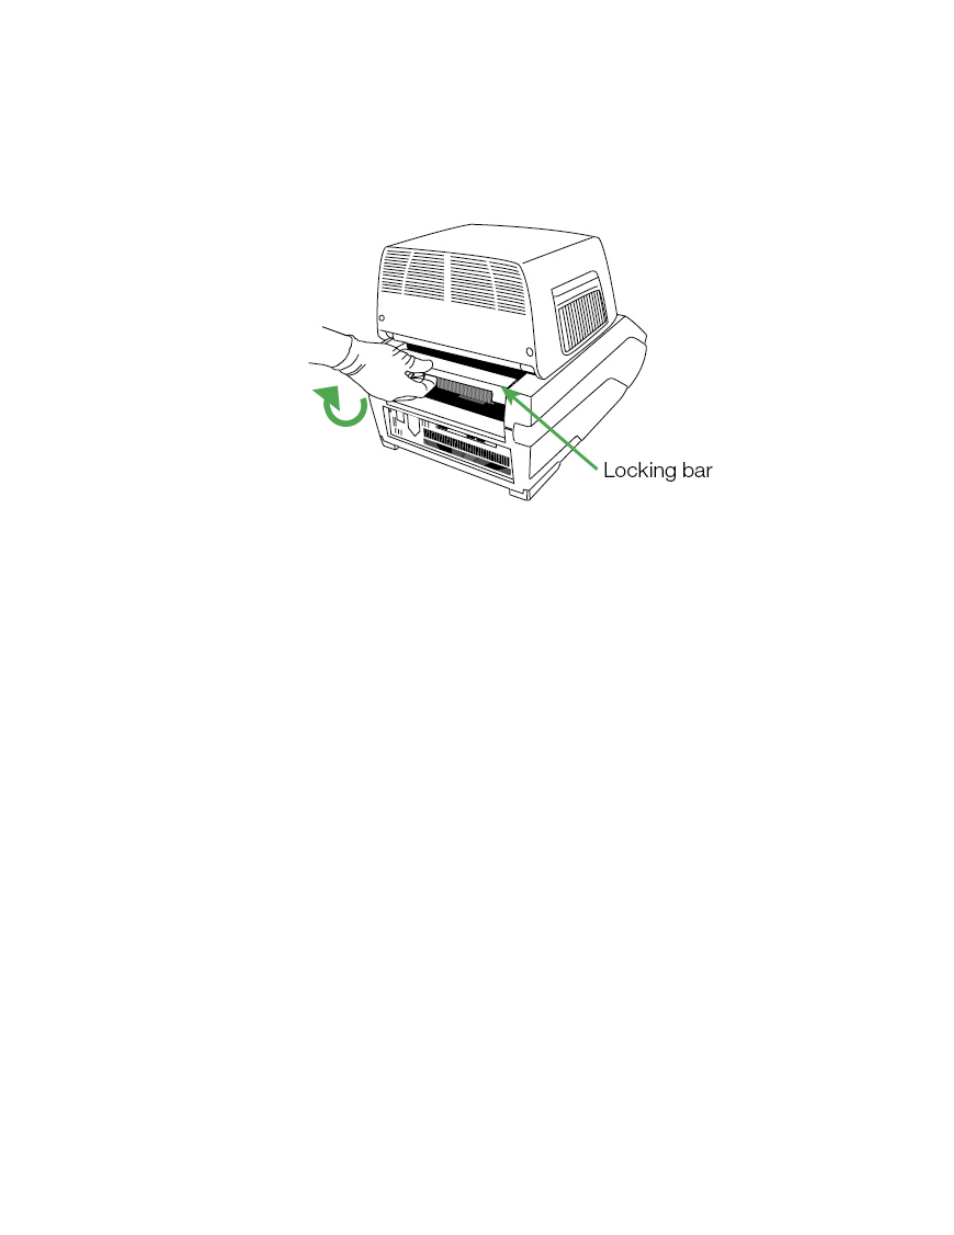
4. Reach around and pull up the locking bar of the C1000 Touch or CFX Connect chassis
until it is flush with the sides of the module bay. This action moves the module forward,
locking it into place (Figure 5).
Figure 5. Locking the optical module into place.
5. Check that the module is completely and evenly seated in the C1000 Touch or CFX
Connect chassis. Check the space around the bottom of the module. There should be no
extra space between the module and the base; the space should be even.
6. Plug the power cord into the back of the C1000 Touch or CFX Connect chassis (Figure 3)
and into an appropriate three-pronged electrical outlet.
7. Press the power switch on the back panel of the C1000 Touch or CFX Connect thermal
cycler chassis to start the system.
8. Follow the instructions on the C1000 Touch front panel or in the CFX Manager software
(for the CFX Connect system) to remove the red shipping screw from the inner heater lid.
•
Open the optical module lid by pressing the button below the Bio-Rad logo
•
Turn the screw counterclockwise to remove it from the hole in the inner heated lid
that corresponds to well A1 for the CFX96, CFX96 Deep Well, and CFX Connect
modules, or to the well adjacent to the left side of B1 for the CFX384 module
9. Remove the shipping plate from the thermal cycler block.
10.Close the optical module lid by pressing the button positioned in front of the block.
11.Press the Screw Removed button to confirm the shipping screw has been removed.
NOTE: If the shipping screw is not removed at this step, it will be detected by CFX
Manager software. Follow instructions to remove the screw (page 20).
TIP: The shipping screw must be in place when the module is shipped. Save this
screw in a safe place for future shipping.