19 . 11 han-brid, Quintax 3 a, Assembly instructions – Northern Connectors Harting HAN Industrial Rectangular Connectors User Manual
Page 302: 50 v 10 a
Han-
Brid
19
.
11
Han-Brid
®
Quintax 3 A
50 V 10 A
"
"https://b2b.harting.com/ebusiness/en/
"
"https://b2b.harting.com/ebusiness/en/
"
"https://b2b.harting.com/ebusiness/en/
"
"https://b2b.harting.com/ebusiness/en/
"
"https://b2b.harting.com/ebusiness/en/
"
"https://b2b.harting.com/ebusiness/en/
"
"https://b2b.harting.com/ebu
"
"https://b2b.harting.com/ebu
"
"https://b2b.harting.com/ebu
"
"https://b2b.harting.com/ebu
"
"https://b2b.harting.com/ebu
"
"https://b2b.harting.com/ebu
"
"https://b2b.harting.com/ebusiness/en/
"
"https://b2b.harting.com/eb
"
"https://b2b.harting.com/ebusiness/en/
"
"https://b2b.harting.com/ebusiness/en/
"
"https://b2b.harting.com/ebusiness/en/
"
"https://b2b.harting.com/ebusiness/en/
"
"
"https://b2b.harting.com/ebusiness/en/
"
"https://b2b .harting .com/ebusiness/en/
"
"https://b2b.harting.com/ebu
"
"https://b2b.harting.com/ebu
"
"https://b2b.harting.com/ebu
"
"https://b2b.harting.com/ebu
"
"
"https://b2b.harting.com/ebu
"
"https://b2b.harting.com/ebu
"
"
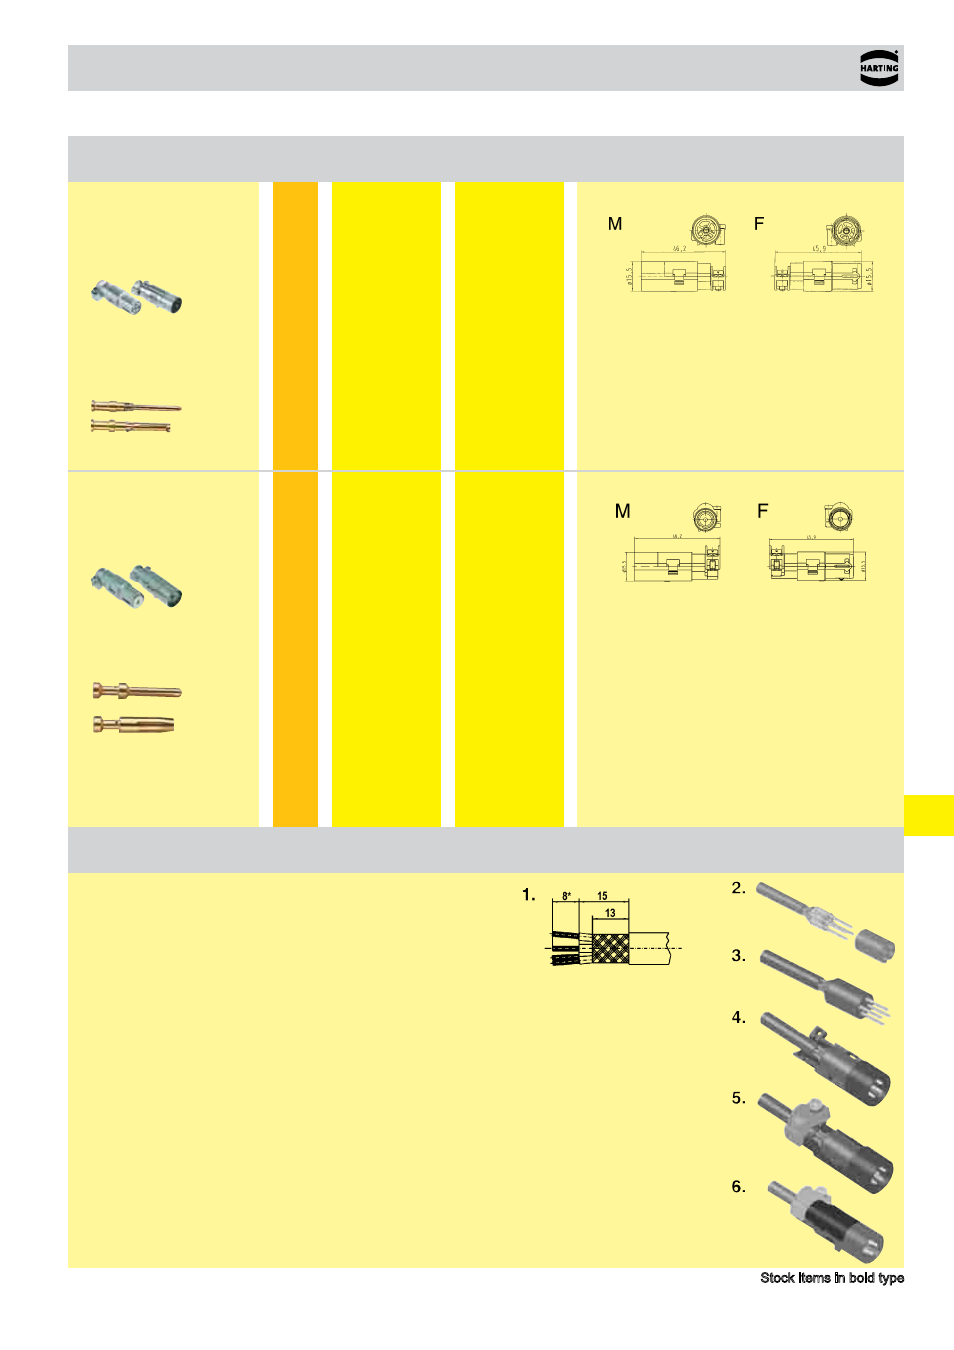
Stock items in bold type
Wire gauge
Part number
Identification
(mm²)
Male contact Female contact
Drawing
Dimensions in mm
Han D
®
Coax contact
75 Ω
1 + shielding, 75 Ω
Han D
®
crimp contacts
Han D
®
Crimp contact
gold plated
0,14-0,37
0,5
0,75
1
1,5
2,5
Han E
®
Coax contact
50 Ω
1 + shielding, 50 Ω
Han E
®
crimp contacts
Han E
®
contacts
gold plated
0,14-0,37
0,5
0,75
1
1,5
2,5
4
5,5
Assembly instructions
Quintax-Z-contact
1. Strip cable acc. to drawing 1 and fold the shielding over the cable.
2. Crimp Han D
®
contacts onto the wires.
3. Insert Han D
®
contacts into corresponding cavaties of insulator until they are snapped in.
4. Fit the insert including the cable into the opened shielded bushing. The coding pin of the shielded bus-
hing has to meet the groove of the insulator.
5. Clamp the tilt over the shielding onto the cable by means of the special clamp (small opening for cable
diameter of 3 - 6 mm, large opening for cable diameter of 6 - 9.5 mm).
6. Check the wiring.
7. Close the shielded bushing with the cover and insert it into the corresponding cavity of the Quintax
Module as usual.