Kinze Ag Leader Integra User Manual
Page 222
206
Firmware Version 5.2
1. To start the Sensor Muxbus Detection process, make any settings changes necessary at the Planter
Configuration screen and then press
. For more information on these settings, see
.
Note: The Muxbus detection process will only start if sensor configuration has changed.
2. Disconnect planter sensors from planter harness
Make certain all planter sensors are disconnected from the planter harness.
3. Accept the Muxbus Detection
A screen appears, informing you that your configuration has changed and that it will require a muxbus
detection. Once all sensors are disconnected, press
on the Configuration Changed screen. The
Muxbus Detection Process then begins.
4. Detect individual row units
Plug in each physical sensor plug into the muxbus
wiring harness on the planter (from left to right).
Follow the on-screen instructions.
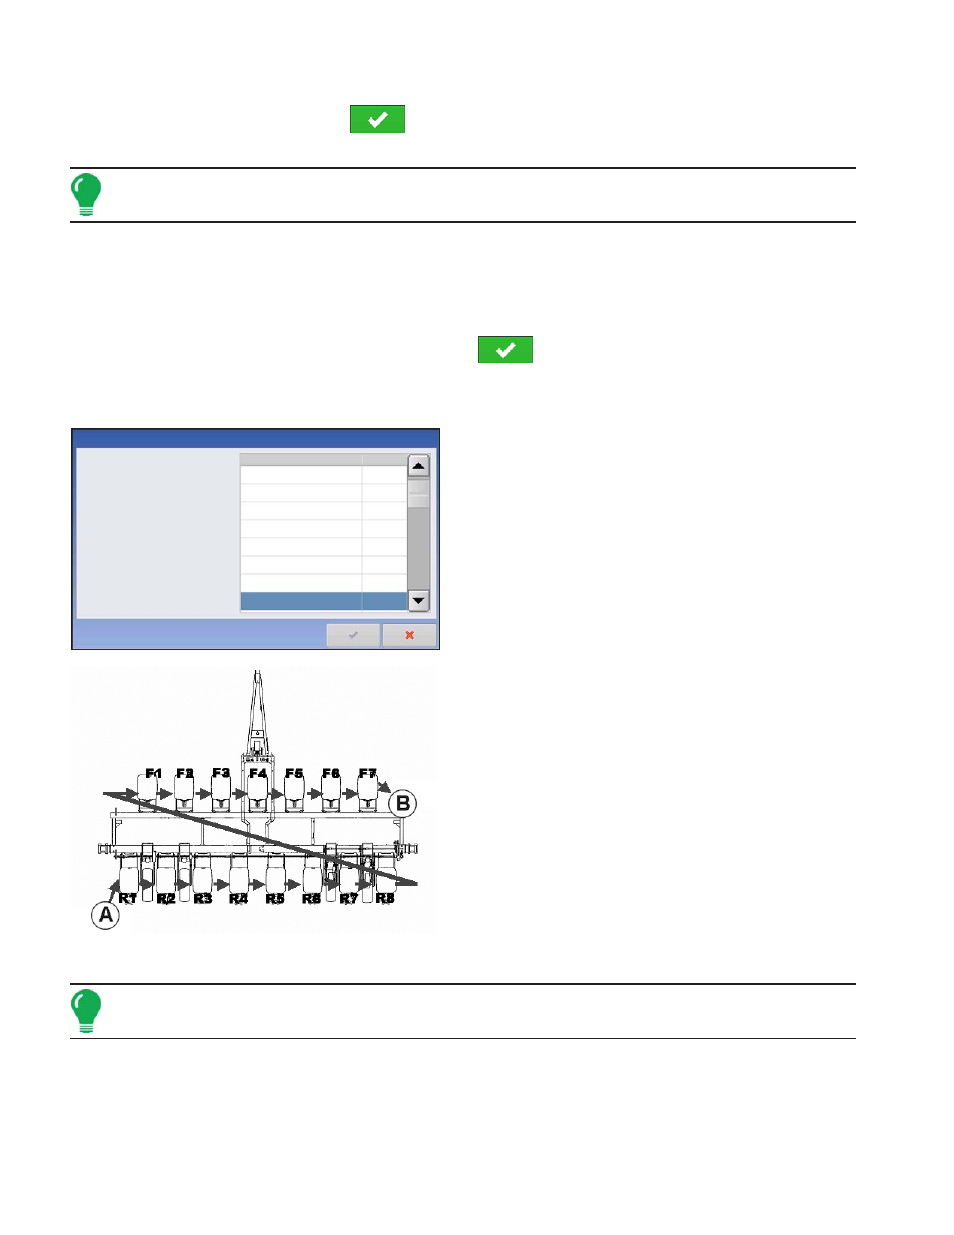
Order of Muxbus Sensor Installation
Install the muxbus sensors in the following order:
• Rear Row Seed sensors from left to right.
• Front Row Seed sensors from left to right.
- As shown from (A) to (B).
• Section Transmission sensors from left to right.
• Ground Speed Pickup Sensor.
• Auxiliary Sensors in the following order:
- a. SDS Sensors.
- b. EdgeVac® Sensors.
- c. Pneumatic Down Pressure.
- d. Seed Scale Sensor, Air Compressor Sensor, and ASD Sensor.
Note: When the row unit sensor is plugged in, the display will beep once and show the status as “Calibrating.”
When calibration is complete, the display will beep again and display either “OK” or “Slow”.
Row 1 OK
Row 2 OK
Row 3 OK
Row 4 OK
Row 5 OK
Row 6 OK
Row 7 OK
Item Status
Sensor Detection
Row 8
Install muxbus sensors in the following order:
1. Rear Row Seed Sensors from left to right.
2. Front Row Seed Sensors from left to right.
3. Section Transmission sensors from left to
right.
4. Ground Speed Pickup Sensor.
5. Auxiliary Sensors in the following order:
a. SDS Sensors
b. EdgeVac Sensors
c. Pneumatic Down Pressure