Setting timeline, Options, Setting timeline options – Google Earth User Guide User Manual
Page 91
example, you can view GPS tracks that occurred within a specific time
period and visually follow these tracks. To do this:
or other time-related data.
2. In the Places panel, select this data. The time slider appears at the
top of the 3D viewer with a time range that corresponds to the data
you selected.
3. Do any of the following:
●
To re-define the time range of data displayed in the 3D viewer, drag
the range markers (
) to the right or left.
●
To move the time range earlier or later, either drag the center tab of
the range in the time slider or click the small white arrows near the
ends of the time slider (
).
●
To play an animation of the sequence, click the Play button (
). Note that this is only useful if only a portion of the data is
defined in the time range.
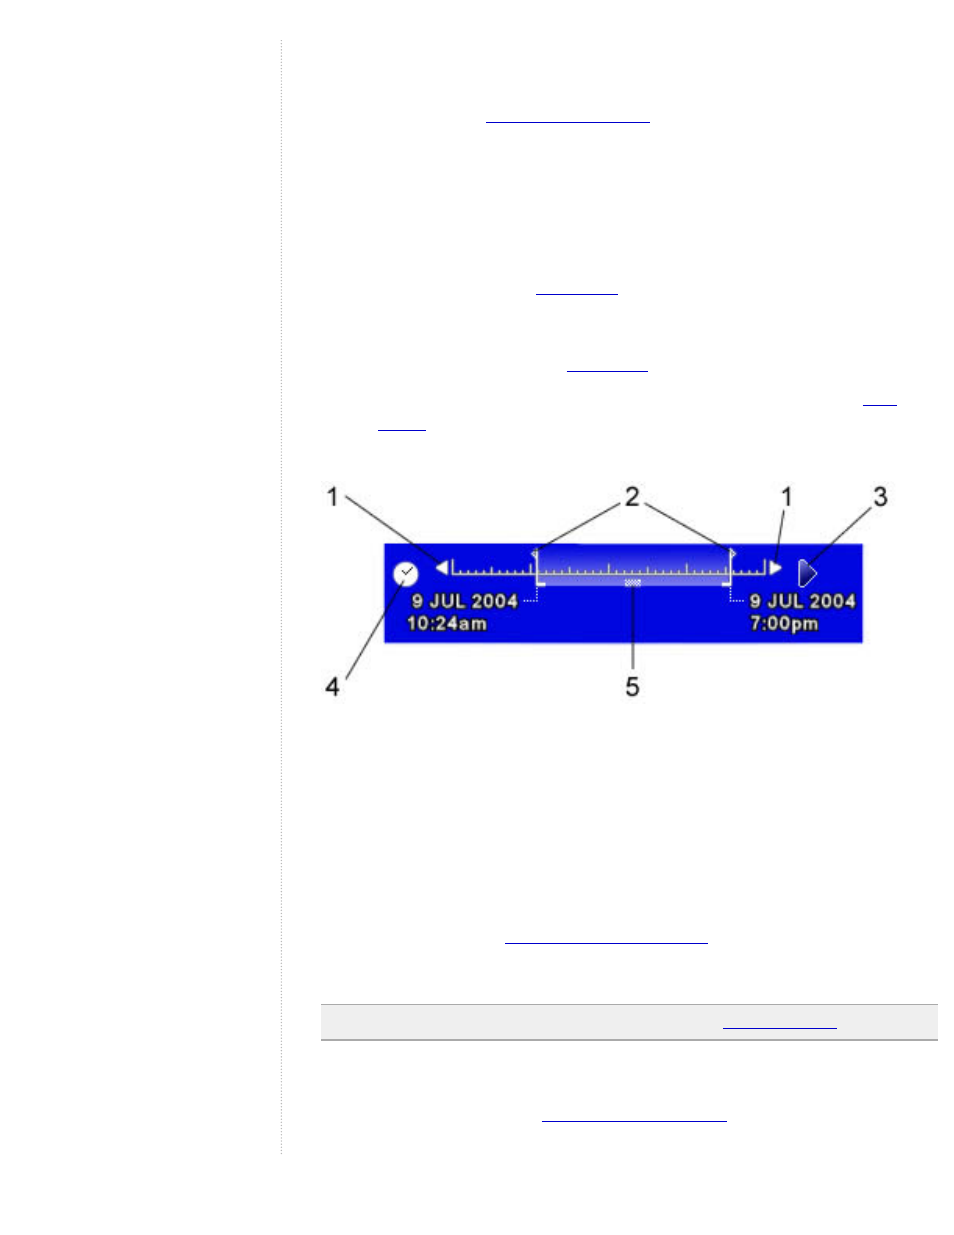
Features of the Time slider include:
1. Click these arrows to move the time range earlier or later.
2. Drag these range markers to the right or left to re-define the time
range of data displayed.
3. Click this to play an animation of the sequence. This works best if
you move the range markers to define a time range smaller than the
whole set.
5. Drag this to move the time range earlier or later.
Note: The time slider is not available when you
Setting Timeline Options
You can set options for the