Setting altitude, Altitude settings, Drawing lines with skirting – Google Earth User Guide User Manual
Page 61: Modifying folder settings
default, the opacity is 100%, which means that it completely obscures any imagery beneath it. If you have
changed the width and color of your line, you might want it to be partially transparent so imagery beneath is
visible. To do this, enter a percentage opacity in the Opacity field or click on the Opacity button and use the
slider to adjust transparency to your preference.
Setting Altitude
You can change altitude settings in the Altitude tab of the Edit Placemark/Folder dialog box (Edit > Properties).
Altitude values can be set on a single item, across all items in a folder using shared styles, or using a mixture of
altitude settings for items in a folder. Unlike other shared elements, modifying one item in a folder does not disable
the shared style feature for other elements such as color and scale. If your folder contains items with different
altitude settings, the parent folder indicates Mixed Modes as the altitude settings.
Finally, you can use the values set in the Altitude area to extrude geometry.
Altitude Settings
There are three options for altitude:
●
Clamped to ground - By default, all folders and placemarks are set to this option. Here, because the
altitude for the placemark is locked to the ground, no height value is allowed for altitude. This ensures that
the placemark remains fixed to the earth, regardless of whether terrain is on or off.
●
Relative to ground - When this option is selected, altitude of the placemark is relative to the actual ground
elevation of the view. For example, if you set 9 meters as the altitude of a placemark in Venice, Italy, the
elevation of the placemark will be 9 meters above the ground because Venice is at sea level. However, if
you set the same placemark above Denver, Colorado, the elevation of the placemark will be 1616 meters,
because the elevation of Denver is 1607 meters. You can see this how this appears in the 3D viewer by
setting elevation, tilting the view, and turning terrain on and off.
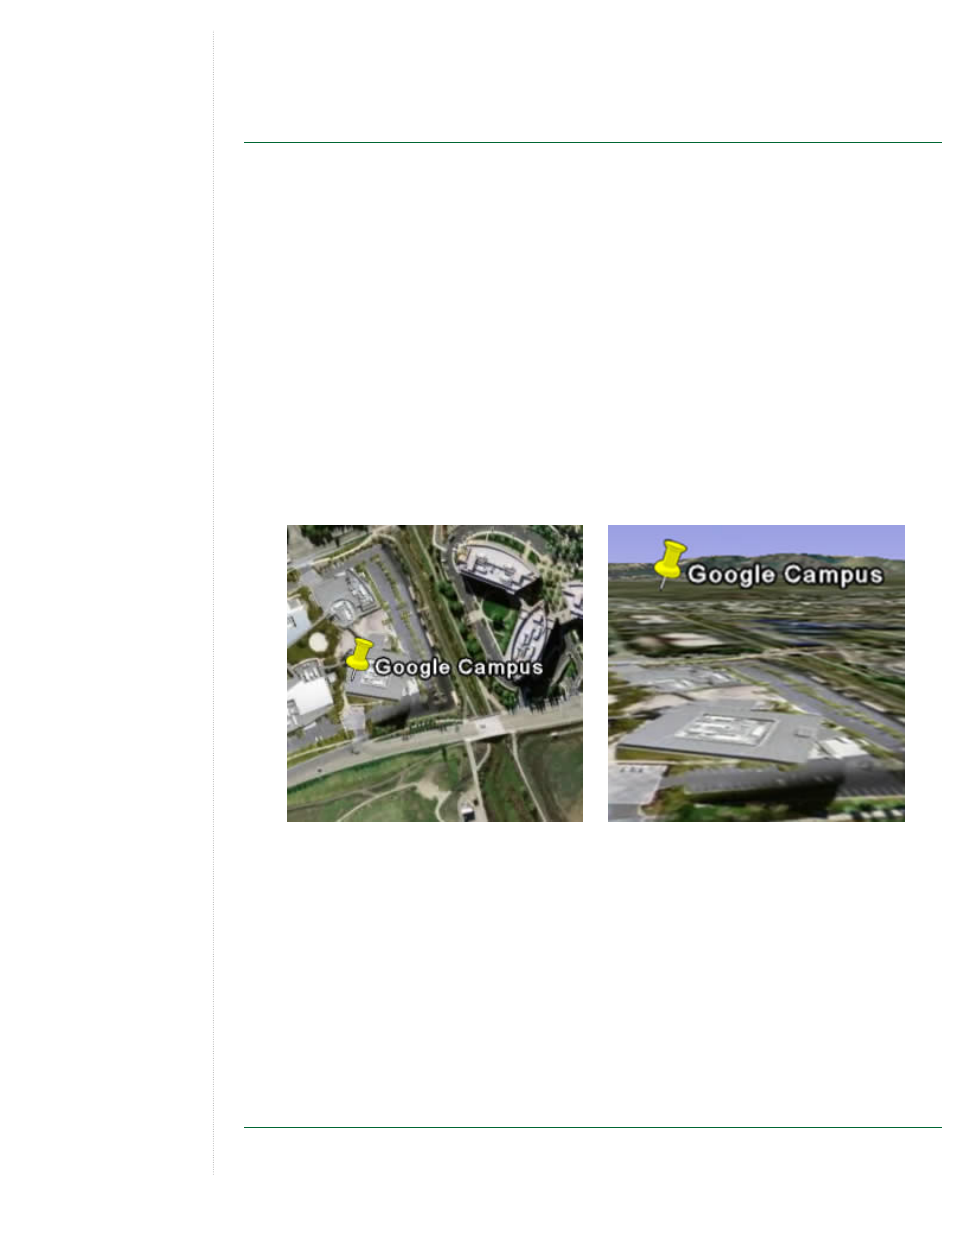
Placemark over the Google campus
with relative altitude set to nine meters,
terrain off
Same placemark, terrain on
You can adjust the altitude using the slider or by entering a value in meters in the Altitude field.
●
Absolute - When this option is selected, altitude of the Placemark is above sea level. In the example
above, if you have terrain on and keep altitude to 9 meters but set the altitude type to Absolute, the icon
would disappear from view because it is actually below the level of the terrain at Denver, Colorado. You
can adjust the altitude using the slider or by entering a value in meters in the Altitude field.
Drawing Lines With Skirting
Once you set an altitude value for a folder or a placemark, you can check Draw lines with skirting. When single-
point placemarks are drawn with skirting, a single line appears from the earth's surface to the placemark. When a
line or a path is drawn with skirting, a geometric shape is drawn from the earth's surface to the path.
Modifying Folder Settings
Applying description, label, and advanced settings to a folder provides display characteristics that differ from
settings applied to individual placemarks or other geometry features. These differences are described here. For