2 opening the disassembly window – Renesas REJ10J1837-0100 User Manual
Page 317
High-performance Embedded Workshop
17. Using the Debugger
REJ10J1837-0100 Rev.1.00 Nov. 16, 2008
302
Both a start and end address should be supplied. You also need to specify the full filename to save the information to. If
needed you can browse to the file to use. Click OK.
17.2.1.9 Printing the disassembly view
The disassembly view can be printed by using [File -> Print] or the Print toolbar button (
) when it is in focus or by
using the menu Print on the Disassembly field (in disassembly mode) pop-up menu.
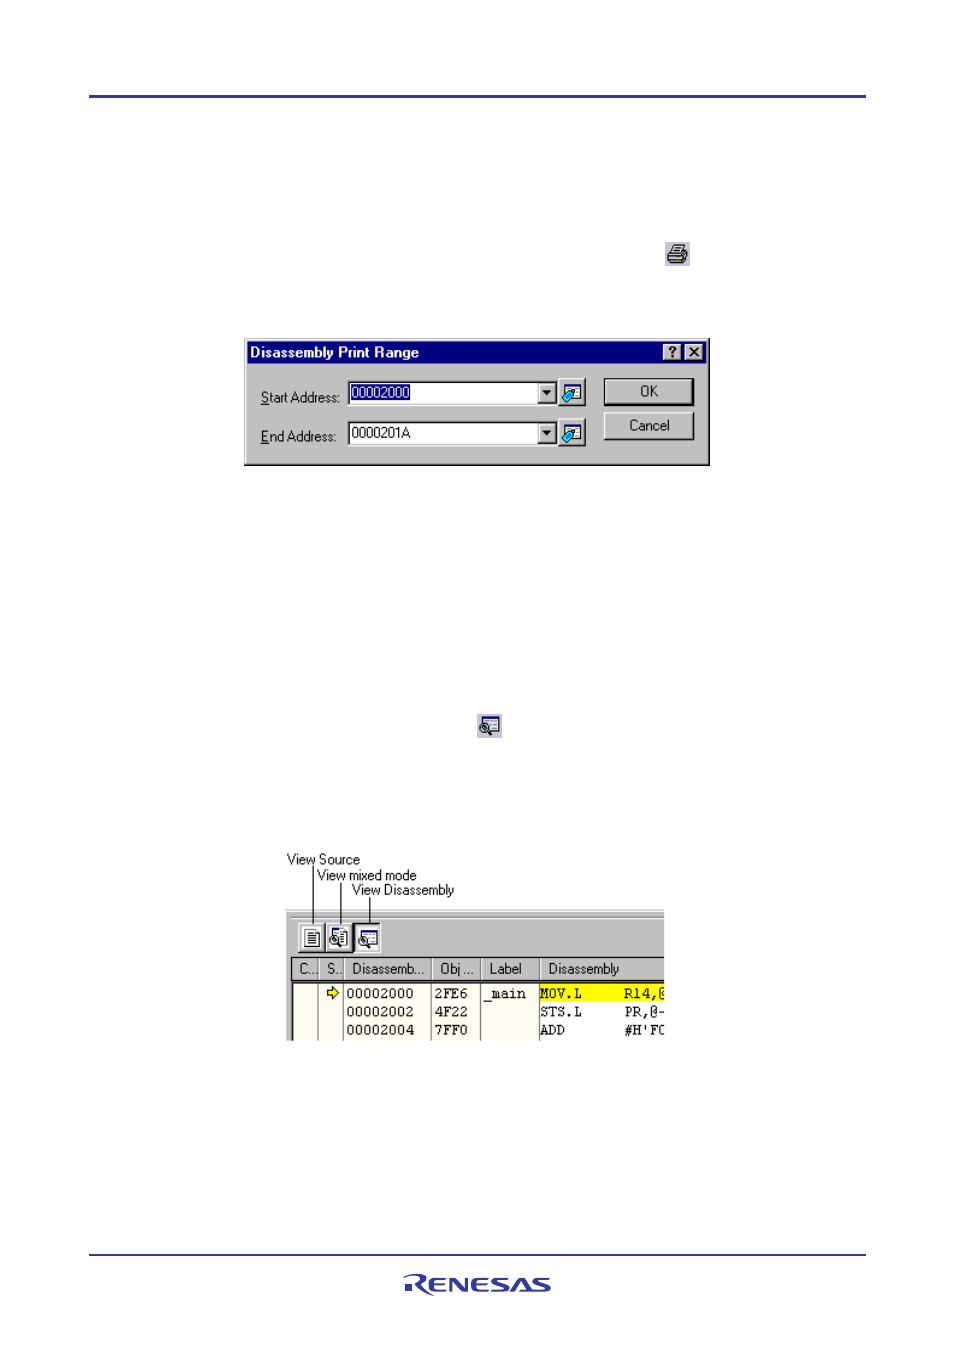
When Print is selected the Disassembly Print Range dialog box is displayed that asks you the range of addresses to
print.
Both a start and end address should be supplied.
Clicking OK on this dialog box then passes the print selection to the standard print formatting and selection dialog box.
From here you can choose your printer and page setup options.
17.2.2
Opening the Disassembly window
If you wish to view code at assembly-language level, then select one of the following operations:
• Choose [View -> Disassembly], OR
• Press CTRL+D, OR
• Click on the View Disassembly toolbar button (
).
The Disassembly window opens at the current program counter (PC) location.
Toolbar
The disassembly window in version 4.02 onwards has been enhanced to include a source view.
This integrated view has a toolbar which allows the switching of mode. When each mode is available it is possible to
click the button and change to the new view.