Renesas REJ10J1837-0100 User Manual
Page 164
High-performance Embedded Workshop
8. Using the Custom Version Control System
REJ10J1837-0100 Rev.1.00 Nov. 16, 2008
149
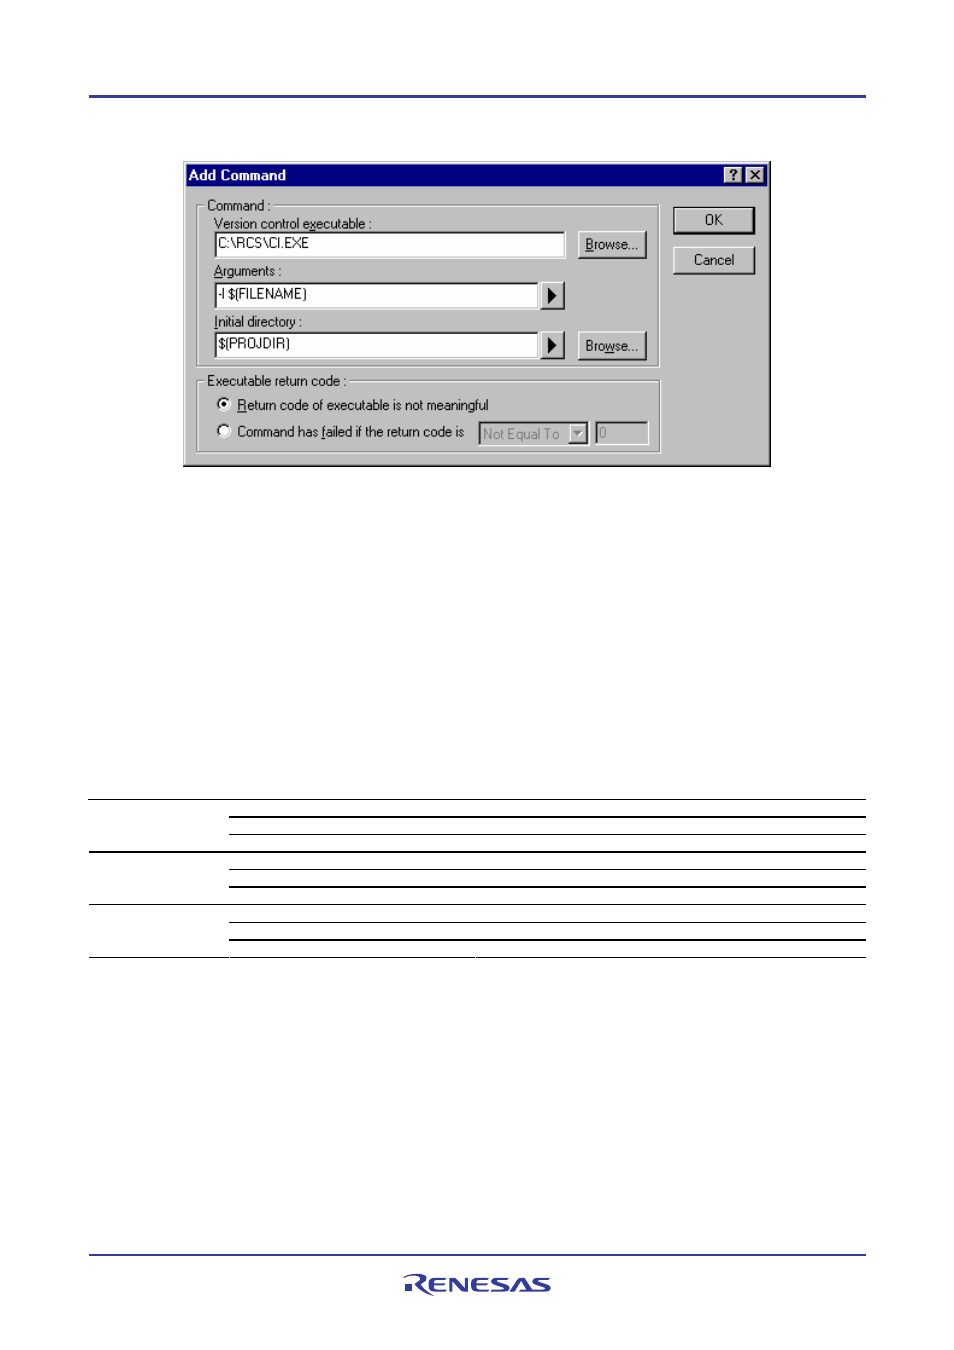
5. The Add Command dialog box appears.
6. Enter "C:\RCS\CI.EXE" in Version control executable.
7. Enter "-l $(FILENAME)" in Arguments.
8. Enter "$(PROJDIR)" in Initial directory.
9. Click the OK button.
10. Click the OK button in the Add Menu Option dialog box.
Tip:
It is recommended that you only register some commands frequently used for version control. Other commands should
be used via the MS-DOS command prompt.
Also set up the following tree commands in the same way.
Command
Option Name
Characters to be Input
Version control executable
C:\RCS\CO.EXE
Argument
-l -f $(FILENAME)
Check out
Initial directory
$(PROJDIR)
Version control executable
C:\RCS\RCSDIFF.EXE
Argument
$(FILENAME)
Diff
Initial directory
$(PROJDIR)
Version control executable
C:\RCS\RLOG.EXE
Argument
$(FILENAME)
Log
Initial directory
$(PROJDIR)
Preparation for version control is now completed.
8.11.1.4 Step 4: Using the Version Control facility (Check-in)
1. Enter a keyword at line 12 in the file "rcs_sample.c" so that you will be able to see the changes made in the
file.
//$Id$
2. Select the file "rcs_sample.c" in the Projects tab of the workspace window and then select [Tools -> Version
Control -> Check in].
3. The MS-DOS command prompt window opens.