Two-point calibration settings – KEYENCE LS-7000 User Manual
Page 77

4-25
Chapter 4 Function Settings
4
Two-point Calibration Settings
Make two-point calibration settings as explained below.
Setting Range
Two-point calibration requires two types of master workpieces that are different to each
other in size. If the master workpieces are target 1 (T1) and target 2 (T2) respectively,
make settings so that the following conditions will be satisfied.
T1 < T2
Furthermore, set the calibration span between 0.5 and 2.0.
Note:
In the case of two-point calibration, the number of averaging measurements is
fixed at 4,096 times.
1
Press the
ENT
key for calibration
setting.
The AREA1 calibration display appears.
HI
GO
LO
2
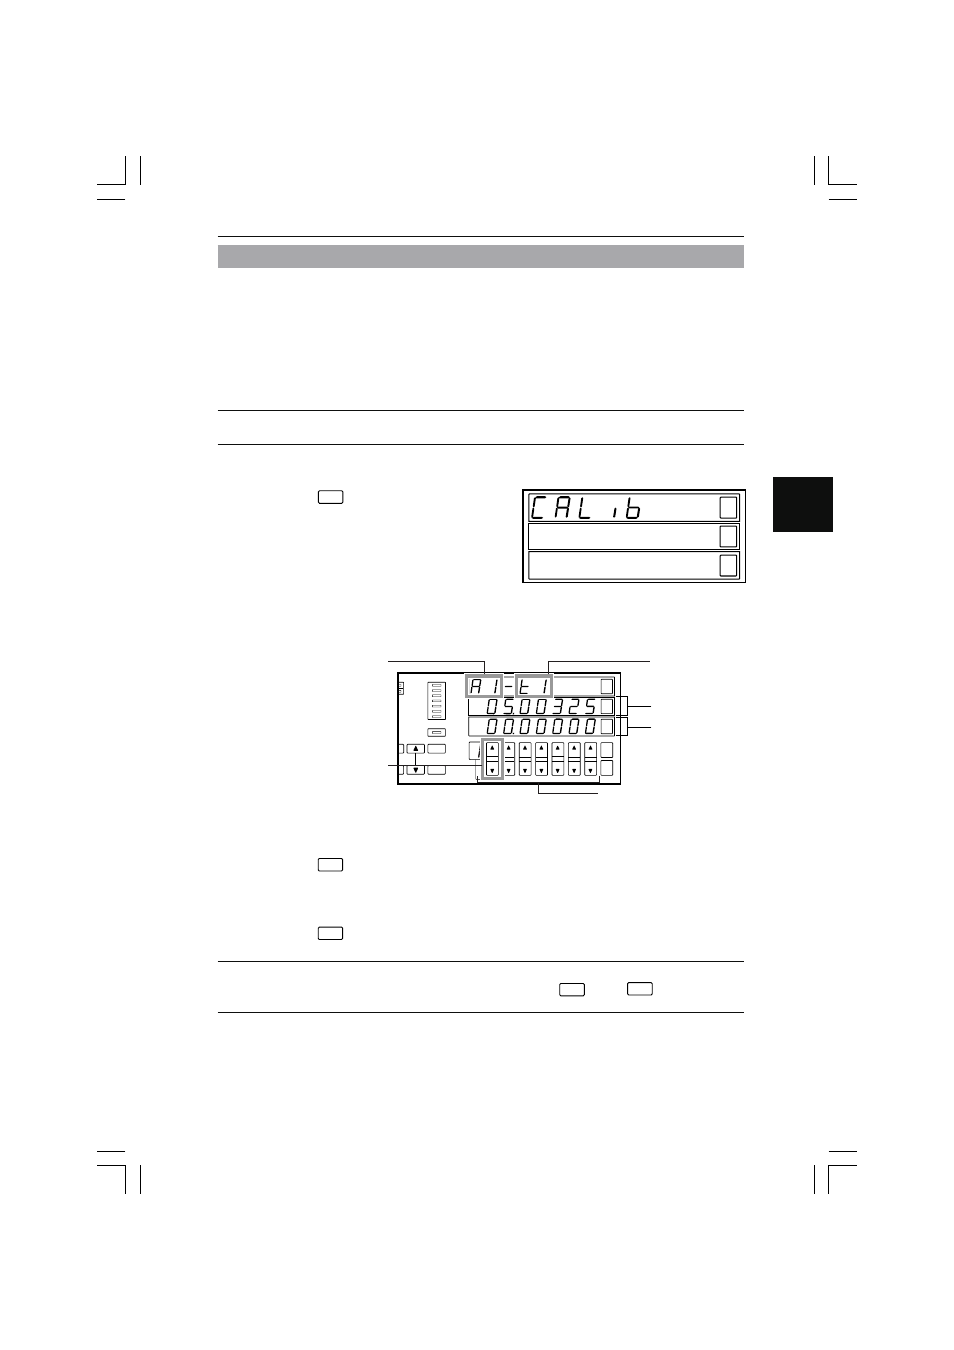
Set the master workpiece, monitor the measured value, and input the T1 value.
PROG No.
AREA
DISP
ESC
G
C
ENT
HOLD
ZERO
FOCUS
A
POSITION
HI
GO
LO
Press these keys to set
the value.
Displays the
measured value.
The input part
flashes.
Indicates that
the T1 value is
displayed.
Indicates that AREA1 is selected.
Press this key to set the value
to a positive or negative one.
3
Press the
ENT
key.
4
Set the other master workpiece, monitor the measured value, and input the T2
value.
5
Press the
ENT
key.
The input item is entered and the calibration setting display appears again.
Note:
If the calibration conditions are not satisfied, “Error-1” will appear on the main
display. Reset the error status by pressing the
ENT
key or
ESC
key and make
the calibration settings again.
