4 installing the drive bay assembly, Installing the drive bay assembly – Kontron TIGH2U Carrier Grade Server User Manual
Page 96
TIGH2U Server—Server Component Replacements
Kontron Carrier Grade Server TIGH2U
Product Guide, rev.1.2
December 2009
96
5.5.4
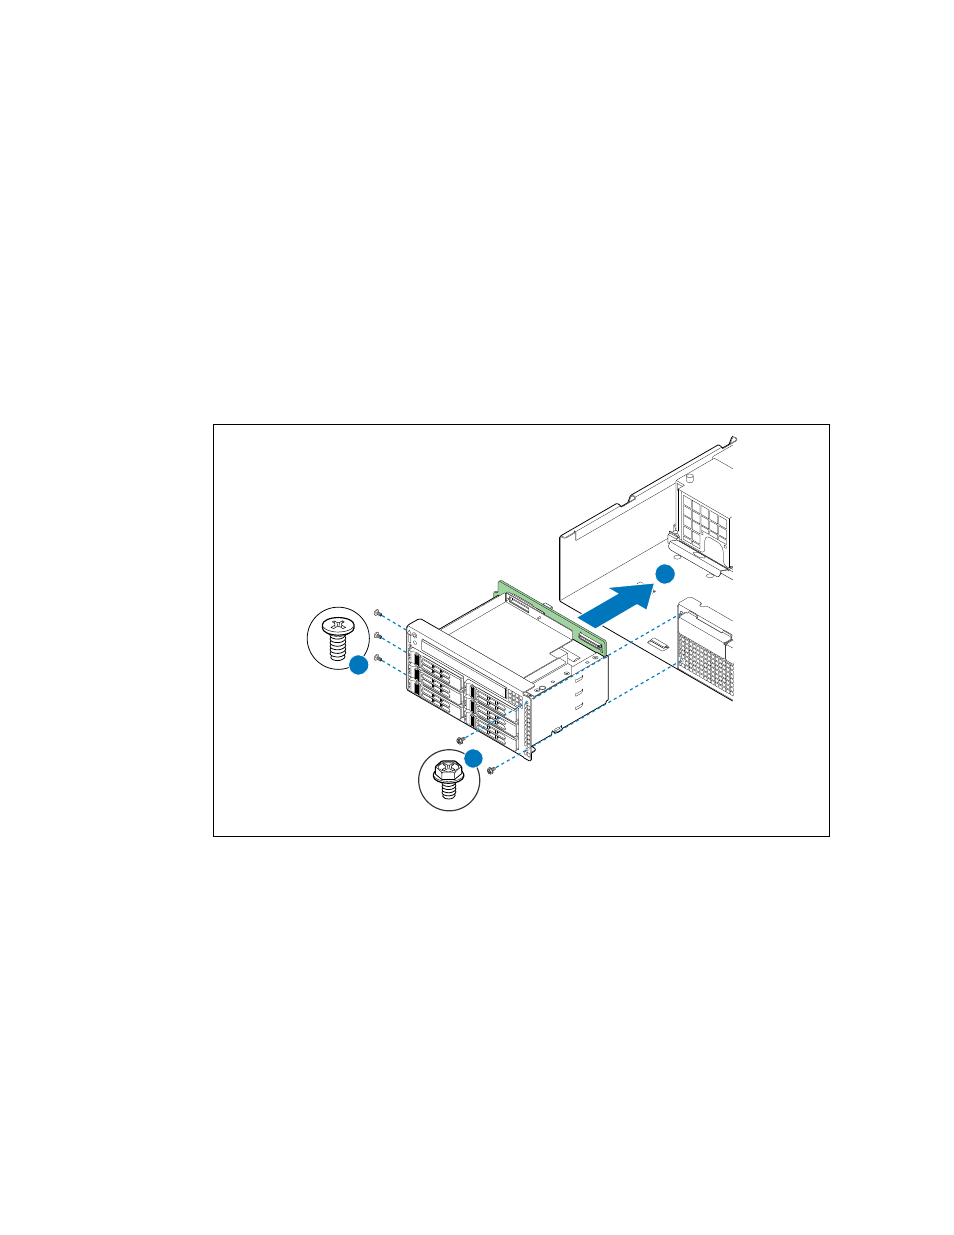
Installing the Drive Bay Assembly
Note:
Once the SAS backplane is attached to the drive bay assembly, the HDDs and an optical
device (or filler blanks if not all slots are used) can be installed into the drive bay
assembly either before or after the assembly is installed in the chassis.
1. Connect the IDE cable and the power cable to the backplane board.
2. Insert the drive bay assembly into the chassis. (
, “A”)
3. Secure the drive bay assembly to the chassis by fastening the screws on both sides. (“B”)
4. Reconnect the SFP power cable to the backplane board.
5. Connect the IDE cable to the server board.
6. Install the PCI fan assembly. For instructions, see
Section 63, “Installing the PCI Fan Assembly”
Figure 76.
Installing the Drive Bay Assembly
A
B
C
TS000314
7. If this is the last task you are performing, replace the front bezel and the chassis top cover.
Reconnect all the external devices and plug in the power cord(s).