3 hot-swappable component installation procedures, 1 installing or replacing a hard drive, 1 removing a hard drive tray – Kontron TIGH2U Carrier Grade Server User Manual
Page 30: Installing or replacing a hard drive 3.3.1.1, Removing a hard drive tray, Section 3.3.1, Installing or replacing a hard, Drive
TIGH2U Server—Server Component Installations and Upgrades
Kontron Carrier Grade Server TIGH2U
Product Guide, rev.1.2
December 2009
30
3.3
Hot-Swappable Component Installation Procedures
The following components are hot-swappable and do not require powering down the system or
removing the chassis cover:
• Hard disk drives
• AC and DC power supplies (if power redundancy is available)
3.3.1
Installing or Replacing a Hard Drive
Up to six hot-swappable SAS drives can be installed in your TIGH2U Server. You must remove the
front bezel to add or replace a hard drive in one of the six drive bays.
Caution:
If you install fewer than six hard drives, the empty bays must have drive trays with
baffles in them to maintain proper system cooling.
The Carrier Grade Server TIGH2U does not support all SAS hard drives. To see a list of validated
manufacturers and hard drive types, see the Tested Hardware and Operating System List (THOL) at :
Click on Downloads and then Compatability Matrix.
3.3.1.1
Removing a Hard Drive Tray
1. Remove the front bezel. For instructions, see
.
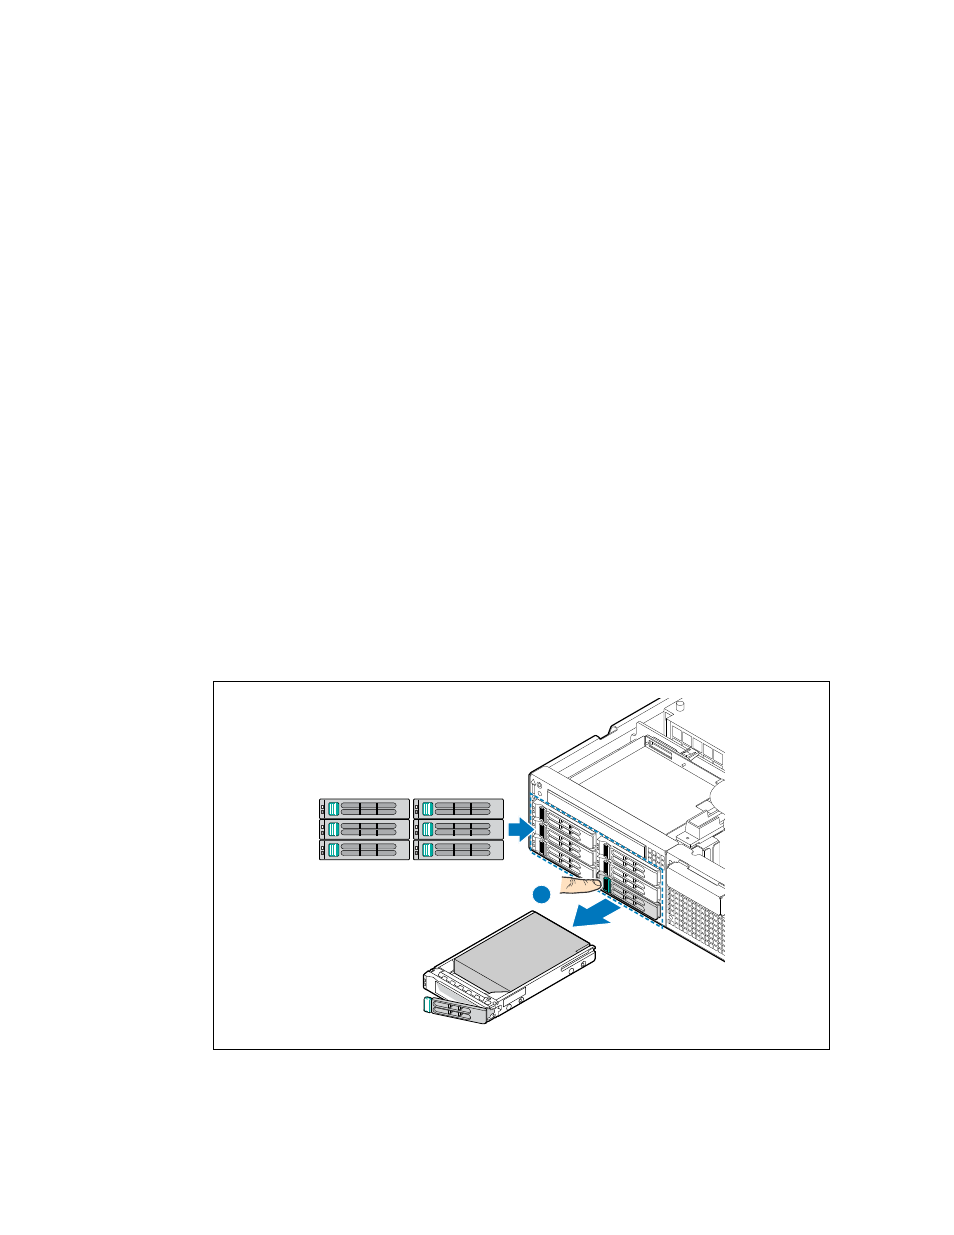
2. Select the drive bay where you want to install the drive and remove the drive tray by pressing the
green button to open the lever. (“A”)
Note:
If you will have fewer than six drives installed, drive bay 0 must be used first, then
drive bay 1, and so forth.
3. Pull the drive tray assembly out of the chassis.
Figure 13.
Removing a Drive Tray
TS000274
5
4
3
2
1
0
A