2 installing the server board, Installing the server board – Kontron TIGH2U Carrier Grade Server User Manual
Page 103
Kontron Carrier Grade Server TIGH2U
December 2009
Product Guide, rev.1.2
103
Server Component Replacements—TIGH2U Server
5.7.2
Installing the Server Board
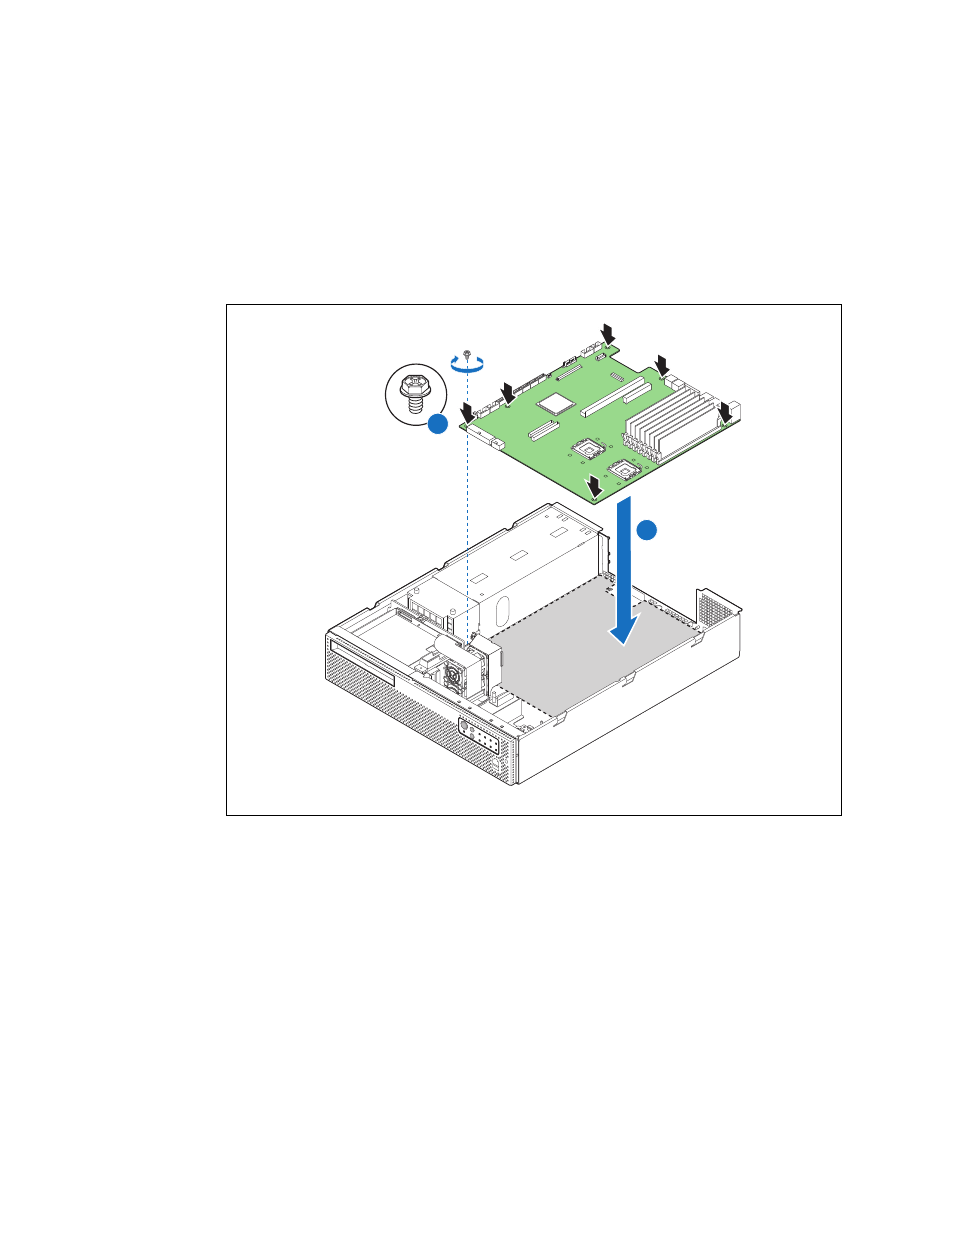
1. Set the replacement board into place (“A”), using caution to make sure no cables are pinched
under the board. Insert the rear edge of the board first, and line up the I/O ports at the rear of
the system.
2. Make sure the standoff locations line up correctly, then insert the six screws that you removed
previously. (“B”)
Figure 81.
Installing the Server Board
l
A
B
TS000441
3. If the replacement board does not have processor(s) / heat sink(s), DIMMs, or optional modules
installed, do the following:
a. Install the processor(s) and heat sink(s). For instructions, see
Section 3.4.5.3, “Installing a
b. Install all DIMMs. For instructions, see
Section 3.4.3, “Installing DIMMs” on page 44
c. Install any I/O expansion modules or remote management modules that you might need. For
instructions see
Section 4.3, “Installing an I/O Expansion Module” on page 59
“Installing Remote Management Module 2 Components” on page 61
.
4. Install the PCI riser assembly. For instructions, see
Section 4.2.5, “Installing the PCI Riser Card
.
5. Install the PCI fan assembly. For instructions, see