Figure 82 – Kontron TIGH2U Carrier Grade Server User Manual
Page 105
Kontron Carrier Grade Server TIGH2U
December 2009
Product Guide, rev.1.2
105
Server Component Replacements—TIGH2U Server
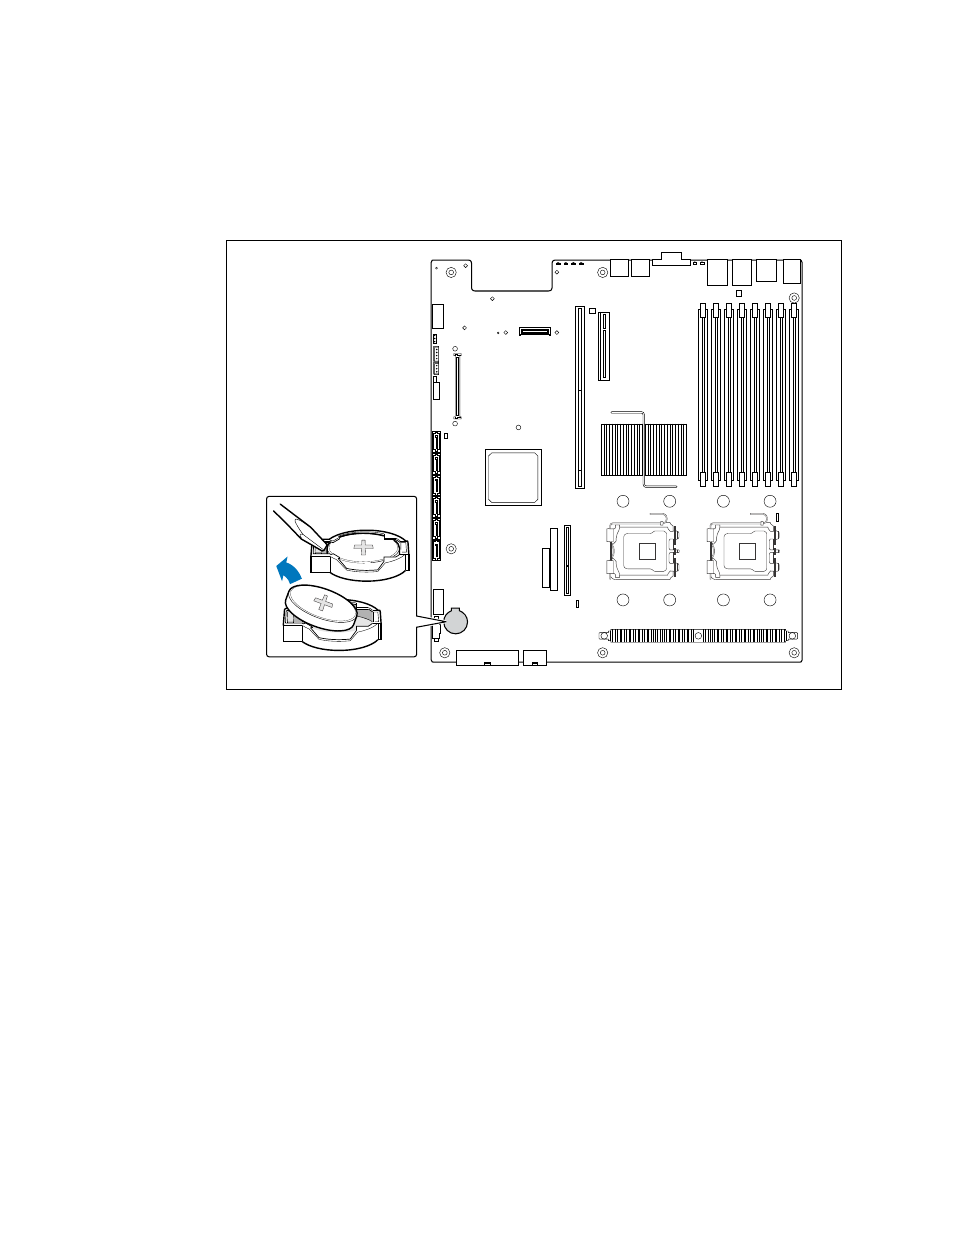
7. Insert the tip of a small flat bladed screwdriver, or better yet an equivalent non-metallic tool,
under the tab in the plastic retainer. Gently push down on the screwdriver to lift the battery.
8. Remove the battery from its socket.
Figure 82.
Replacing the Battery
TS000308
9. Dispose of the battery according to local ordinance.
10. Remove the new lithium battery from its package, and, being careful to observe the correct
polarity, insert it in the battery socket.
11. Install the riser card assembly. For instructions see
Section 4.2.5, “Installing the PCI Riser Card
.
12. Install the PCI fan assembly. For instructions, see
Section 5.2.6, “Installing the Fan Assembly” on
13. Install the processor air duct. For instructions, see
Section 3.2.6, “Installing the Processor Air
.
14. Install the chassis cover. For instructions, see
Section 3.2.4, “Installing the Chassis Cover” on
15. Use the BIOS Setup Utility to restore the configuration settings. For instructions, see
“Using the BIOS Setup Utility” on page 106
.