Ba c – Kontron TIGH2U Carrier Grade Server User Manual
Page 86
TIGH2U Server—Server Component Replacements
Kontron Carrier Grade Server TIGH2U
Product Guide, rev.1.2
December 2009
86
Note:
If you are following these steps as directed by another procedure and are not installing
a new TAM board, disregard steps 10 - 12 and return to your original procedure.
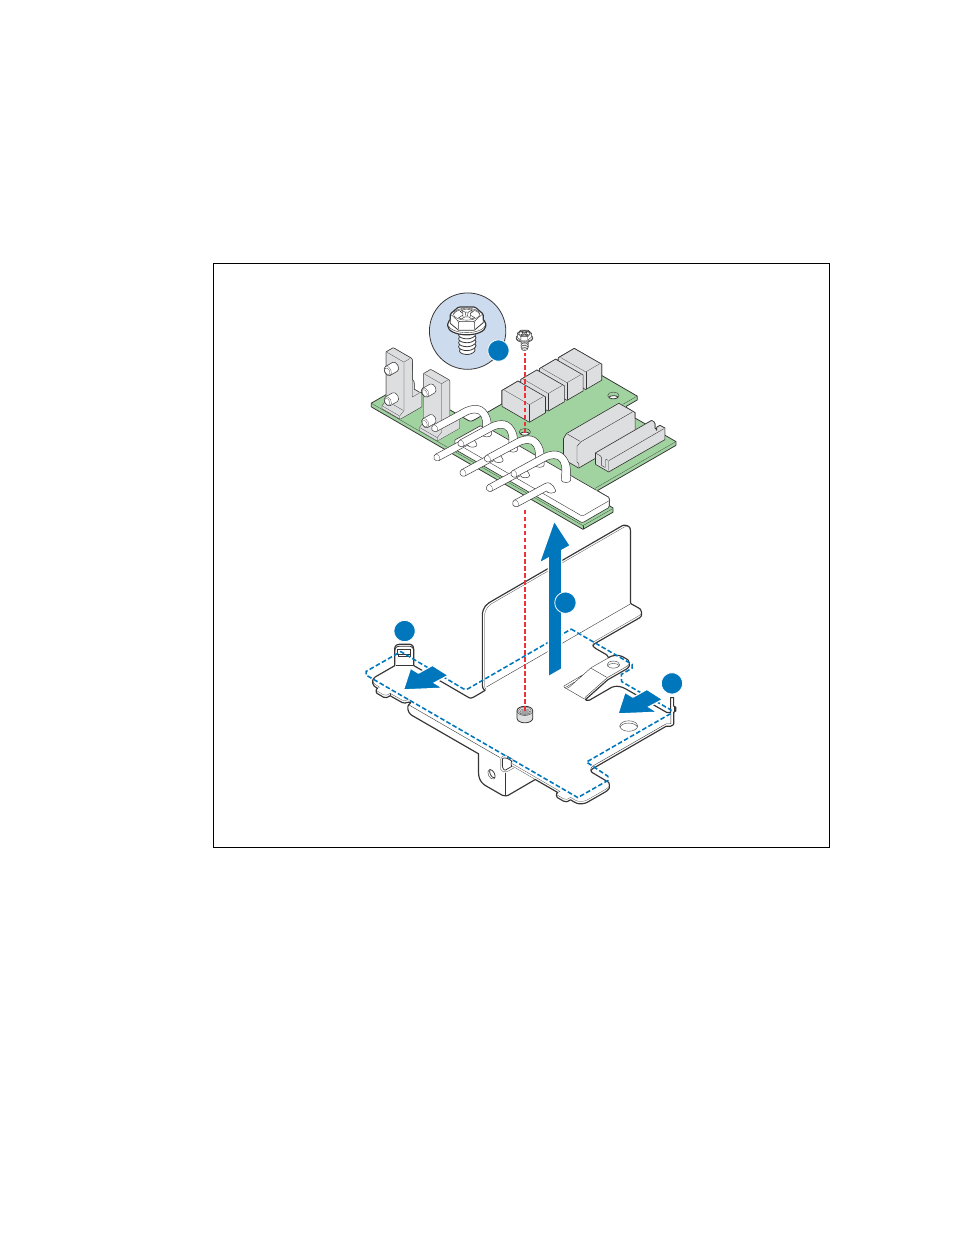
10. Remove the screw at the top front of the TAM board. (“A”)
11. Slide the TAM board slightly forward (“B”), then lift it from the bracket. (“C”)
Figure 67.
Removing TAM Board from Bracket
TS000459
B
B
A
C
12. See the sections that follow to remove the LED light pipe assembly and to re-install the
replacement TAM board.