4 removing memory dimms, Removing memory dimms, Figure 26 – Kontron TIGH2U Carrier Grade Server User Manual
Page 45
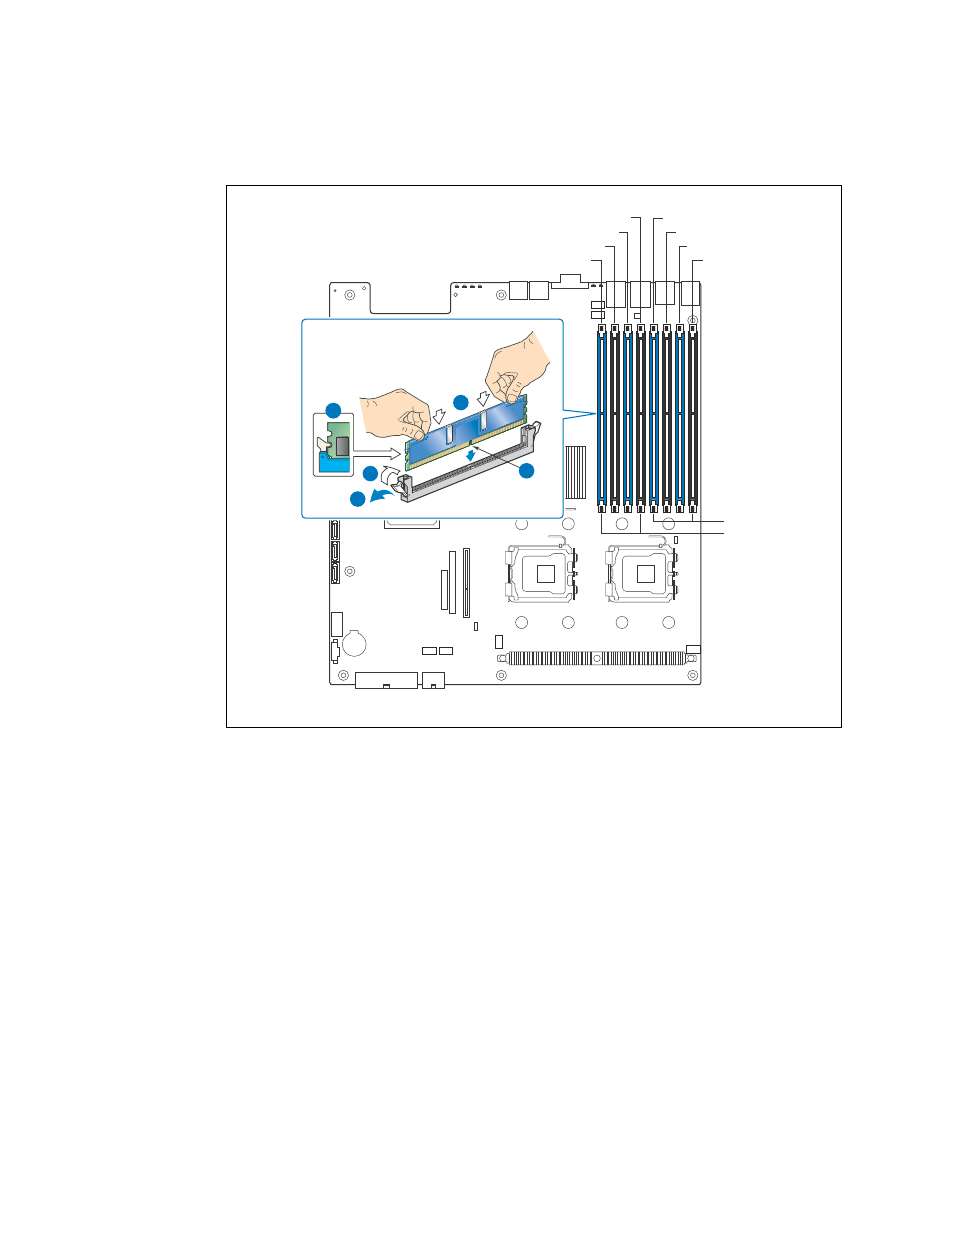
Figure 26.
Installing Memory DIMMs
TS000278-rev
E
A
C
D
B
DIMM A1
DIMM A2
DIMM B1
DIMM B2
DIMM D2
DIMM D1
DIMM C2
DIMM C1
Branch 1
Branch 0
Kontron Carrier Grade Server TIGH2U
December 2009
Product Guide, rev.1.2
45
Server Component Installations and Upgrades—TIGH2U Server
3.4.4
Removing Memory DIMMs
To reduce the risk of electrostatic discharge (ESD) damage to the DIMMs and server board:
• Touch the metal chassis before touching the DIMM or server board.
• Keep part of your body in contact with the metal chassis to dissipate the static charge while
handling the processor.
• Avoid unnecessary movement.
• Use a ground strap attached to the front panel (with the bezel removed.)
To remove a DIMM, follow these steps:
1. Remove the chassis cover. For instructions, see
Section 3.2.3, “Removing the Chassis Cover” on
2. Remove the processor air duct. For instructions, see
Section 3.2.5, “Removing the Processor Air
.
3. Locate the DIMM(s) and select the ones to be removed. See
.
4. Open the DIMM socket levers.