3 installing the cpu fan assembly, Installing the cpu fan assembly, Ba 5.2.3 installing the cpu fan assembly – Kontron TIGH2U Carrier Grade Server User Manual
Page 77
Kontron Carrier Grade Server TIGH2U
December 2009
Product Guide, rev.1.2
77
Server Component Replacements—TIGH2U Server
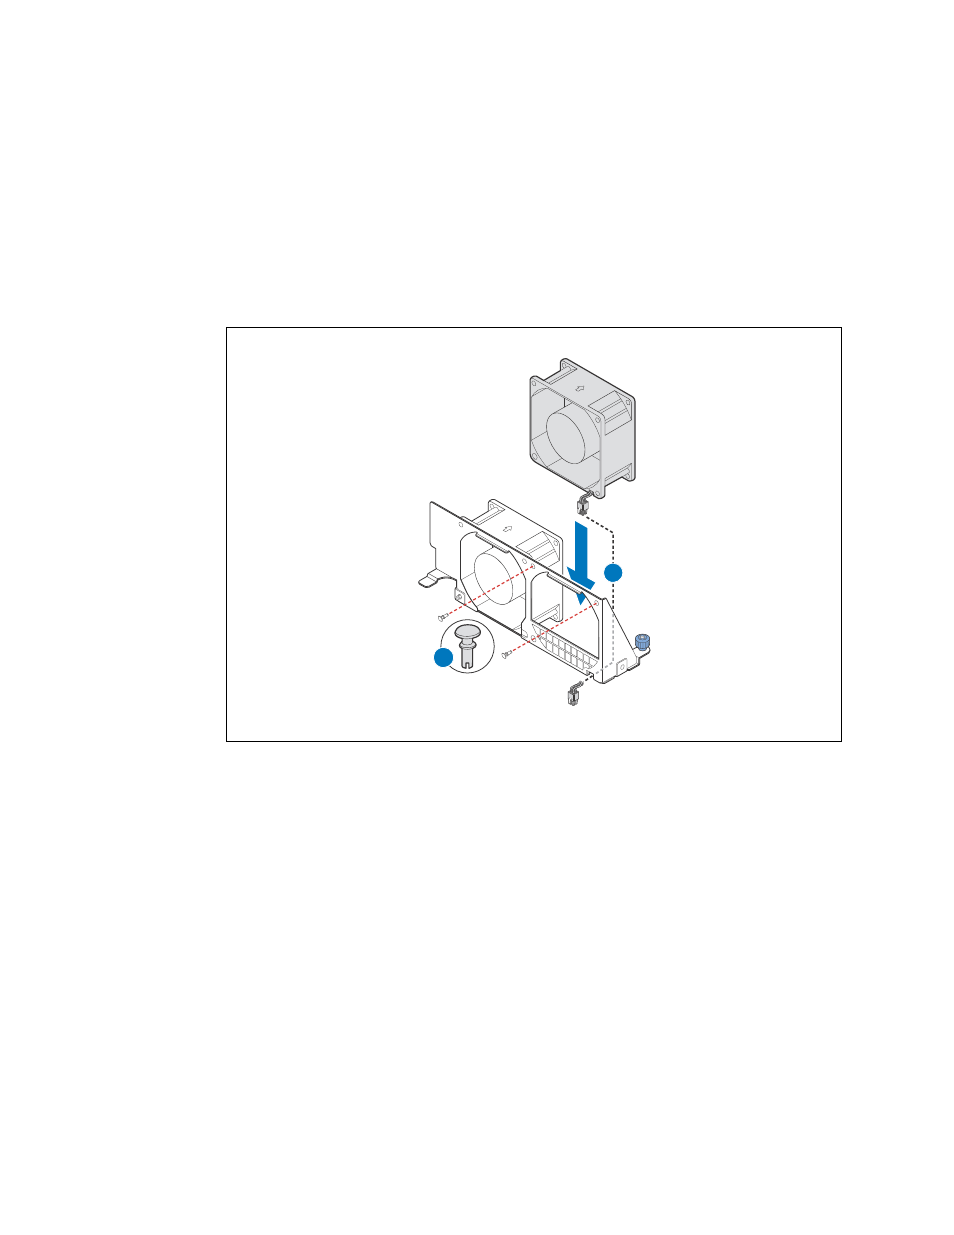
3. Place the new fans into the fan assembly bracket with the airflow arrows or the labels if there are
no airflow labels, pointing toward the rear of the chassis.
Note:
It is important to insert the fans in the correct direction. The air must flow from the
front of the chassis to the back.
4. Route the fan power cable through the cut-out on the bottom of the bracket and bring it to the
front corner opening. (
, “A”)
5. Fasten each fan to the bracket with two rivets. (“B”)
Figure 58.
Installing New Fans into the Bracket
TS000458
B
A
5.2.3
Installing the CPU Fan Assembly
1. Position the fan assembly bracket in the chassis. (See
2. Tighten the blue thumbscrew to secure the fan bracket in the chassis. (“B”)
3. Plug the fan power cables back into the SFP board connectors. See “F” on
for the location of these connectors:
— Connect the left fan to connector J7A2 on the SFP board
— Connect the right cable to connector J7A1 on the SFP board
4. If this is the last task you are performing, replace the processor air duct and the chassis top
cover. Reconnect all the external devices and plug in the power cord(s).