2 removing the pci riser card assembly, Removing the pci riser card assembly – Kontron TIGH2U Carrier Grade Server User Manual
Page 56
TIGH2U Server—Optional Component Installations
Kontron Carrier Grade Server TIGH2U
Product Guide, rev.1.2
December 2009
56
4.2.2
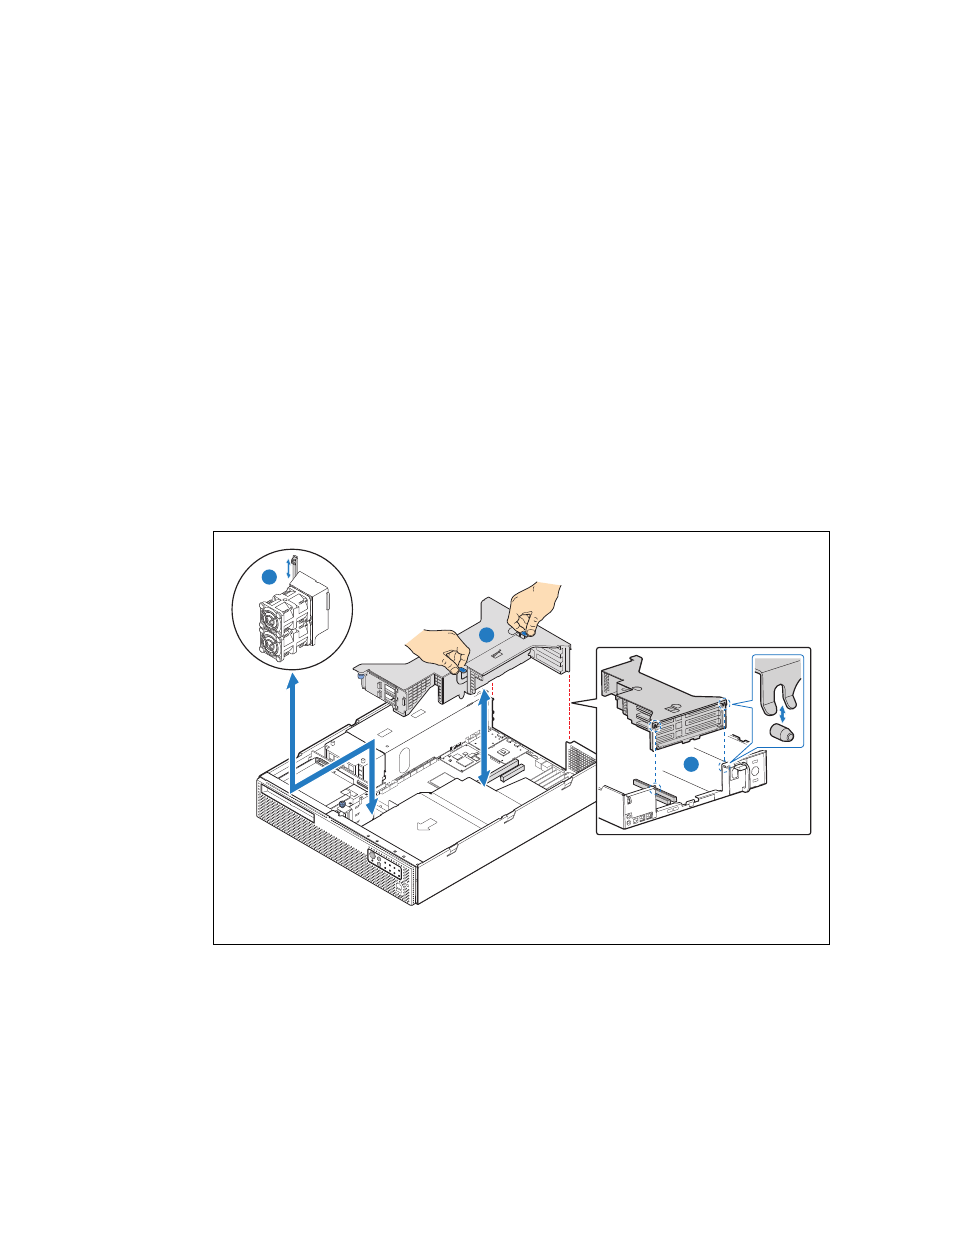
Removing the PCI Riser Card Assembly
To remove the riser card assembly from the chassis, follow these steps:
1. Remove the chassis top cover. For instructions, see
Section 3.2.3, “Removing the Chassis Cover”
2. Remove the locking pin for the PCI fan assembly. See
(“A”).
3. Slide the PCI fan assembly slightly left to release it from the clip on the right side.
Note:
It is not necessary to detach the flex cable over the fan assembly. However, use caution
so you do not damage this cable when moving the fan assembly.
4. Slide the PCI fan asssembly slightly forward to clear it from the riser card assembly.
5. Lift up on the front of the PCI riser retention plate until it clears the riser card assembly.
6. Slide the PCI riser retention plate rearward to disengage the two tabs that hold it in place over the
power supply area. Lift the retention plate from the chassis.
7. Grasp the PCI riser card assembly by the two flexible blue handles and carefully pull the assembly
out of the chassis. (“B”)
8. Note the pins on each side of the rear panel opening where the riser card assembly bracket forks
attach. (“C”) These pins are important when you re-install the riser card assembly.
Figure 36.
Removing the Riser Card Assembly
C
TS000358
A
B