7 installing an optical device, 1 removing the optical device filler panel, Installing an optical device 4.7.1 – Kontron TIGH2U Carrier Grade Server User Manual
Page 69: Removing the optical device filler panel, Sfp board a b
Kontron Carrier Grade Server TIGH2U
December 2009
Product Guide, rev.1.2
69
Optional Component Installations—TIGH2U Server
7. Remove the TAM board. For instructions, see
Section 5.3.1, “Removing the TAM Board” on
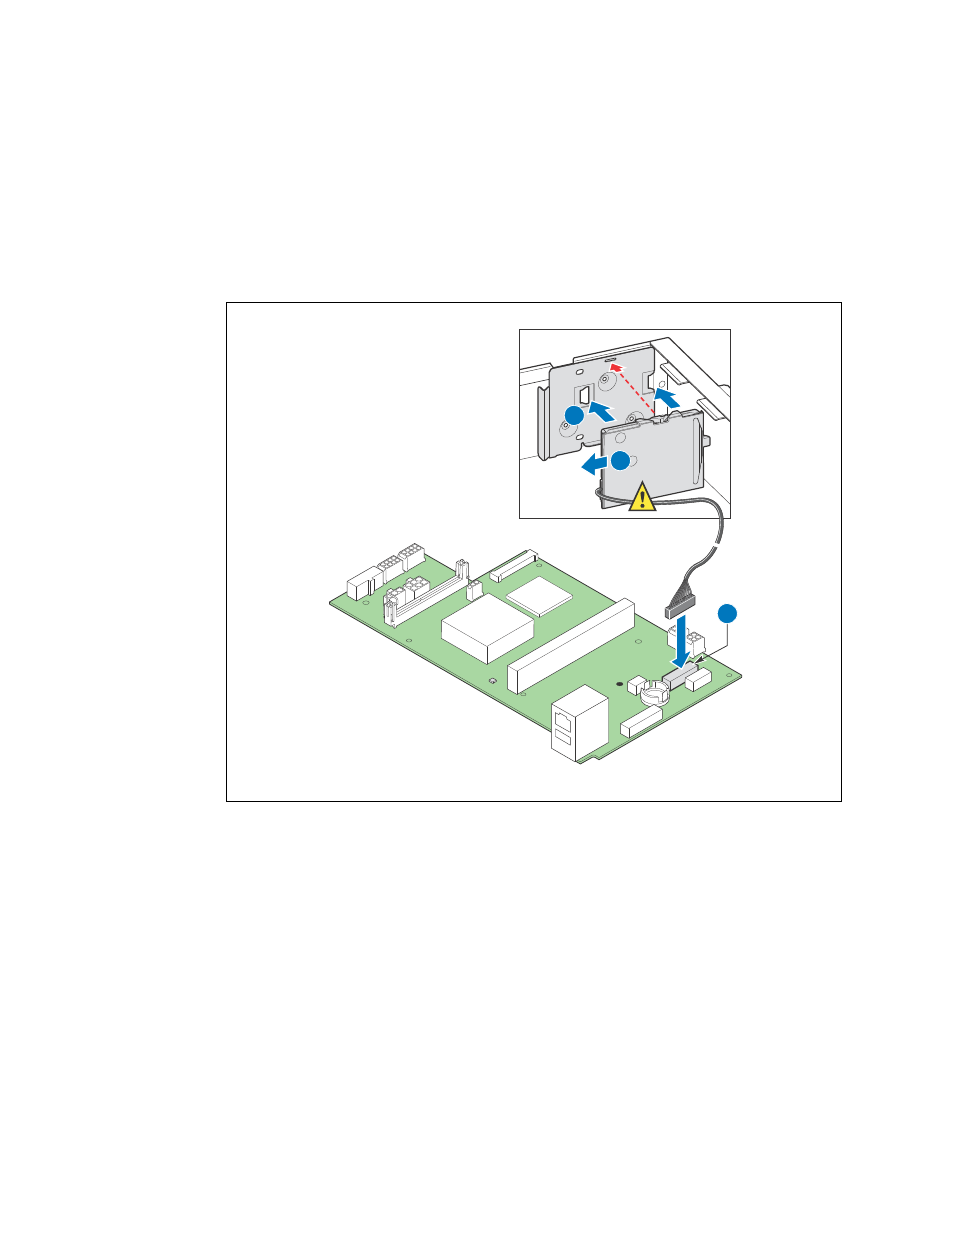
8. Place the smart battery on the bracket on the side wall of the chassis. (
, “A”). The plastic
tab on the battery case goes into the slot in the chassis. (See the red arrow in the figure.)
9. Slide the battery toward the chassis rear to lock it into place. (“B”)
10. Connect the cable from the battery to the connector on the SFP board. (“C”)
Figure 51.
Installing the Intel
®
RAID Smart Battery
SFP Board
A
B
Intel RAID
Smart
Battery
TS000446
C
11. Install the TAM board. For instructions, see
Section 5.3.3, “Installing the TAM Board” on page 88
.
12. Install the front panel bezel. For instructions, see
Section 3.2.2, “Installing the Front Bezel” on
13. If this is the last task you are performing, replace the processor air duct and the chassis top
cover. Reconnect all the external devices and plug in the power cord(s).
4.7
Installing an Optical Device
The optical device is not hot-swappable. To replace a previously installed device or install a new one,
you must first power down the system and remove the chassis cover and front bezel.
4.7.1
Removing the Optical Device Filler Panel
1. Remove the chassis top cover. See