Configure afu using scp (part 2 of 3) – Epiphan Networked VGA Grid User Manual
Page 210
Networked VGA Grid User Guide
5-4 File and recording transfer
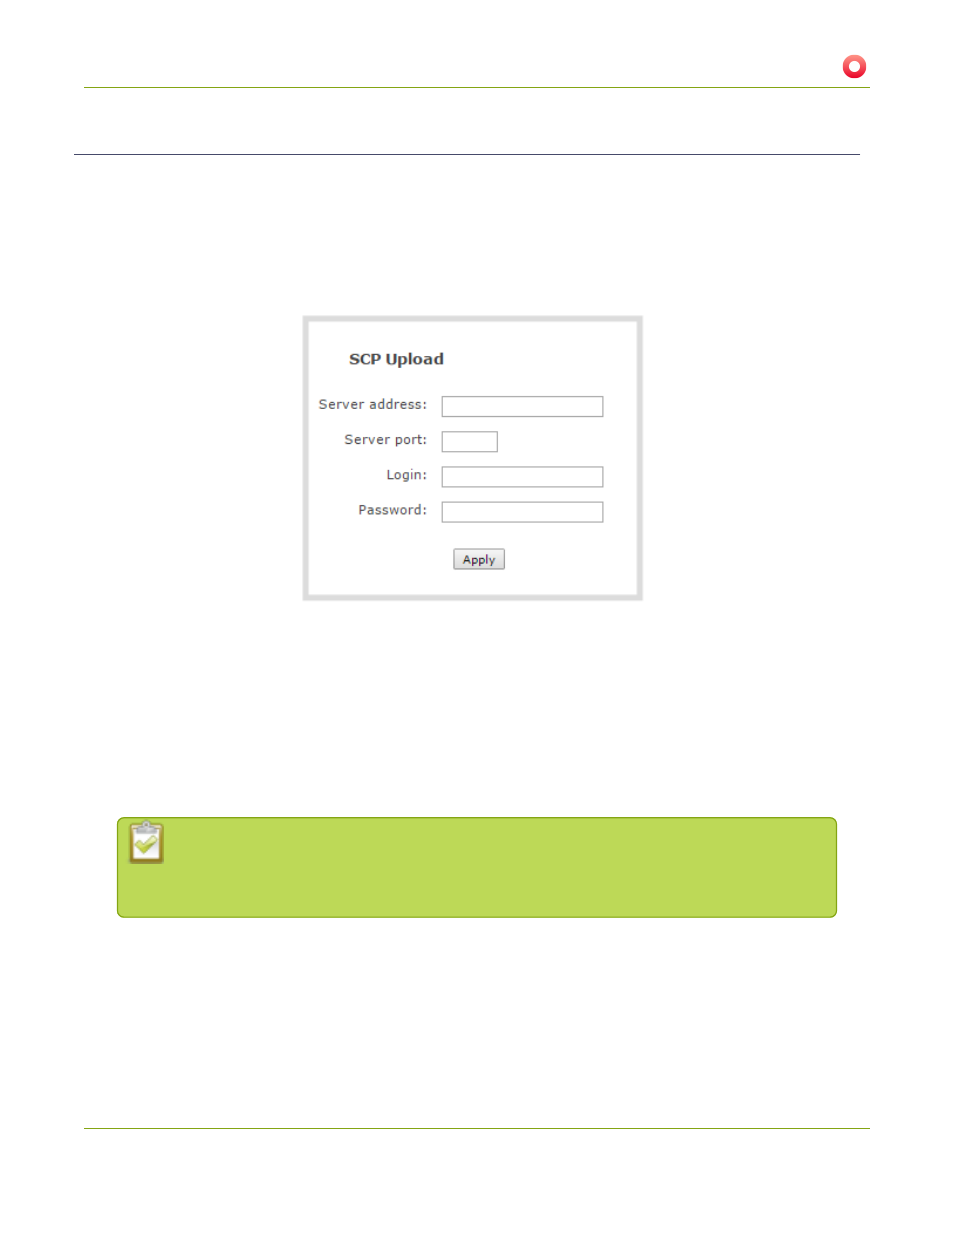
Configure AFU using SCP (part 2 of 3)
This procedure assumes you have completed the steps in
Enable and configure the frequency of AFU (part 2 of
and wish to continue with configuration of upload via secure copy (SCP).
To configure upload via SCP:
1. Select SCP Client from the protocol drop down list in the Automatic File Upload configuration page; the
lower half of the page reflects the selection.
2. Specify the target Server address. If your system is configured with DHCP or has a valid DNS
), you can use the server’s fully qualified domain name
instead of the IP address.
3. Specify the Server Port used for the destination SCP server. The standard port is 22.
4. Enter the SCP account username in the Login field.
5. Enter the SCP account password in the Password field; the characters are masked with dots.
(Alternatively you can choose to use a private key instead of a password for authentication.)
For secure copy you can upload an SSH identity for your Networked VGA Grid. This key must
be trusted by the destination server. Details for generating the key and setting up this trust
are beyond the scope of this document.
6. If desired, scroll down to the section labelled SSH identity for SCP and SFTP clients.
1. If no identity is uploaded, or to upload a new identity (overwrites the old identity):
a. Click Choose File; a file selection dialog opens.
b. Select the private key file from your hard drive and click Open.
198