Geocoding your table automatically, Geocoding, Step 3 – Pitney Bowes MapMarker USA User Manual
Page 78: Geocoding your table
Geocoding Your Table Automatically
MapMarker USA 25
78
User Guide
5. Click OK when done editing the new column information.
6. A message appears telling you that the table must be closed and re-opened for update. Click
Yes to continue.
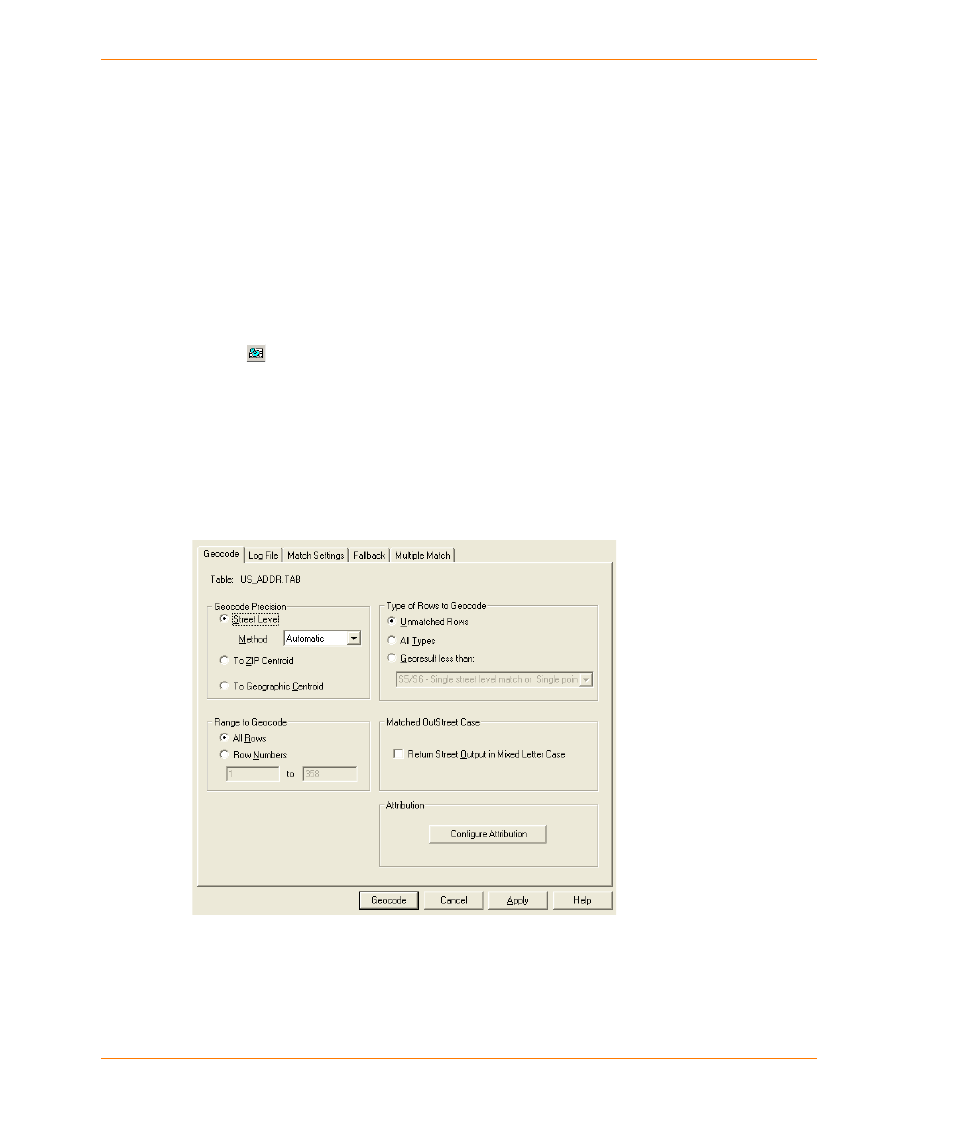
Geocoding Your Table Automatically
To geocode automatically:
1. If the Geocode dialog is not automatically displayed upon leaving the Select Output dialog, do
one of the following:
•
Select Table > Geocode from the MapMarker menu.
•
Click .
•
Click the right mouse button, and select Geocode from the pop-up menu.
2. In the Geocode Precision group, select Street Level and select Automatic from the Method
drop-down list.
Alternatively, you could geocode to ZIP Centroid or Geographic Centroid.
3. Select the Range to Geocode and Row Numbers to geocode. By default, MapMarker
automatically geocodes the unmatched rows. For previously geocoded tables, you may be able
to improve matching by re-geocoding records that had a georesult below a specified level.
4. Set additional geocoding preferences by selecting the appropriate tabs and check boxes. For an
explanation of these preferences, see
Using Geocoding Options on page 92.
In particular, see
Match Settings Dialog on page 96
to apply a range of highly restrictive or less restrictive match
criteria, and
to permit a less precise geocoding match if the
original criteria do not produce a match.