Pitney Bowes MapMarker USA User Manual
Page 182
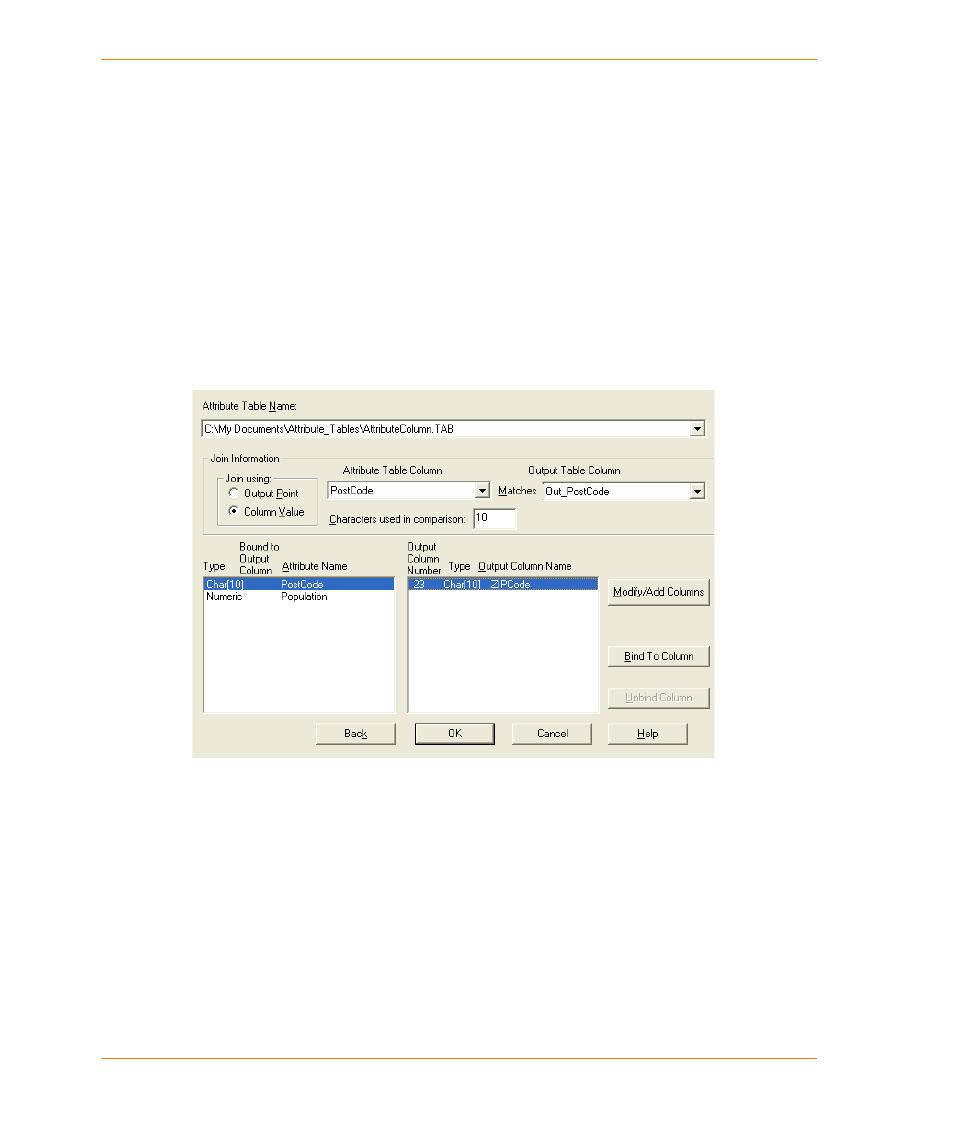
Table Attribution with MapMarker
MapMarker USA 25
182
User Guide
3. In the Attribute Table Column drop-down list, select the column in the attribution table that you
want to join to the output table.
4. In the Output Table Column drop-down list, click the column in the output table that you want to
join to the attribution table.
5. In the Characters used in comparison box, type the number of characters you want MapMarker
to use in determining a match between the joined attribute and output columns.
6. In the input table list box at the bottom left of the dialog, select the column in the attribute table
from which you want to pull attributes. For example, select the PostCode column.
7. In the output table list box at the bottom right of the dialog, select the column in your geocoded
table into which you want to add attributes. For example, select the ZIPCode column. (You may
need to add this column if it does not already exist.)
8. Click Bind to Column. The input column list box indicates the output column number to which
the input column is bound.
Repeat this process for each column value attribution you wish to do. For each table you select,
you can choose whether to do output point or column value attribution.
9. When finished, click OK.
You are now ready to add the bound attributes to your table. You can do this by geocoding the table
or by adding attributes via a batch process. See
Adding Attributes to Your Table
.