Cloud and precipitation data in the profile view – Jeppesen FliteDeck 3 User Manual
Page 217
JeppView FliteDeck User's Guide
220
1. Select an airport on the Terminal page (see
additional information).
2. After an airport chart is displayed, click INFO: [Airport ID].
3. Click Weather and the METAR information is at the top of the page.
• On the Enroute Nav page:
1. With a pointing device, click an airport in the enroute chart.
If the airport was selected, the name and the identifier appear in the status
bar. If you see something other than the intended airport, such as
latitude/longitude coordinates or an intersection, zoom in closer and try again.
2. Click INFO: [Airport ID].
3. Click Weather and the METAR information is at the top of the page.
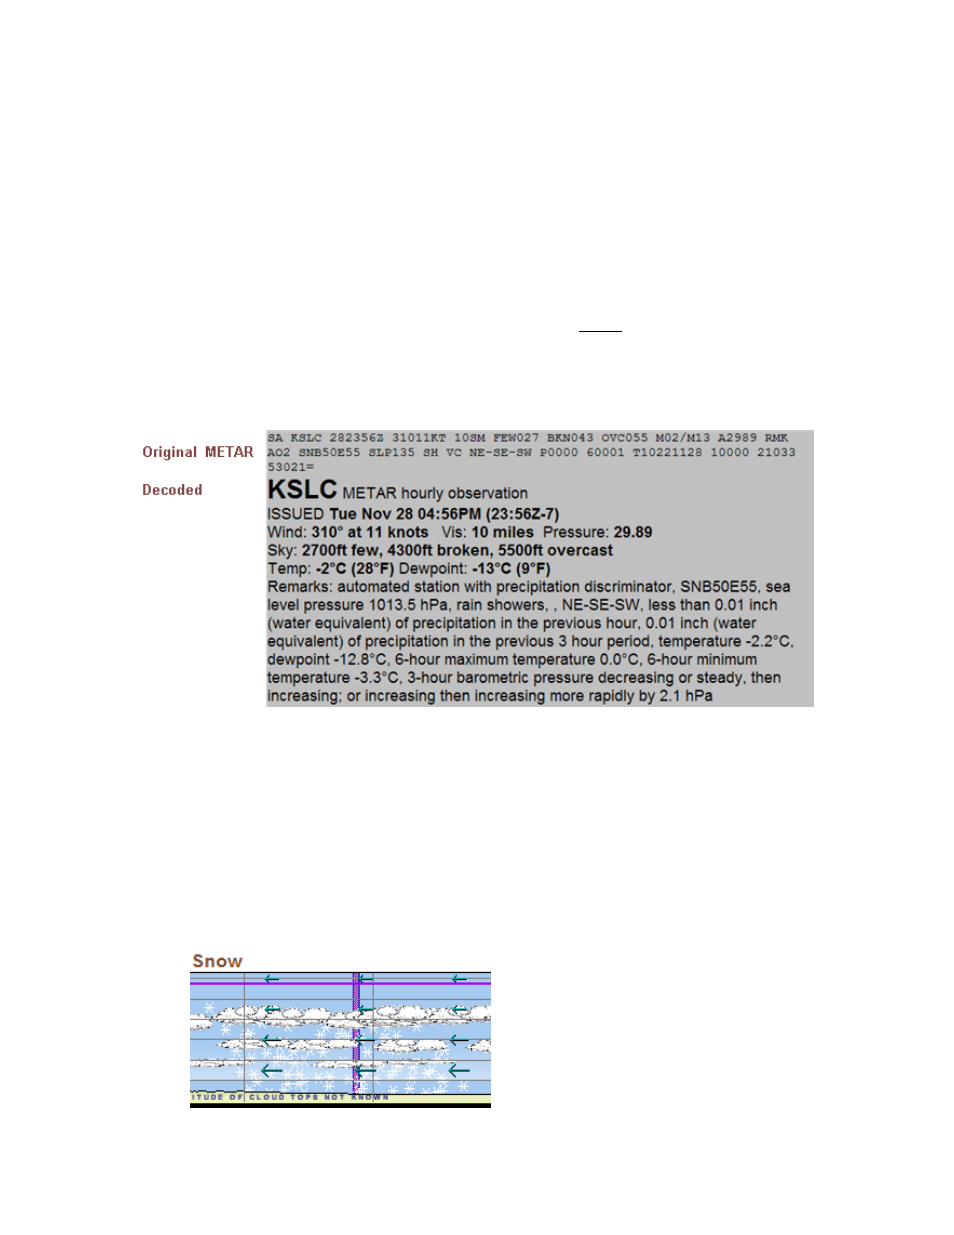
FliteDeck displays the METAR information in code and plain language.
Although the content may vary somewhat, a typical METAR contains several distinct
elements. If an element cannot be observed at the time of the report, it will be
omitted.
Cloud and Precipitation Data in the Profile View
FliteDeck also displays symbols depicting precipitation. The precipitation symbols
give qualitative indications of this type of activity, but are not very specific. Weather
symbols are always displayed in the Profile View as long as the data is being received
from your weather receiver. At this time, an option to hide the information is not
available. See
for additional information.