2 vial tray configuration for masterlab analyzer, Vial tray configuration for masterlab analyzer – Metrohm Vision Manual User Manual
Page 63
▪▪▪▪▪▪▪
61
•
Cancel:
This cancels all actions performed while the dialog box has been open. The box is closed, and
remains as it was before it was opened.
3.9.2
Vial Tray Configuration for MasterLab analyzer
MasterLab analyzer scans a number of vials without operator supervision. Vials are located in a vial
holder (tray). In order to automatically conduct the analysis the tray needs to be configured in
advance. The configuration includes the tray layout, Product ID and Sample ID of material in each
vial, and the scanning order.
Choosing the tray layout
•
Make sure you are connected to the XDS MasterLab analyzer in Data Acquisition mode, with
the correct DCM with reflectance amplifier.
•
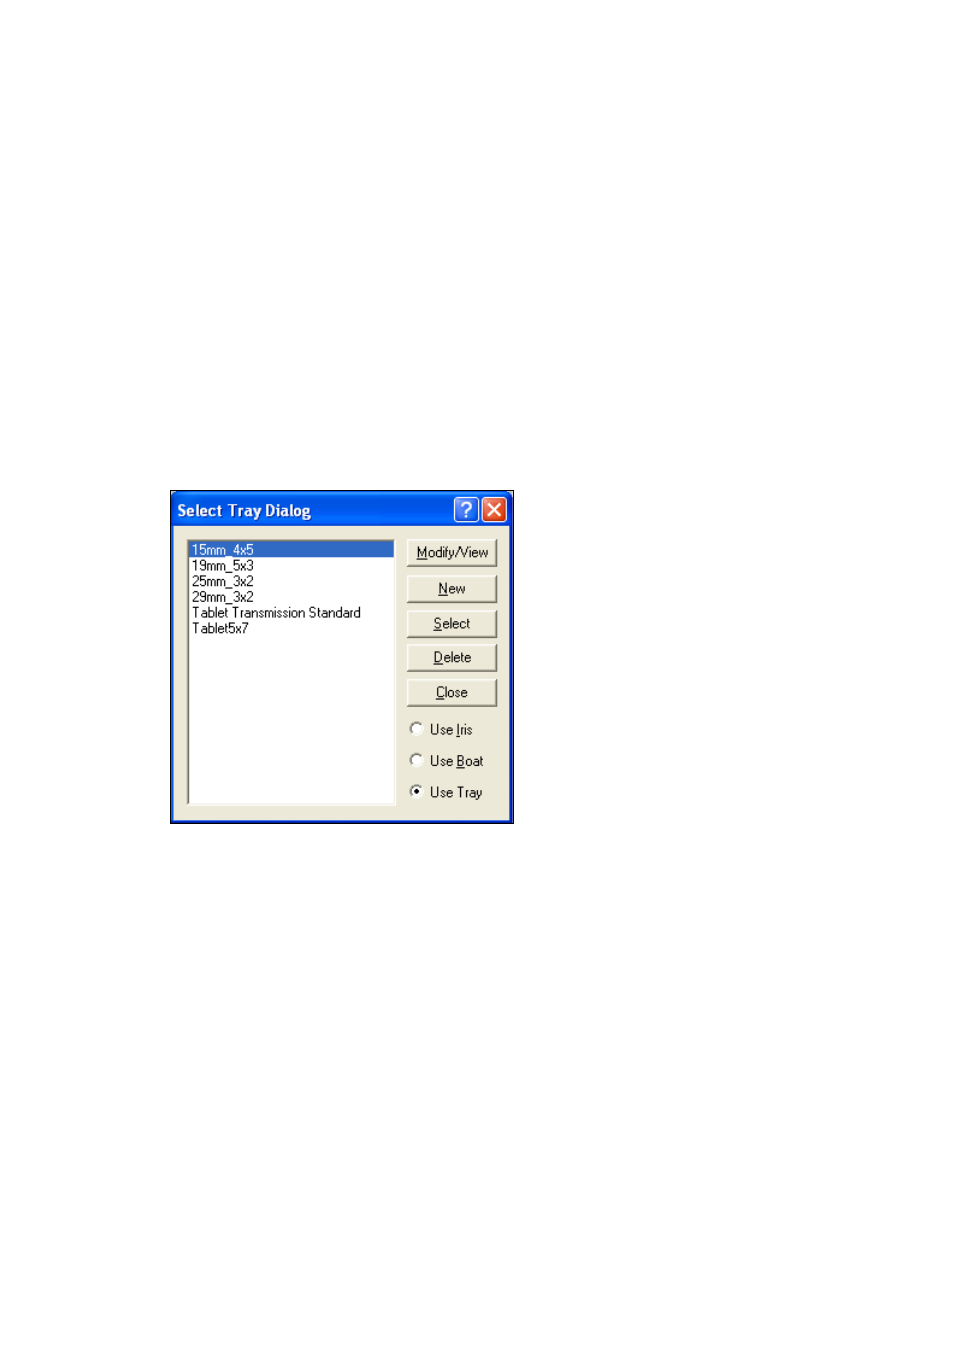
Select Configure/Tray from the main menu. The Select Tray dialog opens:
•
The four entries on top show four standard trays, with vial diameter, and the numbers of vials
in the holder. Choose the proper tray layout and click on Select button. Make sure that the
Use Tray option is selected and click on Close button. For custom tray configuration please
check the analyzer manual.
•
Note that the “Spot Size” option in the Data Collection Method should be adjusted if the vial
used is smaller than 21.56mm diameter. The default spot size is 17.25mm in reflectance.
Normally the beam size should be set for 80% of the vial diameter. For the 15mm vial, use a
12mm spot size.
Use of Vial Dialog Selection Menu
To set up the MasterLab analyzer for automated sampling, follow these instructions:
•
From the main menu, click on Acquire/Sample. Vision prompts for the Product ID using this
dialog box: