Rack, Mounting, Hardware – Dell TL2000 User Manual
Page 57
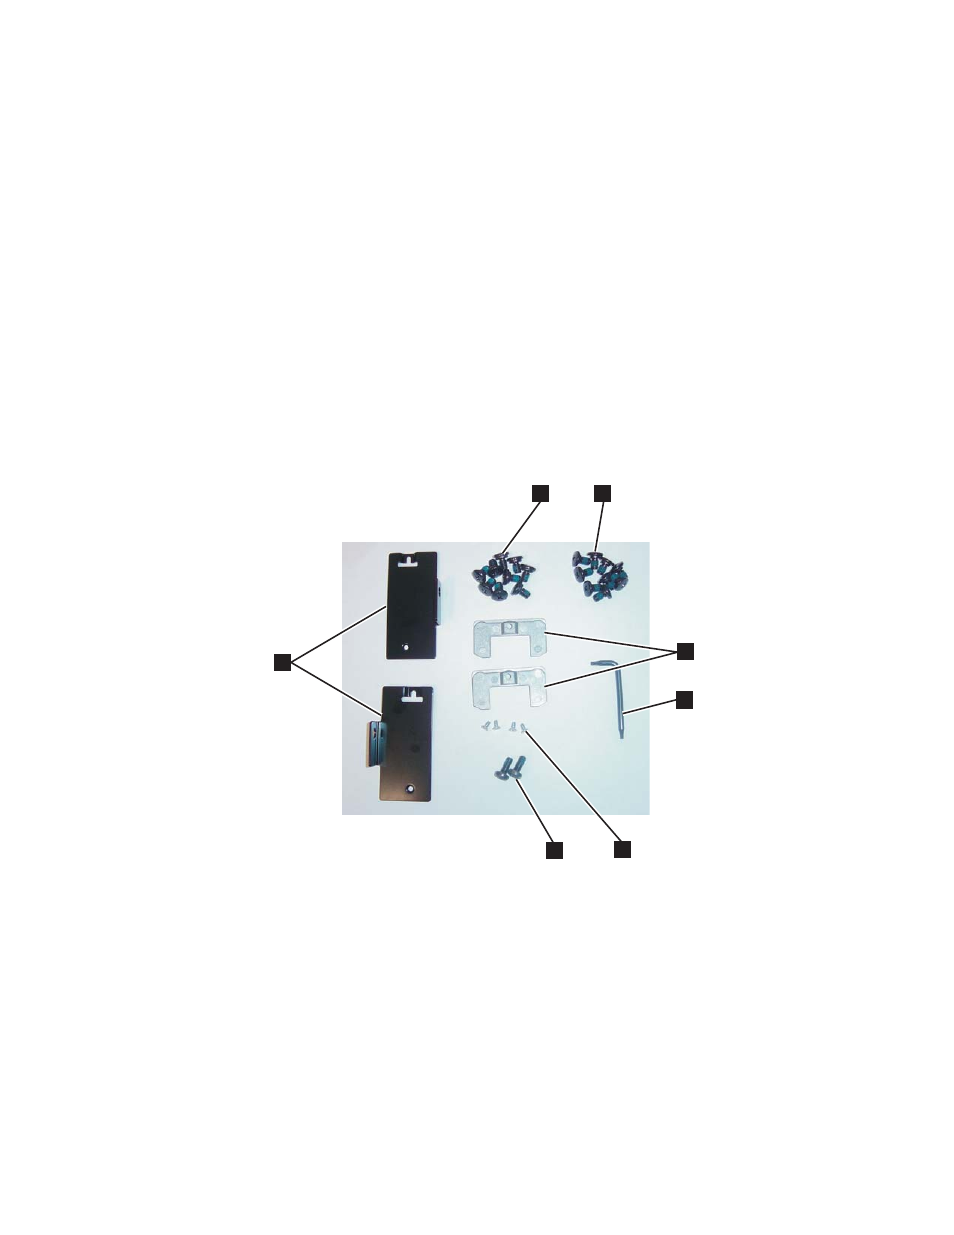
1.
Verify
that
your
rack
kit
includes
the
following
contents
(see
v
Packaged
in
plastic
material:
–
2
rails
(not
shown)
–
2
mounting
brackets
( 1 )
v
Packaged
in
the
small
bag
with
no
label:
–
1
T10
Torx
wrench
( 5 )
–
2
U-shaped
anchors
( 4 )
–
4
small
screws
for
securing
the
anchors
and
brackets
( 6 )
–
2
large
screws
to
secure
the
mounting
brackets
to
the
rack
( 7 )
v
Packaged
in
the
small
bag
with
″Round
Hole
″
on
the
label:
9
screws
to
be
used
on
racks
with
round
holes.
( 2 )
v
Packaged
in
the
small
bag
with
″Square
Hole
″
on
the
label:
9
screws
to
be
used
on
racks
with
square
holes.
( 3 )
Note:
Eight
screws
are
needed
for
the
installation.
One
additional
screw
is
provided
for
security.
2.
Determine
the
location
in
your
rack
for
your
library
to
be
installed
and,
using
a
pencil,
mark
the
location
on
each
vertical
rail
in
your
rack.
Note:
A
2U
library
requires
2U
(3.5
in.=
two
EIA)
of
rack
space.
A
4U
library
requires
4U
(7
in.
=
four
EIA)
of
rack
space
1
3
4
6
2
a77ug208
5
7
Figure
4-6.
Rack
Kit
Mounting
hardware
Chapter
4.
Installation
and
Configuration
4-7