Rear, Panel, Library – Dell TL2000 User Manual
Page 197: With, Fibre, Channel, Full, Height, Drive, Position
4.
If
the
defective
library
is
rack
mounted,
remove
the
two
screws
( 1
in
from
the
front
of
the
defective
library
anchoring
the
mounting
brackets
on
the
library
to
the
rack.
With
assistance,
remove
the
defective
library
from
the
rack.
5.
Place
the
defective
library
on
a
clean
and
sturdy
work
surface.
6.
Proceed
to
a77ug101
1
3
4
2
5
6
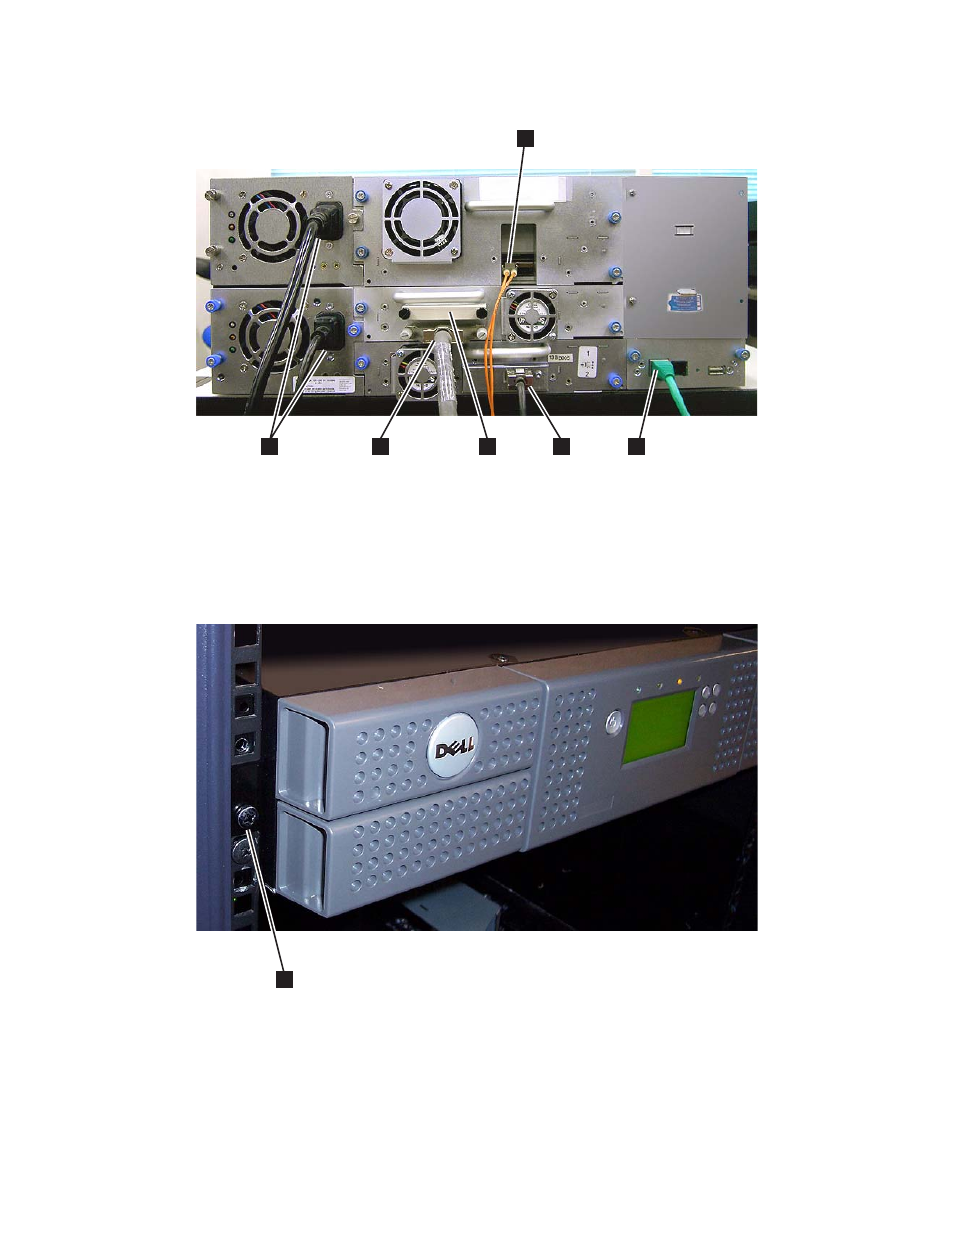
Figure
10-11.
Rear
panel
of
a
4U
library
with
a
Fibre
Channel
full
height
drive
in
the
top
position,
a
SCSI
half
height
drive
in
the
middle
position,
and
a
SAS
half
height
drive
in
the
bottom
position
a77ug178
1
Figure
10-12.
Removing
the
two
mounting
bracket
screws
anchoring
the
library
to
the
rack
(one
screw
on
each
side
of
the
library
Chapter
10.
Check,
Adjust,
Remove,
and
Replace
10-11
See also other documents in the category Dell Computer Accessories:
- POWEREDGE 2950 (182 pages)
- POWEREDGE 2950 (112 pages)
- POWEREDGE 2950 (186 pages)
- POWEREDGE 2950 (10 pages)
- POWEREDGE 2950 (15 pages)
- Console Switch (58 pages)
- PowerConnect 2024 (46 pages)
- 2161DS-2 (56 pages)
- 5316M (15 pages)
- PowerConnect M6348 (737 pages)
- PRECISION 530 (8 pages)
- PRECISION 530 (126 pages)
- PRECISION 530 (300 pages)
- INFINISCALE III M2401G (27 pages)
- POWEREDGE RADI H700 (29 pages)
- ? PowerEdge 6800 (31 pages)
- POWEREDGE M1000E (1168 pages)
- POWEREDGE M1000E (382 pages)
- POWEREDGE M1000E (1080 pages)
- POWEREDGE M1000E (370 pages)
- POWEREDGE M1000E (14 pages)
- POWEREDGE M1000E (116 pages)
- POWEREDGE M1000E (268 pages)
- POWEREDGE M1000E (86 pages)
- POWEREDGE M1000E (2 pages)
- POWEREDGE M1000E (94 pages)
- POWEREDGE M1000E (260 pages)
- POWEREDGE M1000E (138 pages)
- POWEREDGE M1000E (8 pages)
- POWEREDGE M1000E (96 pages)
- POWEREDGE M1000E (1682 pages)
- POWEREDGE M1000E (108 pages)
- POWEREDGE M1000E (58 pages)
- POWEREDGE M1000E (1316 pages)
- POWEREDGE M1000E (7 pages)
- POWEREDGE M1000E (146 pages)
- POWEREDGE M1000E (23 pages)
- POWEREDGE M1000E (144 pages)
- POWEREDGE M1000E (27 pages)
- POWEREDGE M1000E (22 pages)
- POWEREDGE M1000E (168 pages)
- POWEREDGE M1000E (934 pages)
- POWEREDGE M1000E (737 pages)
- POWEREDGE M1000E (1246 pages)
- POWEREDGE M1000E (666 pages)