Turning Technologies CPS User Manual
Page 17
CPS for PC
17
3
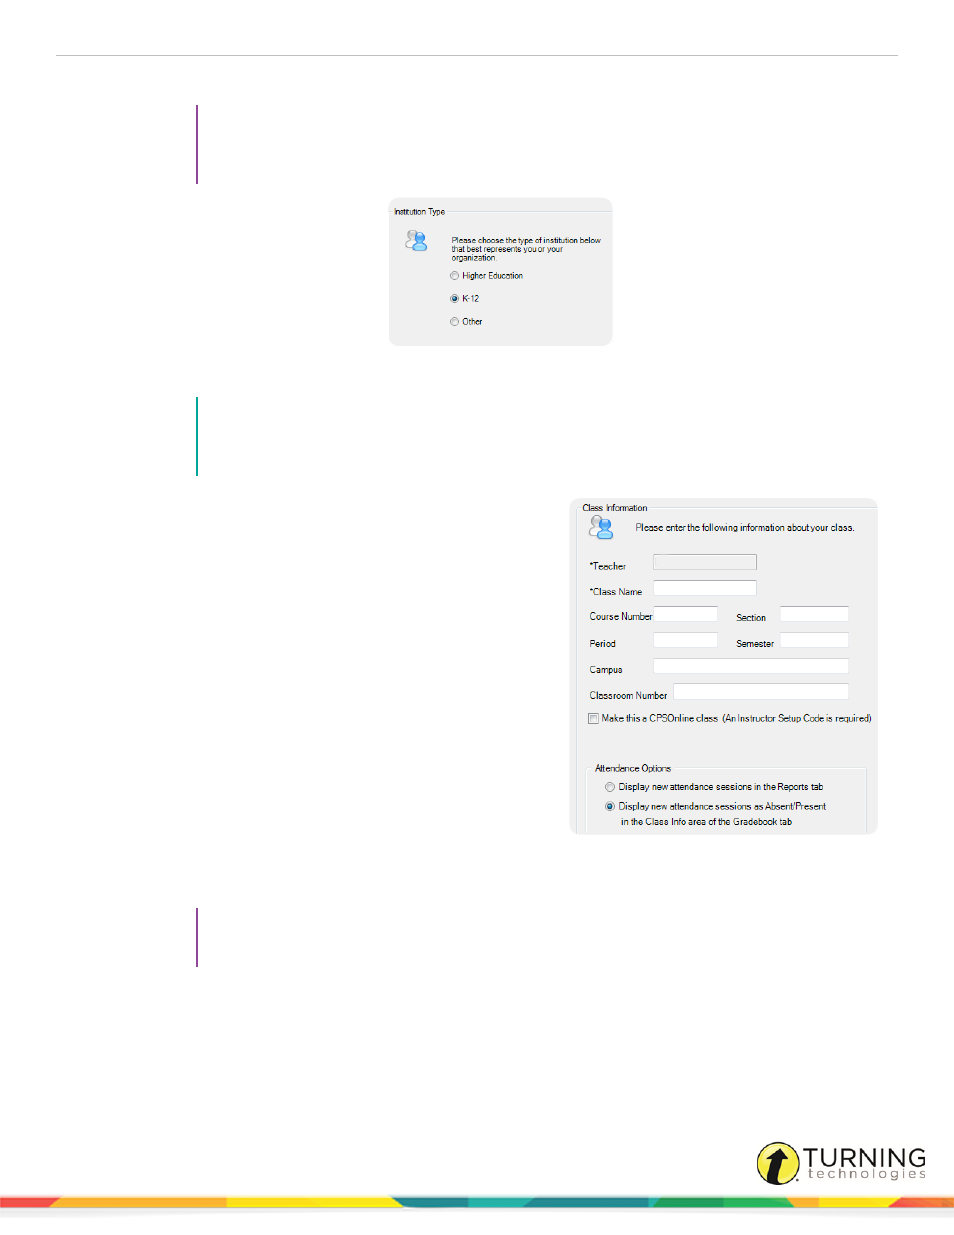
Select the appropriate institution.
TIP
Select K-12 as the institution type unless a CPSOnline account has been created. Selecting
Higher Education requires a CPSOnline Username and password. For further information, see
4
Click Next.
NOTE
If this is the first time creating a CPS class, enter your contact information and click Next. If you
have previously created a CPS class, your contact information will autopopulate. You will
automatically move to the Class Information page.
5
Enter the Class Name and any optional fields pertaining to the
class. The optional fields are:
l
Course Number - Course number assigned by your
school.
l
Section - Section number for your class.
l
Period- Period in which you hold your class.
l
Semester - Semester during which you teach your
class.
l
Campus - Building or campus where you teach your
class.
l
Classroom Number - Room number for your class.
l
Make this a CPSOnline class (An Instructor Setup
Code is required) - Leave the box in front of this option
blank.
l
Attendance Options - This is the location where you
store your attendance records in CPS. You can view
the attendance as a grade in the Assessments area of
the Report tab or as Absent/Present in the Class Info area of the Gradebook tab in the Report section.
TIP
Attendance records can be saved in the Reports tab for future exporting. Additionally, saving
attendance records in the Reports Gradebook allows you to use the internal gradebook feature.
6
Click Next.
7
Click Next to create your class or click Back to review your information.
8
When finished, click Done to close the CPS - New Class Wizard.
To create an additional class, select the option I want to make another class.
turningtechnologies.com/user-guides