Labconco PURICARE Procedure Station Models 34812xx User Manual
Page 72
Page 72 of 197
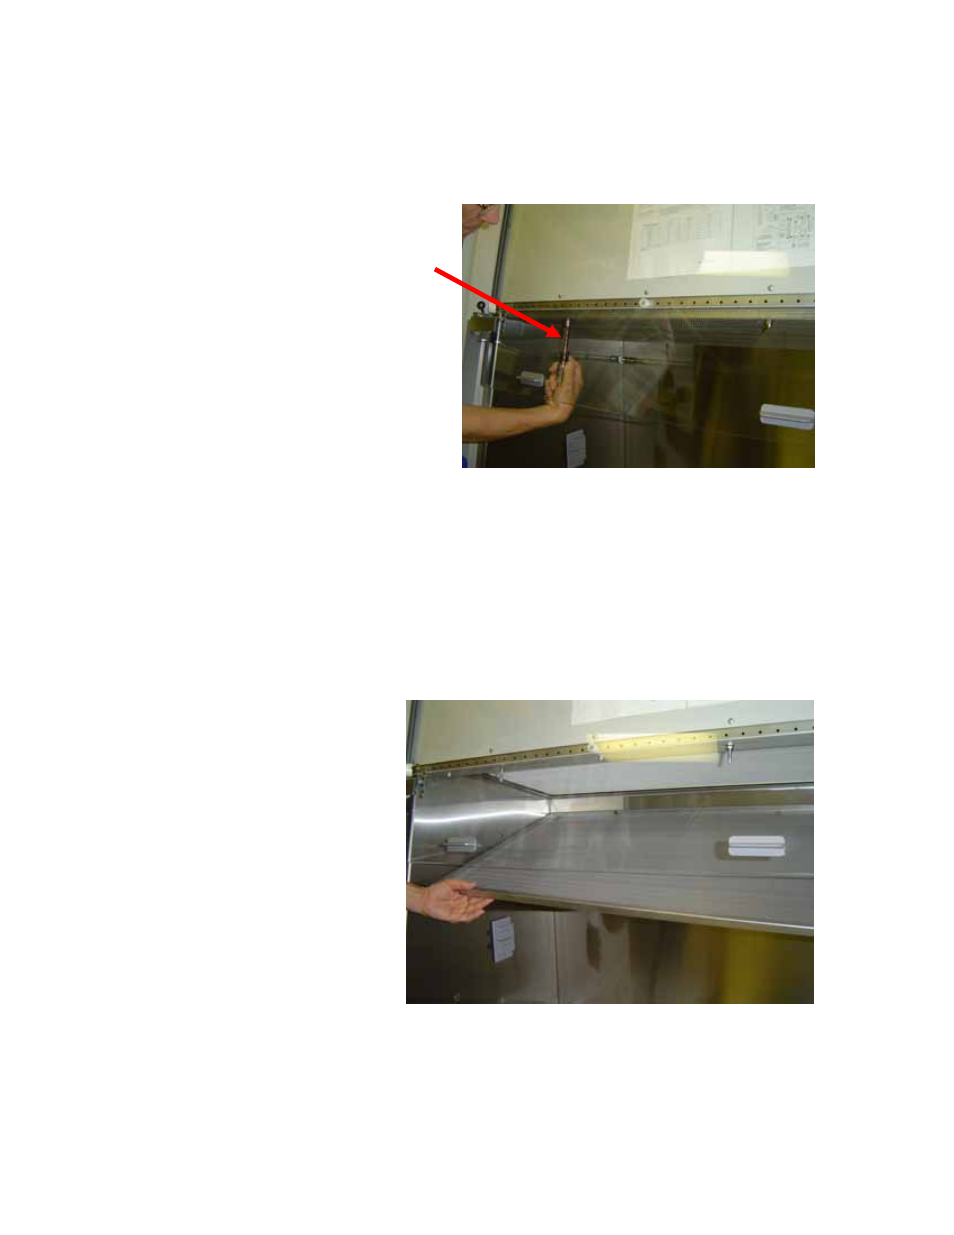
8. Remove the diffuser by raising the sash as high as it will go, and then removing
the two acorn nuts with a 7/16” wrench or socket, as shown in Figure 5-9.
Figure 5-9
Removing the diffuser acorn nuts (Dress
panel and lamps removed for clarity
only).
Note: The diffuser acorn nuts are secured to the studs with a removable thread locking
compound to prevent them from vibrating loose during shipment of the Logic. There
may be some resistance the first time the nuts are removed; this is normal. No
additional thread locking compound need be applied to these acorn nuts unless the unit
is being prepared for shipment.
9. Lower the front edge of the diffuser until clears the bottom of the sash, and then
pull the diffuser straight out of the cabinet, as shown in Figure 5-10.
Figure 5-10
10. Open the following number of Laskin nozzle(s):
For all 3-foot Logic models – 1 nozzle
For all 4-, 5- and 6-foot Logic models – 2 nozzles
11. Ensure the pressure gauge on the generator is reading 20 +/- 1 PSIG.
- PURICARE Procedure Station Models 34810xx PURICARE Procedure Station Models 34802xx PURICARE Procedure Station Models 34800xx Type B2 Biosafety Cabinets Models 34610xx Type B2 Biosafety Cabinets Models 34410xx Type A2 Biosafety Cabinets Models 34609 Type A2 Biosafety Cabinets Models 34509 Type A2 Biosafety Cabinets Models 34409 Type A2 Biosafety Cabinets Models 34309 Type A2 Biosafety Cabinets Models 34608xx Type A2 Biosafety Cabinets Models 34508xx Type A2 Biosafety Cabinets Models 34408xx Type A2 Biosafety Cabinets Models 34308xx Type A2 Biosafety Cabinets Models 34600xx Type A2 Biosafety Cabinets Models 34500xx Type A2 Biosafety Cabinets Models 34400xx Type A2 Biosafety Cabinets Models 34300xx