KEYENCE BL-600 Series User Manual
Page 54
Chapter 4 Setup Software
44
4
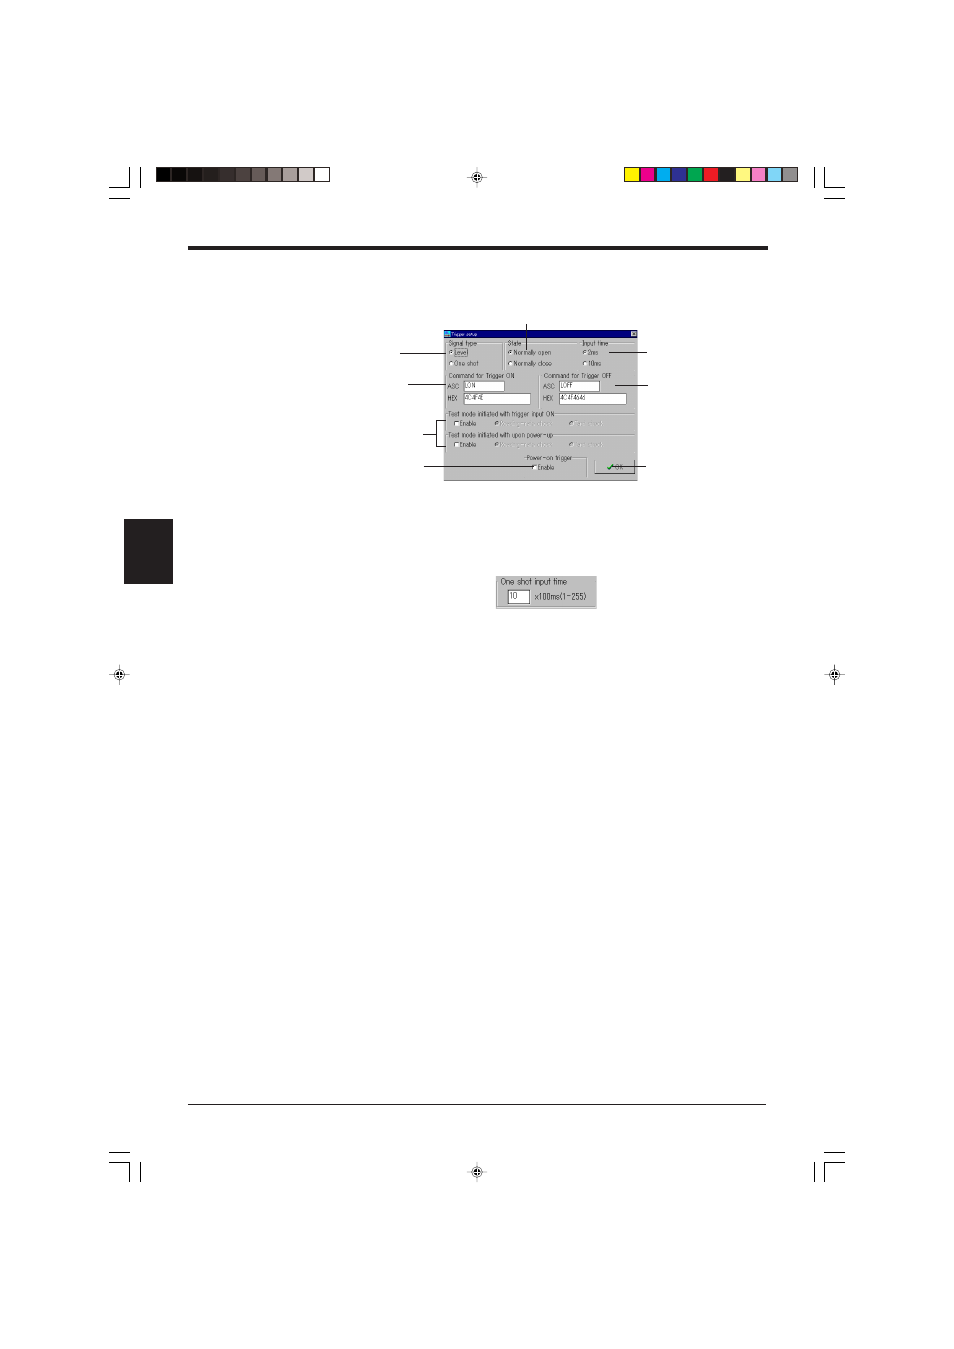
2. Set the items for [Trigger setup].
When the [Trigger setup] button is clicked, the “Trigger setup” screen appears.
Set the following items.
“Signal type”
➮ See pages 86 and 87.
Select a “Signal type”.
•
If “One shot” is selected:
The “One shot input time” setting box appears. Specify a value for the
input time within the range of 1 to 255 (100 ms to 25.5 s).
“State”
Select whether to emit a laser beam when the trigger input is on (Normally-
open) or when the trigger input is off (Normally-closed).
Starting method and type of test mode
Select this option to start the test mode if the trigger input is on or if the BL-
600 Series is turned on. Normally, this option is not selected.
*
If “Test mode initiated with trigger input ON” is selected, the trigger input
cannot function normally.
“Power-on trigger”
•
If “Enable” is not selected:
The BL-600 Series does not emit a laser beam for 5 seconds after it is
turned on, even if the trigger input turns on.
•
If “Enable” is selected:
The BL-600 Series emits a laser beam immediately after being turned on
if the trigger input turns on.
Select this option to activate the laser beam continuously once the BL-
600 Series has been turned on.
“Command for Trigger ON”/“Command for Trigger OFF”
➮ See page 115.
Set the characters for the command used to control the reading operation
(Laser ON/OFF) with command communication.
Any number of characters, up to 8, can be set. Normally, the initial setting
(LON: Trigger ON, LOFF: Trigger OFF) should be used.
“Input time”
Specify the ON time of the trigger input to enable the signal.
Specify “10 ms” to ignore chattering of the contact when a contact type
output (relay, etc.) is used for the trigger input.
“Signal type”
“State”
Starting method and
type of test mode
Click the [OK] button to
return to the [[Main]] screen.
“Command for Trigger
OFF”
“Command for
Trigger ON”
“Input time”
“Power-on trigger”