Communication setup for the 6416y2 card, Front panel dip switches, 6416y2 as control master – Aviom Pro64 Network Manager User Manual
Page 34: 6416y2 as a slave device
25
P
ro
64 N
etwork
M
aNager
U
ser
g
Uide
Communication Setup for the 6416Y2 Card
This section details the card settings required for updating firmware; they must be made on all the 6416Y2
cards in a network before being installed in a Yamaha host device and running Pro64 Network Manager for
the first time. DIP switch settings are slightly different if the 6416Y2 card is the network’s Control Master
versus if it is a slave card.
Front Panel DIP Switches
On the front panel of the 6416Y2 card, the system lock (DIP switch #9) and m‑control (DIP switch #10)
functions need to be disabled during a firmware update. To do this set DIP switch #9 and #10 up—this is
the ‘off’ position for switches in this DIP switch block. If the network contains multiple 6416Y2 cards, be
sure to disable m‑control on each card before starting the firmware update process. Choose the front‑
panel option that suits your application (the card is either the Control Master or a slave device), then move
on to setting up the card’s other DIP switches for the firmware update by following the steps in the section
that follows.
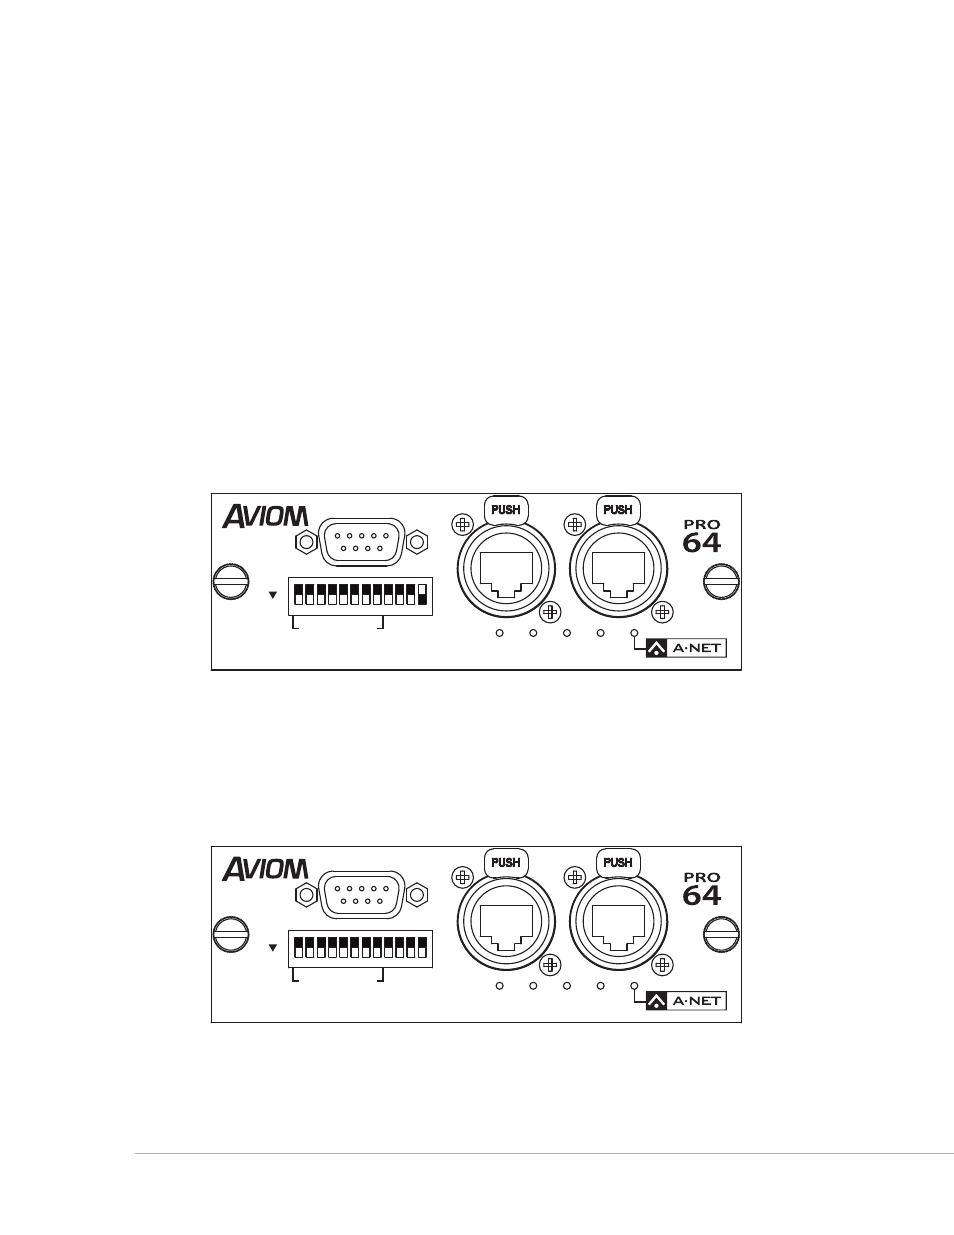
6416Y2 as Control Master
RS–232/422
STEREO LINK
6416
Y2
B
A
ON
CTL
CLK
AUTO
ERR
1 2 3 4 5 6 7 8 9 10 11 12
Front panel settings for a card set as Control Master; switch #12 down (DIP switch handles are black)
6416Y2 as a Slave Device
RS–232/422
STEREO LINK
6416
Y2
B
A
ON
CTL
CLK
AUTO
ERR
1 2 3 4 5 6 7 8 9 10 11 12
Front panel settings for a non-Control Master (slave) card; all DIP switches in the up position