Overview, Specifying your settings for media streaming – Matrox MXO2 PCIe Host Adapter User Manual
Page 260
236
Chapter 17, Using Matrox MXO2 with StudioCoast vMix
Overview
You can use your Matrox MXO2 system as an input device to feed live video and
audio to StudioCoast vMix for streaming, such as for broadcasting live sports
events, concerts, news, educational seminars, and corporate meetings. For
example, you can select any video and audio source connected to the MXO2
inputs as your A/V sources for use with vMix, and stream your video and audio
to a live streaming service.
¦
Note
You won’t be able to use vMix with MXO2 if you’re currently running
another application that uses your MXO2 hardware, such as Matrox A/V Tools.
You must close other applications that use your MXO2 hardware before starting
vMix.
Specifying your settings for media streaming
This section provides instructions on how to use MXO2 as the input device for
video and audio in StudioCoast vMix.
1
Connect the video and audio input sources that you want to stream to the
corresponding inputs on your MXO2 hardware. For a list of the video input
formats supported on the various MXO2 inputs, see
2
Start StudioCoast vMix and click the
Add Input
button on the Input Bar at
the bottom of the main window.
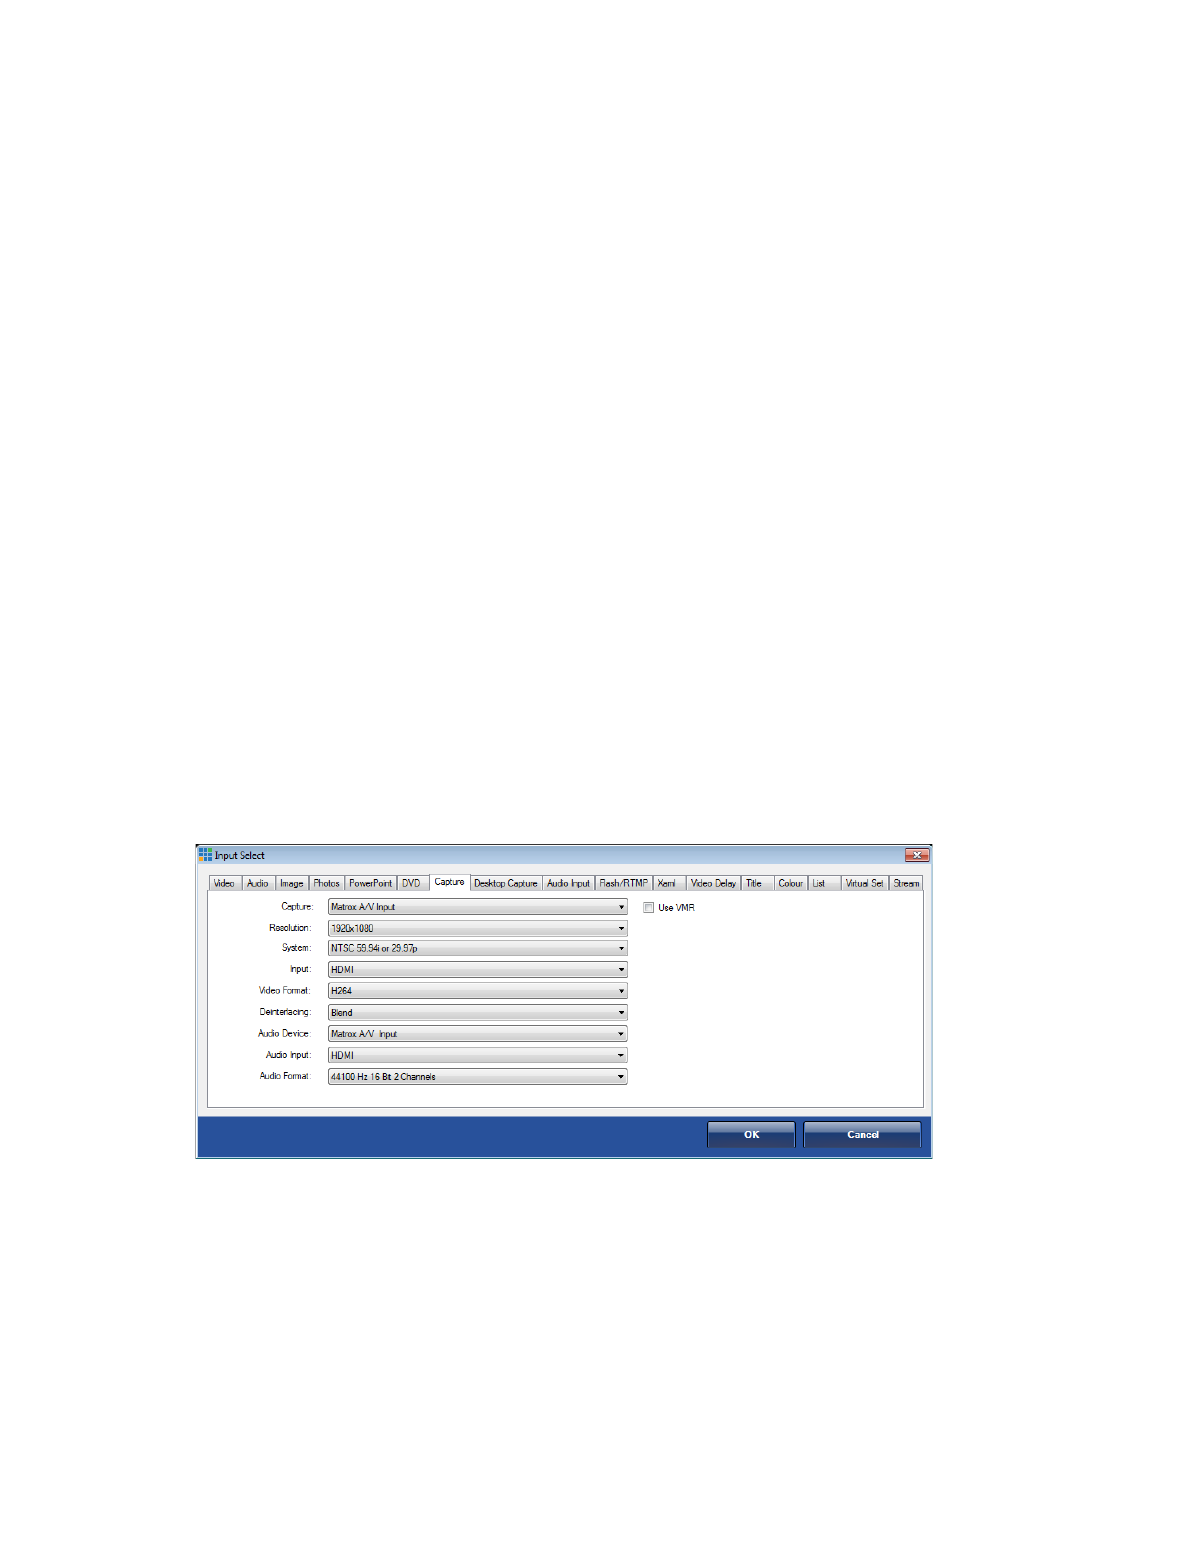
3
In the
Input Select
dialog box, click the
Capture
tab:
4
From the
Capture
list, select
Matrox A/V Input
.
5
From the
Resolution
list, select the frame size that matches your source
video, such as
1920x1080
.