Defining a recording schedule – Interlogix DVR 42 User Manual User Manual
Page 95
TruVision DVR 42 User Manual
93
Defining a recording schedule
Defining a recording schedule lets you specify when the DVR records video and
under what circumstances. Each camera can be configured to have its own
recording schedule.
The schedules are visually presented on a map for easy reference. See
Figure 35 below for an example.
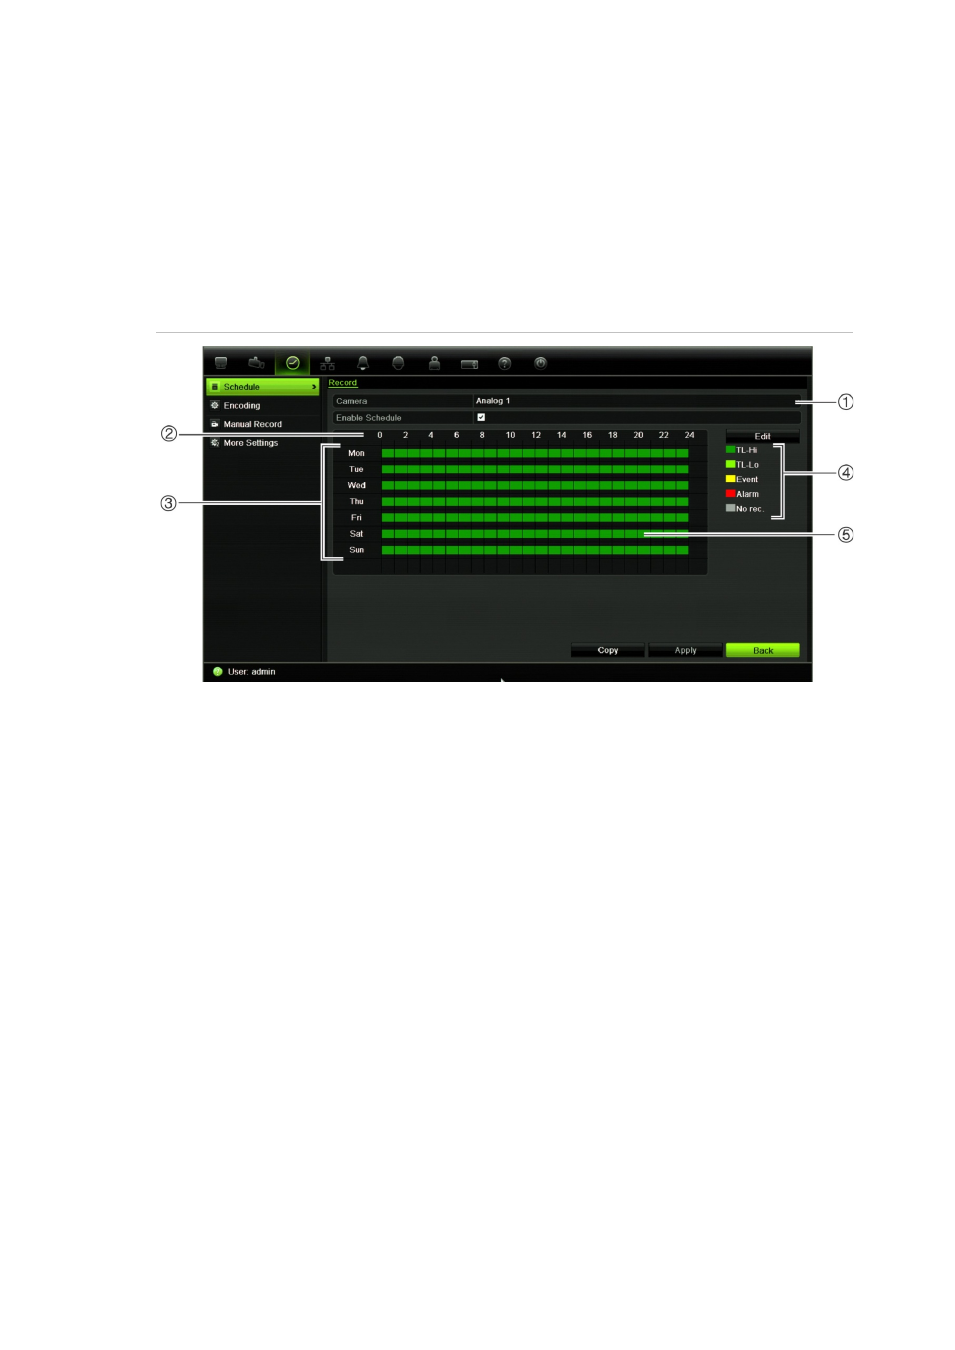
Figure 35: Description of the Schedule window
1. Camera. Select a camera.
2. Schedule time. Represents the 24-hour cycle during which a schedule is selected.
3. Schedule day. There are eight days to select: Sunday (Sun), Monday (Mon), Tuesday (Tue),
Wednesday (Wed), Thursday, (Thu), Friday (Fri), Saturday (Sat) and Holiday (if Holiday has
been enabled).
4. Recording type. There are five recording types to select, which are color-coded:
TL Time lapse (Green squares): Record of a specific day. Each green square in the
timeline represents an hour in the 24-hour period.
TL-Hi (Dark green): High quality time lapse. Records high quality video.
TL-Lo (Bright green): Low quality time lapse. Records low quality video. This could be
used, for example, for night recordings when few events or alarms are expected. Saving
the video in low quality helps save resources on the HDD.
Event (Yellow): Records only events, such as motion detection and POS/ATM text
insertion.
Alarm (Red): Records only alarms.
None (Grey): No recording during this period.
5. Timeline. There is a 24-hour time line for each day. Up to eight recording periods can be
scheduled during the 24-hour period.