Rs-485 ports – Interlogix DVR 42 User Manual User Manual
Page 11
TruVision DVR 42 User Manual
9
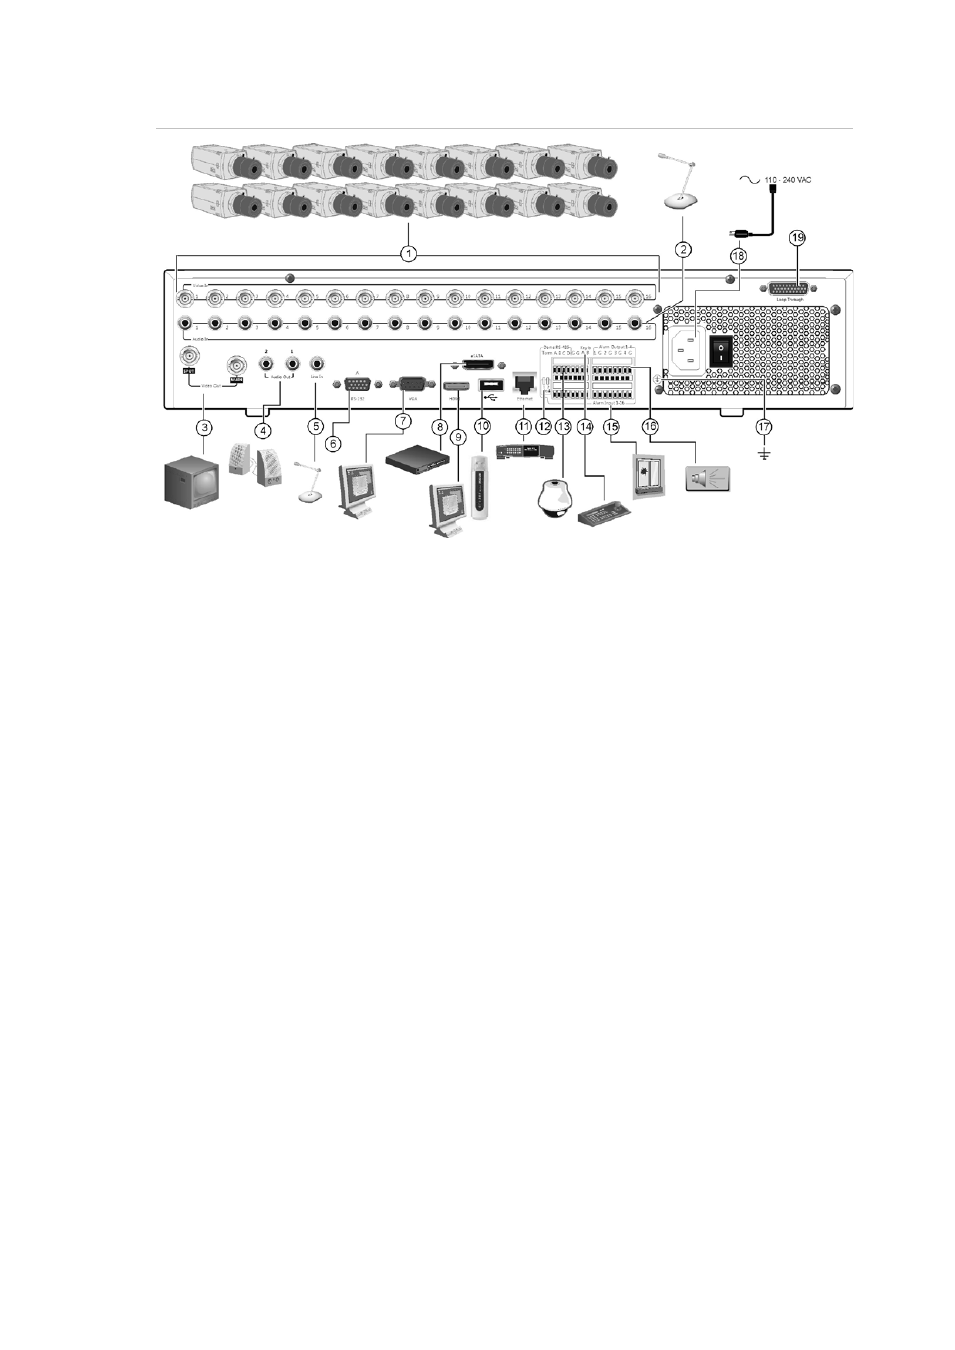
Figure 1: Back panel connections
1. Connect up to 16 analog cameras to BNC
connectors (depends on the DVR model).
2. Connect audio inputs (available for each
camera) to RCA connectors.
3. Connect up to two CCTV monitors (BNC-
type connectors):
- Spot monitor
- Main monitor
4. Connect to speakers for audio output.
5. Connect RCA connector to a microphone.
6. Connect to a RS-232 device.
7. Connect one CCTV monitor (BNC-type
connector).
8. Connect to an optional eSATA device such
as SATA HDD, CD/DVD-RM.
9. Connect to a HDTV. The HDMI connection
supports both digital audio and video.
10. Connect to an optional USB device such as
a mouse, CD/DVD burner or HDD. The
DVR supports both a USB DVD and a USB
HD on the front and back USB ports.
11. Connect to a network.
12. Terminate the line to the dome cameras
using this RS-485 switch. Default is Off.
13. Connect to a PTZ control.
14. Connect to a keyboard (KTD-405 shown)
15. Connect up to 16 alarm inputs.
16. Connect up to four alarm relay outputs.
17. Connect to ground.
18. Connect to a power supply.
19. Loop through for up to 16 analog cameras
(see item 1).
RS-485 ports
There are two RS-485 ports on the back panel of the DVR. See Figure 2 on page
10 for the serial pin outs.
• Dome RS-485:
A and B: Connect pan, tilt, zoom control of PTZ dome cameras. A = +, B = -
C and D: Not used