Auto archiving – Interlogix DVR 42 User Manual User Manual
Page 72
70
TruVision DVR 42 User Manual
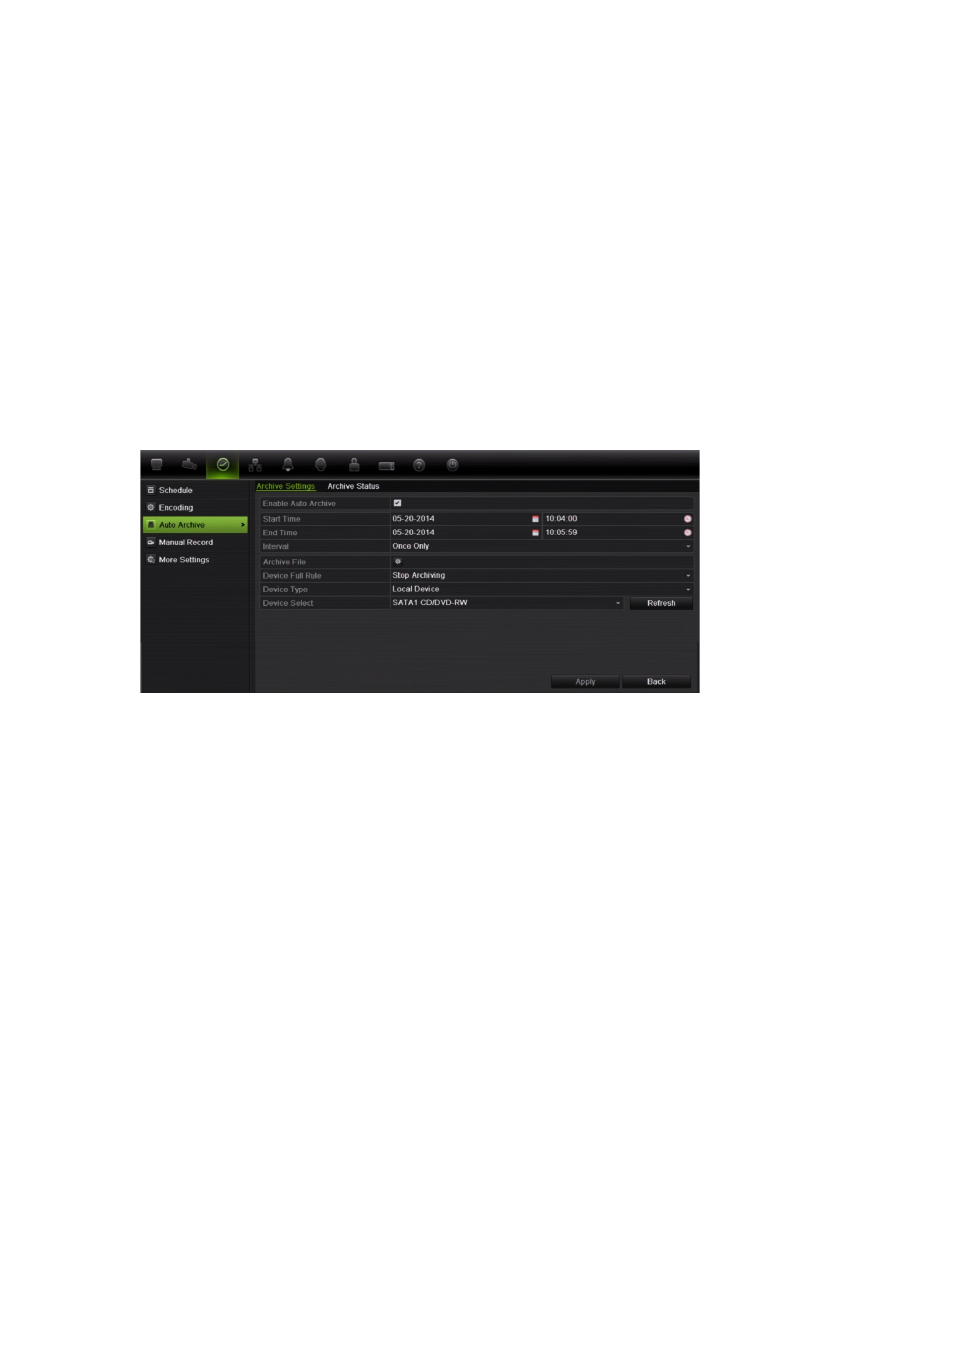
Auto archiving
You can schedule the DVR to automatically archive recordings at set interval
times to an external storage device. You can also select the cameras and
recording types to auto archive as well as define how the system responds when
the HDD becomes full.
It is easy to see the time of the most recent and next archive recording. Simply
select the Archive Status tab and the information is displayed.
To schedule automatic archiving:
1. Connect the backup device to the DVR.
2. In the configuration menu, click
Video Schedule > Auto Archive > Archive
Settings
.
3. Check
Enable Auto Archive
.
4. Select the start and end date and time periods during which archiving can
occur automatically.
5. Under
Interval
, select the desired interval time for archiving.
The interval time options available are: 1 hour, 2 hours, 4 hours, 8 hours, 24
hours, or Once Only. Default is 1 hour.
6. Click
Archive File
. In the window that appears, select the cameras and
search parameters required:
Record Type
: All, constant, motion, text insertion, alarm, or manual.
File Type
: All, locked, or unlocked.
Note: You can copy these selected parameters to other cameras. Click
Copy
and select the desired cameras.
Click
OK
and
Apply
to save, and return to the Archive Settings window.
7. Under
Device Full Rule
, select how the DVR responds if the backup device
becomes full. There are two options: Stop Archiving (default) or Overwrite.
If overwrite is selected, the oldest files are overwritten.
8. Under
Device Select
, select the backup device used.