Configuring ddns – Interlogix DVR 42 User Manual User Manual
Page 115
TruVision DVR 42 User Manual
113
Configuring DDNS
A static IP address never changes so you can enter it into the browser or CMS
and the DVR network connection will always work with it.
However, if you have a dynamic IP address for your public IP address, it will
change every time you connect to the network. Under such situations, you can
set up a dynamic domain name system (DDNS) that will link your public IP
address to a host name so that you can connect to the DVR with the host name.
Note: If you are not seeing video over your cellular network, some cellular
providers block port 554 so you may need to change it to another value. See
Appendix C “Port forwarding information” on page 146 for more information.
There are two ways to set up a DDNS:
• DynDNS: Manually create your own host name. You will first need to create a
user account using the hosting web site, DynDDNS.org.
• ezDDNS: Activate the DDNS auto-detection function to set up a dynamic IP
address. The server is set up to assign an available host name to your DVR.
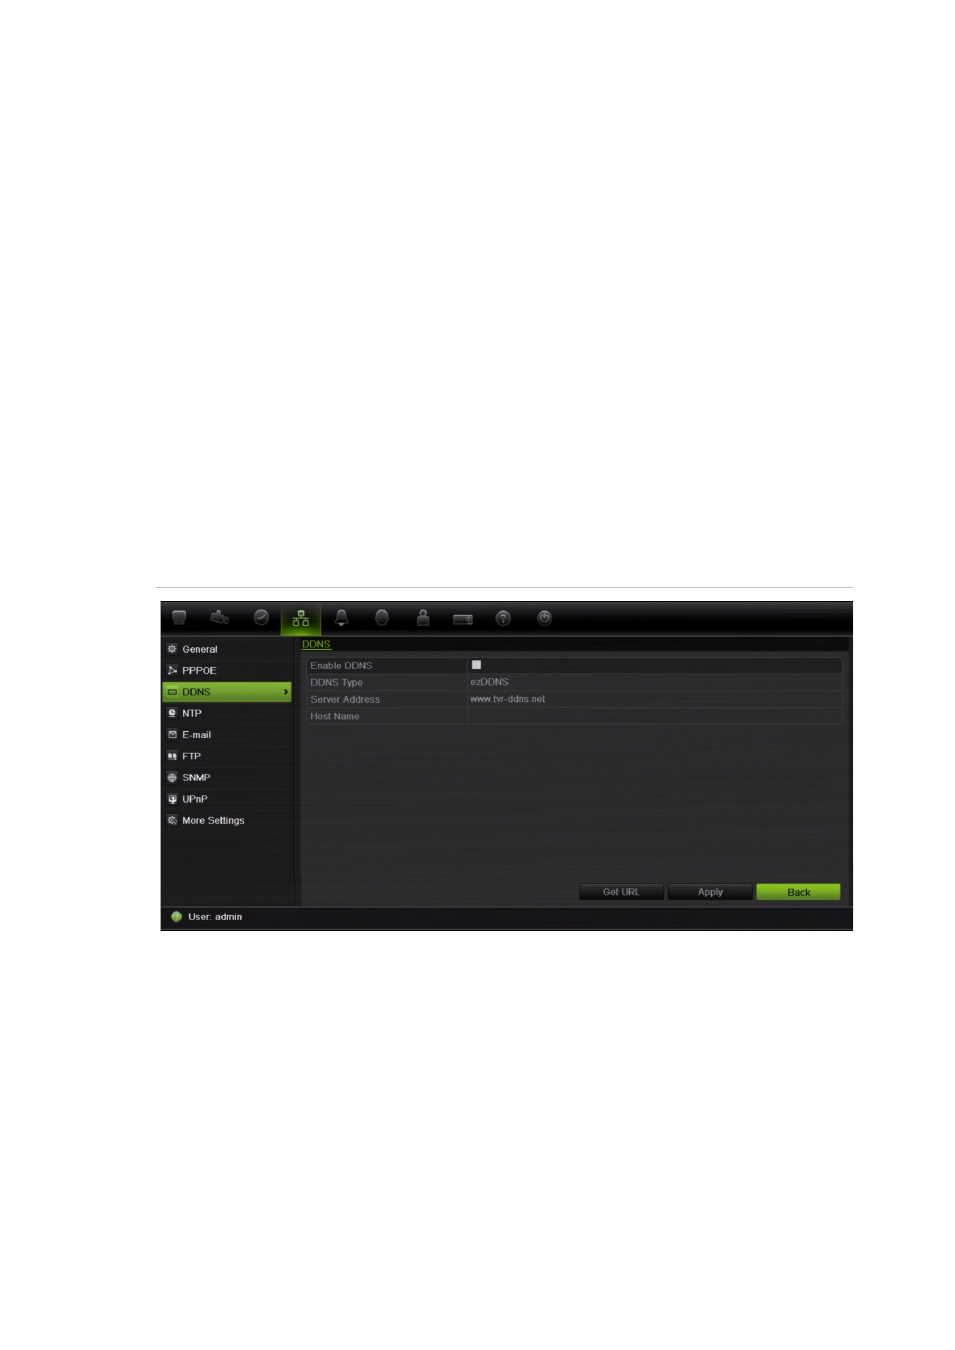
Figure 37: ezDDNS setup window
To set up DDNS:
1. From the menu toolbar, click
Network Settings
>
DDNS
.
2. Check the
Enable DDNS
box to enable this feature.
3. From
DDNS type
, select one of the DDNS types listed:
• ezDDNS: Click the
Get URL
button. The URL address to access the unit
is displayed. If no host name is specified, the DDNS will allocate one
automatically.
The maximum length for the host name field is 63 characters. This limit
does not include tvn-ddns.net. An example of a host name could be
max63chars.tvr-ddns.net.