Kenmore 385. 19000 User Manual
Page 50
Attention! The text in this document has been recognized automatically. To view the original document, you can use the "Original mode".
Setting Stitch Length and Left/Right Needle
Position
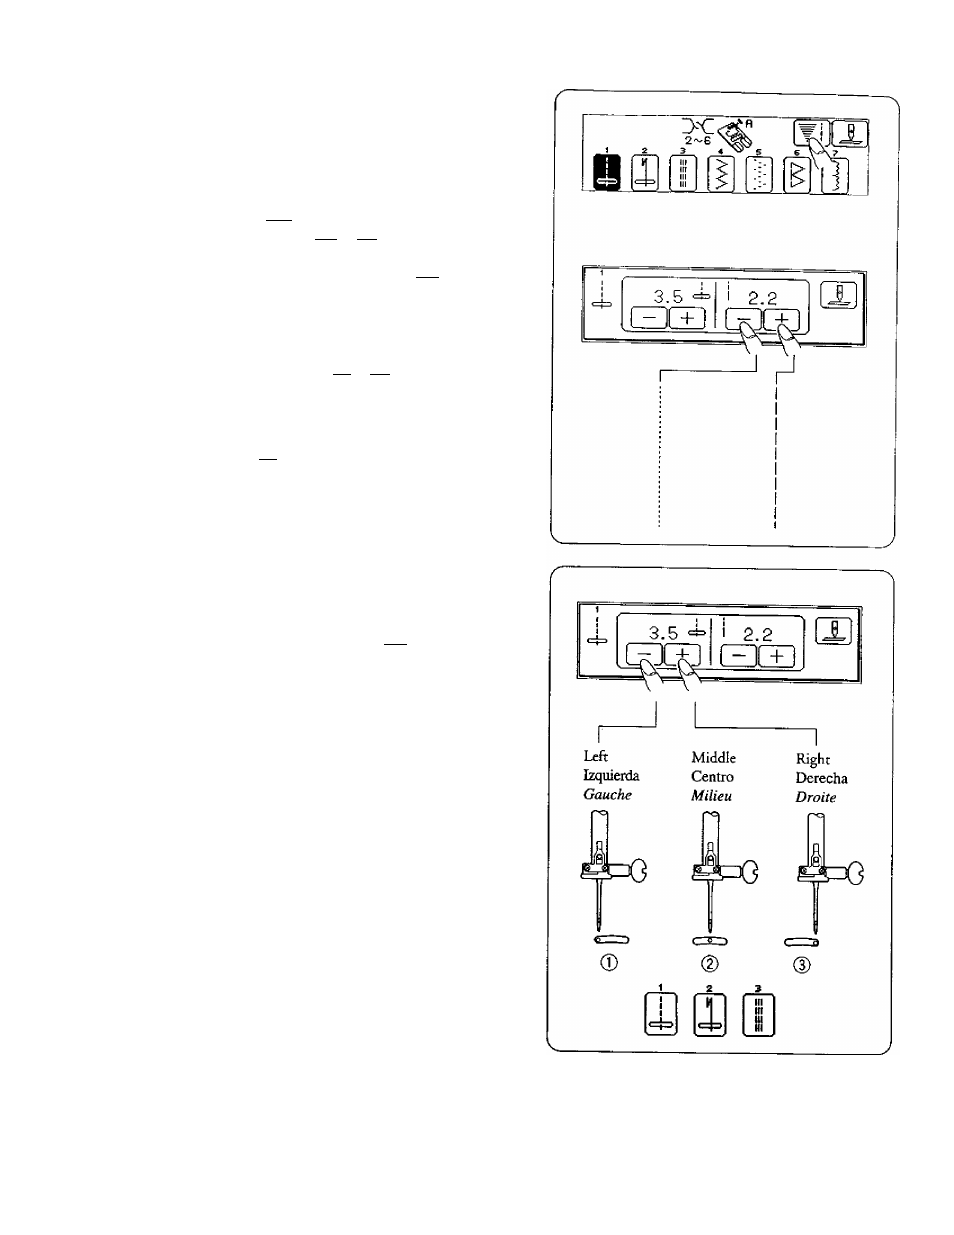
• Manual Stitch Length
' 1 hese settings apply only to “straight” stitch
patterns 1 through 3.
Press the |¥ 11 key to adjust the stitch length
manually. Use the
\~^ \
or | + | keys (on the right) to
adjust the stitch length. To decrease length, press
the (3D To increase length, press the[ + ] key.
The pre-programmed stitch length setting is
suitable for most of your sewing needs. However,
you can change these settings to accommodate
different fabric characteristics or achieve a desired
effect. Hold down the [ - | or | + | key until you
reach the desired setting,
* The reverse stitch length cannot be set longer than
2.5 mm (1/8 ").
Press the | ^ | key again to return the visual touch
screen to the former display.
• Variable Needle Position
When you select stitch patterns
1
through 3 (see
bottom of box on right), you can adjust the lefr/right
needle position. When you press the I ~ I key , the
needle p>osition will move to the left.
When you press the [3 key, the needle position will
move to the right.
© Left (0.0)
@ Middle (3.5)
(D
Right (7.0)
Note:
When using a straight stitch foot, make sure to
use center needle position (|).
Otherwise the needle may break.
34