Fg] ffll fill, Flo^c i o a – Kenmore 385. 19000 User Manual
Page 44
Attention! The text in this document has been recognized automatically. To view the original document, you can use the "Original mode".
SECTION
III
CONVENTIONAL
SEWING
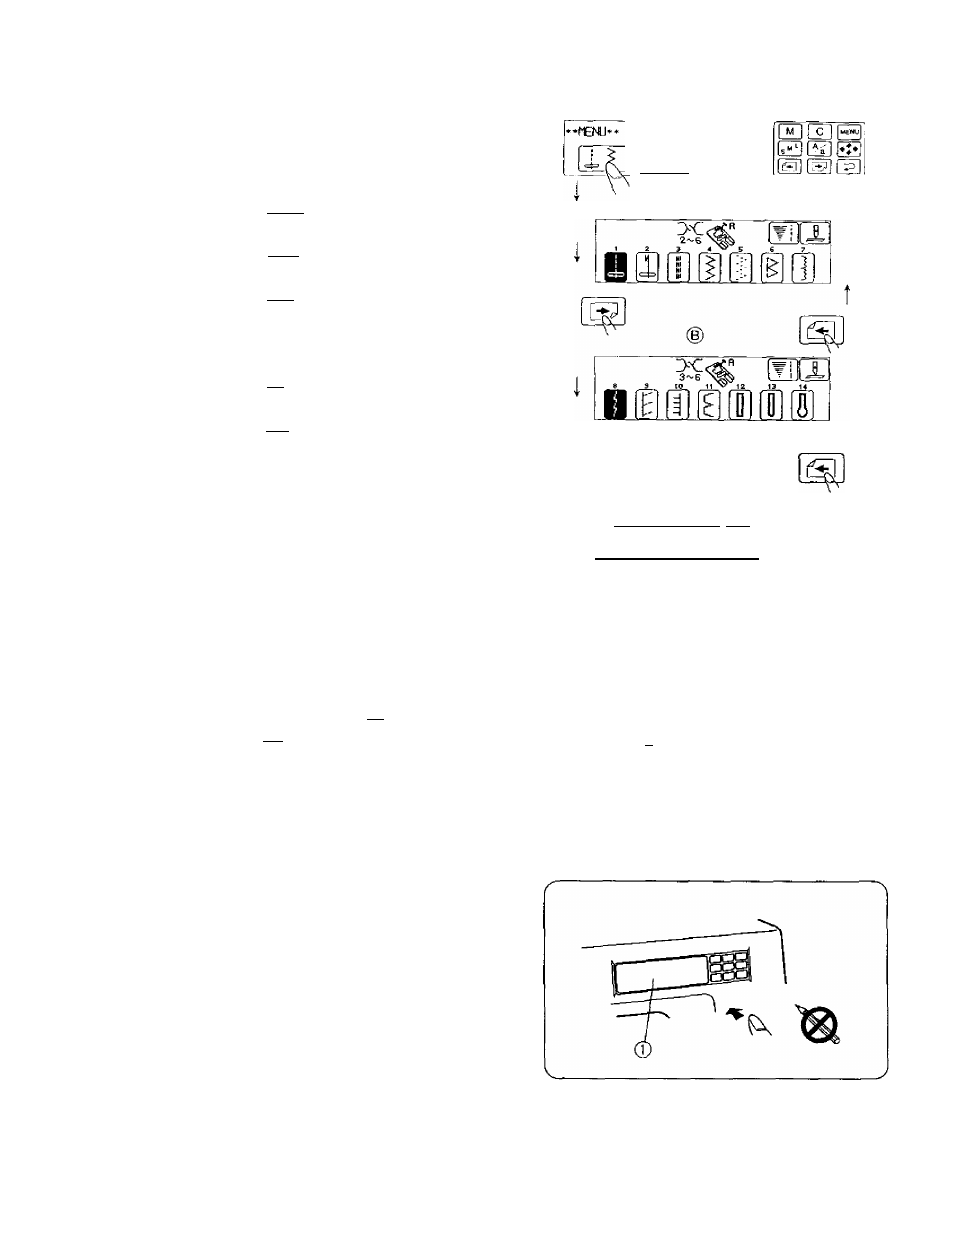
Selecting Patterns (Conventional Sewing)
♦ Changing the visual touch screen
♦
When the power switch is turned on, the menu
screen is displayed.
♦
When the | J, |~j] | key is pressed, Screen (A) is
displayed.
♦
When the | E3~| key is pressed, Screen is
displayed.
♦
When the j~[gf| key is pressed again. Screen (C) is
displayed.
♦
When the | key is pressed. Screen @ is
displayed.
♦
When the ISi key is pressed again. Screen@ is
displayed,
♦ When the [
^
] key (return key) or the key is
pressed, the menu screen is displayed.
Note:
In conventional sewing, the start/stop button
cannot
be
used. Please use the foot control.
CAUTION:
*
Do not press the surface of the visual touch
screen with hard or sharp objects like pencils
or screw drivers.
When you select a pattern or function on the
screen, it is not necessary to press hard; just
touch the keys with your finger.
*
Use a dry soft cloth to wipe off the screen.
• Selecting Patterns
Press the center of a desired pattern on the screen.
® Appropriate needle thread tension is displayed.
(2) A suitable foot is displayed.
(D
Stitch Width and Length Piey : jT||
When the |Tj | key is pressed, the stitch width
and length can be adjusted (see page 40).
® Up/D own Needle Position Key:
When this key is pressed, the needle bar alternates
between up and down positions when the machine
stops (see page 30).
FlO^c i O a
V
(D
Visual touch screen
(A)
>c
3~B
e
»
10
11 >y
i t
IS i<
I
i ^
[11
fg] ffll fill
3-7
2
9
® (D d) (3)
fl i^T
MI
2
28