Red Lion IndustrialPr 6000 Router User Manual
Page 176
Software User Guide
176
Advanced Tab
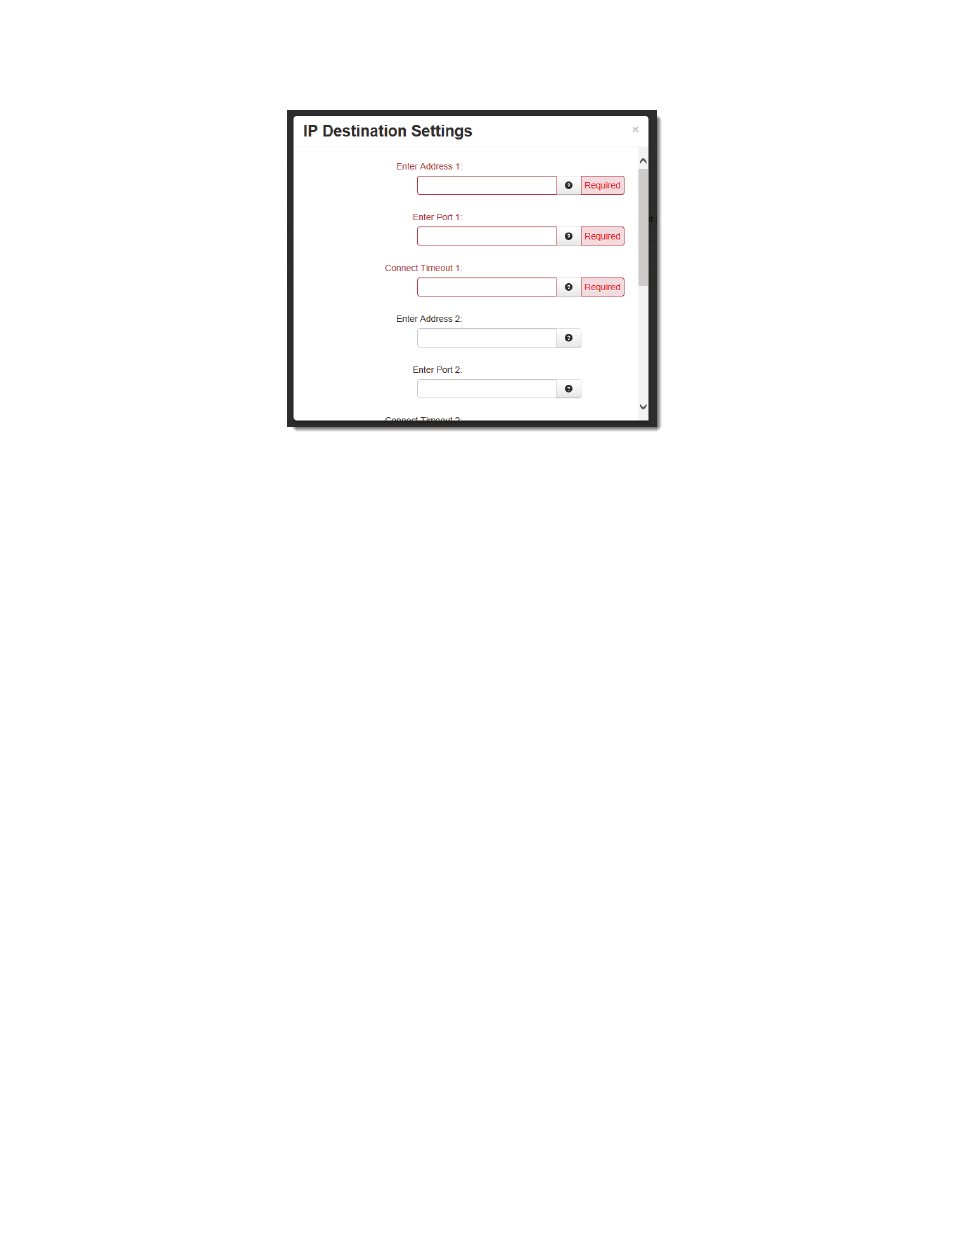
Enter Address 1 (Required): This is a Client Primary IP Address that Gwlnx uses to connect to the Host Server.
Enter Port 1 (Required): This is a Client Primary Port Address that Gwlnx uses to connect to the Host Server Port.
Connect Timeout 1 (Required): Specify the time in seconds to attempt a connection to this TCP Destination, before
declaring it unreachable. After the specified time, the next destination will be attempted. Valid range is 2 ‐250 sec‐
onds. The recommended setting for this field is 10 seconds. A value less than 10 seconds is not recommended for a
wireless environment
Enter Address 2: This is a Client First Alternative IP Address that Gwlnx uses to connect to the Host Server.
Enter Port 2: This is a Client First Alternative Port Address that Gwlnx uses to connect to the Host Server Port.
Connect Timeout 2: Specify the time in seconds to attempt a connection to this TCP Destination, before declaring it
unreachable. After the specified time, the next destination will be attempted. Valid range is 2 ‐ 250 seconds. The rec‐
ommended setting for this field is 10 seconds. A value less than 10 seconds is not recommended for a wireless envi‐
ronment.
Enter Address 3: This is a Client Second Alternative IP Address that Gwlnx uses to connect to the Host Server.
Enter Port 3: This is a Client Second Alternative Port Address that Gwlnx uses to connect to the Host Server Port.
Connect Timeout 3: Specify the time in seconds to attempt a connection to this TCP Destination, before declaring it
unreachable. After the specified time, the next destination will be attempted. Valid range is 2 ‐ 250 seconds. The rec‐
ommended setting for this field is 10 seconds. A value less than 10 seconds is not recommended for a wireless envi‐
ronment.
Header Type: This is a Header Length used in TCPIP packet that contains the Message Length being Send or Receive.
The recommended setting for this field is Default.
•
Click on the Finish button and you will be directed to the IP Destinations dialog window and the IP Destinations
Table Properties will be populated with the entered data.
•
Click on the “Save” button for changes to be saved without activating the interface, the “Apply” button will save
your settings and apply them immediately. To revert to the previous defaults, click on the “Revert” button.