Replacing the hard drive duct – Apple iMac G5, 20-inch User Manual
Page 102
100 - iMac G5 (20-inch) Take Apart
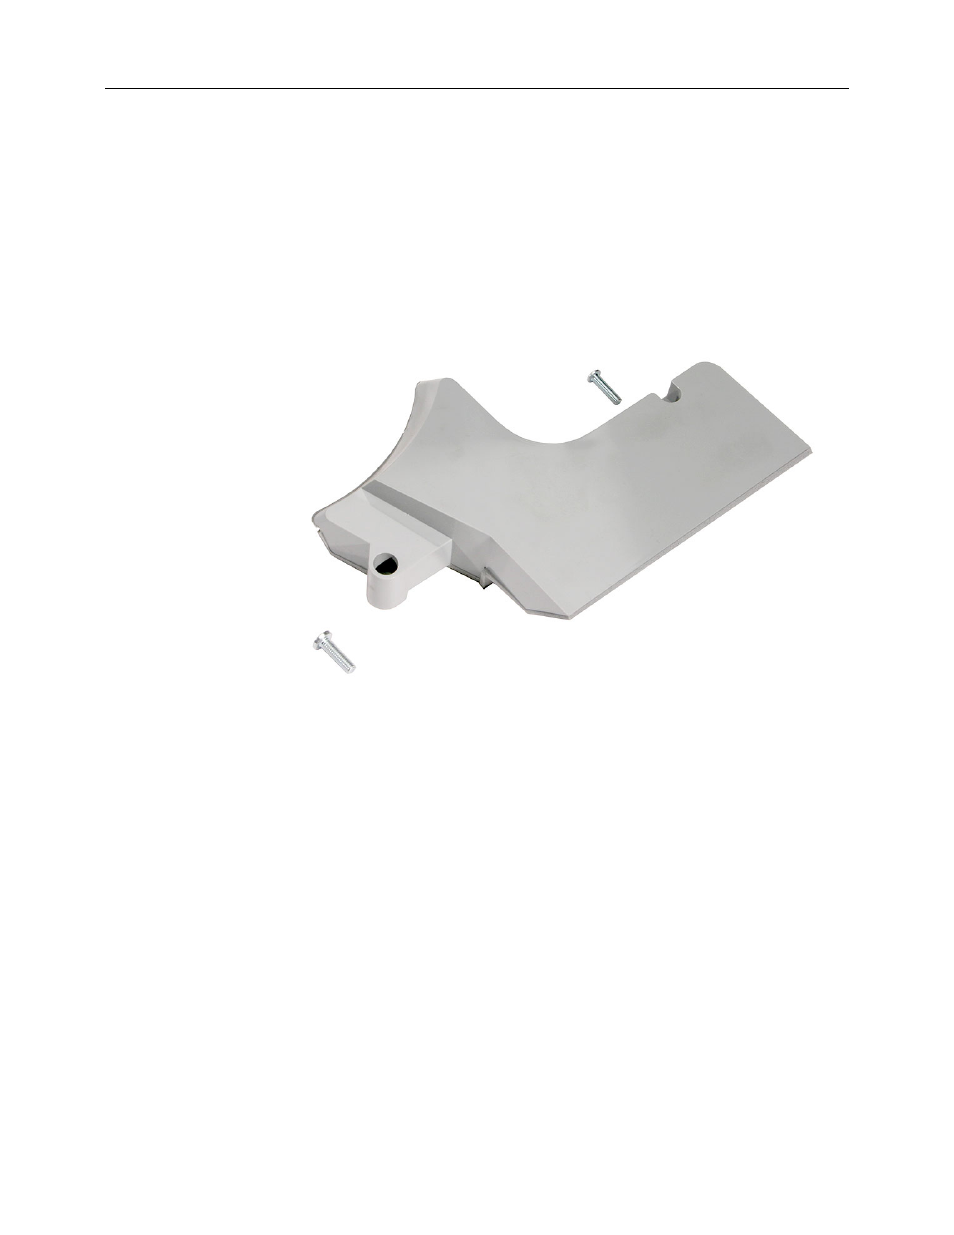
Hard Drive Duct
Replacing the Hard Drive Duct
1.
Place the hard drive duct over the logic board so that the bottom of the duct fits into
the edge of the heat shield without any gaps.
2.
Replace the two screws.
Replacement Note: Although the screws are the same length, the head shape
differs. Replace the screw with the thicker head into the fully recessed screw hole.
3.
Replace the back cover.
See also other documents in the category Apple Computers:
- iMac G5 (96 pages)
- iMac G5 (2005) (96 pages)
- iMac (6 pages)
- iMac (76 pages)
- Mac Pro Computer (92 pages)
- Mac Pro (88 pages)
- Mac mini (96 pages)
- Mac mini (original) (106 pages)
- eMac (10 pages)
- eMac (80 pages)
- Power Mac G5 (Late 2005) (33 pages)
- Power Mac G5 (Early 2005) (120 pages)
- iMac G3 (38 pages)
- Intel-based iMac (Mid 2007) (76 pages)
- iMac G5 (iSight) (96 pages)
- Mac mini (Early 2006) (96 pages)
- Power Mac G5 (36 pages)
- Power Mac G5 (112 pages)
- Mac mini (Intel-based; Mid 2007) (72 pages)
- PowerPC G5 (15 pages)
- Macintosh Performa 578 (161 pages)
- Xserve G5 (94 pages)
- Xserve G5 (96 pages)
- Xserve (Hard Drive Replacement) (3 pages)
- Workgroup Server 8550 (121 pages)
- Workgroup Server 8550 (163 pages)
- iMac computer (120 pages)
- LC 560 (2 pages)
- Mac G4 (Video Card Replacement) (6 pages)
- Mac 6500/275 (232 pages)
- Mac Performa 5300 CD series (Tech informatiom) (8 pages)
- Power Macintosh 6500 Series (260 pages)
- eMac (Stand Installation) (13 pages)
- Remote Desktop (16 pages)
- Remote Desktop (116 pages)
- Remote Desktop (203 pages)
- MAC PRO (Hard Drive Replacement) (5 pages)
- iMac G5, 20-inch (22 pages)
- Power Macintosh 7100/66AV (132 pages)
- Xserve Late 2006/Early 2008 (PCI Expansion Card Replacement) (6 pages)
- Xserve (Blower Replacement) (5 pages)
- Xserve RAID (Locking Switch Replacement) (6 pages)
- Macintosh Performa 640 Series (DOS Compatible) (196 pages)
- Mac 9600 (237 pages)