E-44, Window, Entering “reason – Yokogawa FieldMate User Manual
Page 94
E-44
IM 01R01A01-01E
9th Edition : May 31, 2013-00
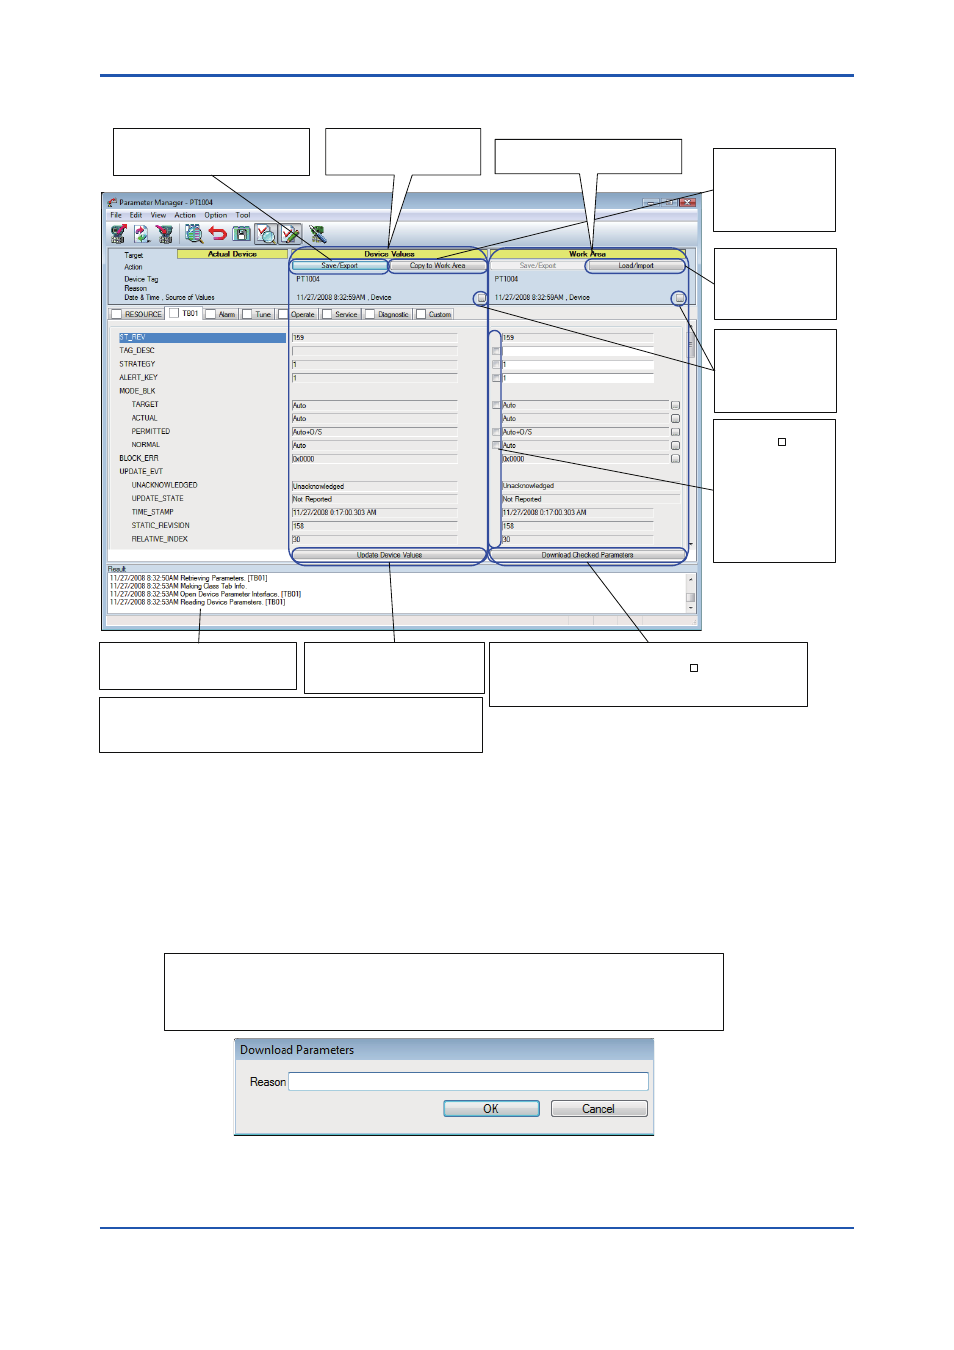
Window
E030302E.ai
n
Click this button to export the device
parameter values (left half of the window)
to a file.
The Device Values area
displays the device parameter
values at the time of startup.
The work area displays the parameter
values read from the device or a file.
Click this button to copy
the actual device
parameter values (left
half of the window) to
the right half of the
window.
Click this button to read
the parameter values
from a file and display
them in the right half of
the window.
Click one of these
buttons to display
detailed information on
the parameters shown in
the left/right half of the
window.
A checkbox ( ) is
displayed for writable
parameters. When a
parameter value is
modified, a checkmark is
added to the checkbox.
A checkmark indicates
that the parameter is to
be downloaded.
Click this button to write the parameters in the displayed tab that
have a checkmark added to the checkbox ( ) to the device in the
order that they are displayed in the window, and then read back only
the parameters that were written and update the Work area.
Magenta is used to indicate that the values in the right and left half of the window
are different and the parameter is writable.
Yellow is used to indicate that the values in the right half and left half of the window
are different and the parameter is read-only.
The tab name indicates not the block tag
but the block type and number for
Foundation Fieldbus.
Click this button to read the
parameter values for the displayed
tab from the device and update the
Device Values area.
Figure E-3-18
Parameter Manager Window (when Device is Connected)
Entering “Reason”
When modifying device parameters, the user is now able to enter the “Reason” and display it in
History.
Up to 50 single-byte characters can be entered in “Reason.”
E030303E.ai
Executing the Download Checked Parameters command opens the following dialog box. This
dialog box enables the user to enter any character string and the entered character string
displayed in History.
(Alternatively, the user can leave “Reason” empty and click the “OK” button.)
Figure E-3-19
Reason
A character string that is entered in the following dialog box is also displayed in History.