Select meter location – E-Mon Energy Software User Manual
Page 100
Meter
E-Mon Energy User Manual
9-5
E-MON
Select Meter Location
To select the Meter Location:
1
From the E-Mon Energy™ Explorer window, click and select Hardware\Set Location
from the drop-down menu. The Select Location dialog box opens.
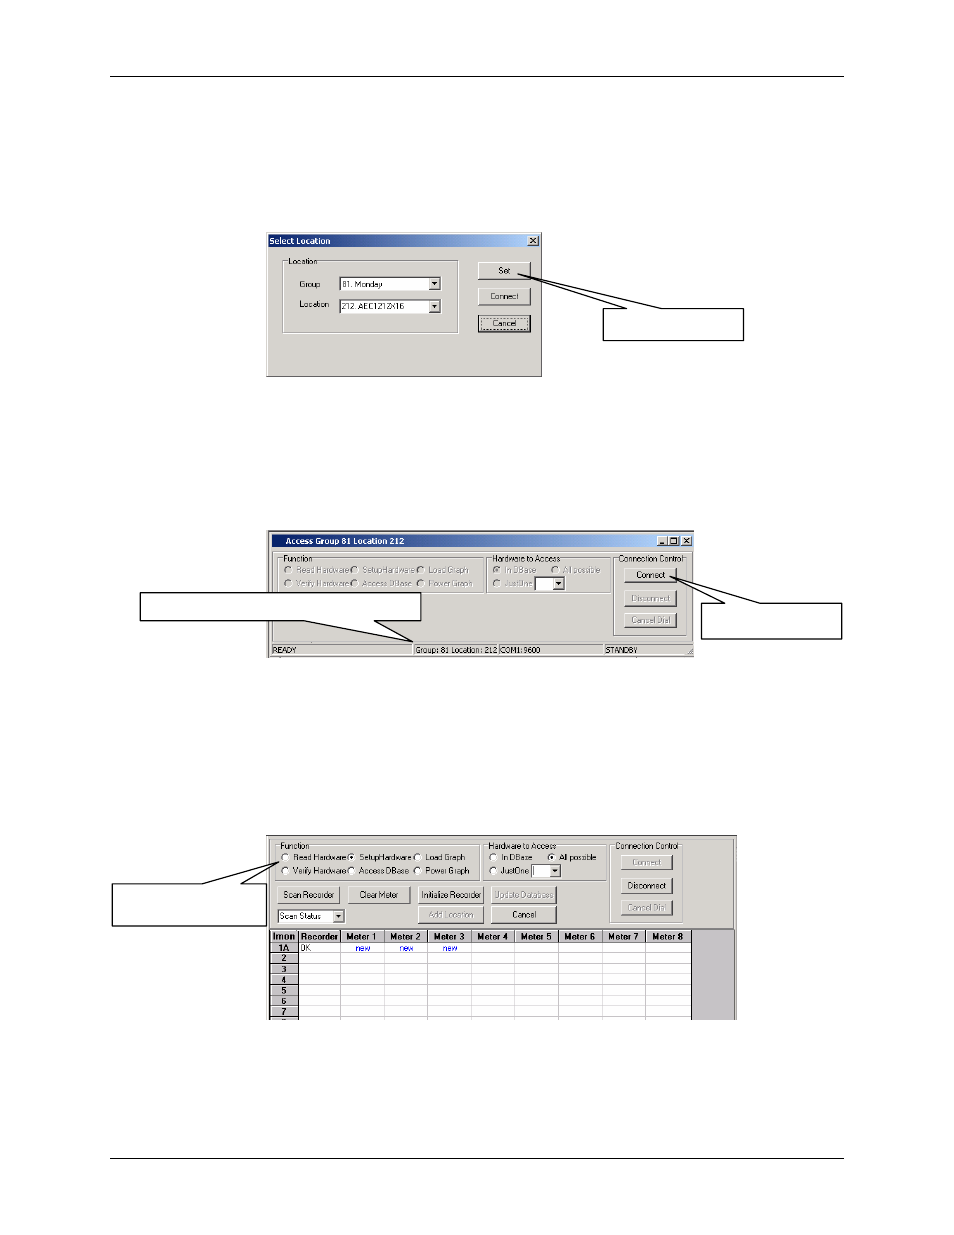
Figure 9.3 - Select Location Dialog
2
From the Group drop-down list, select a Group.
3
From the Location drop-down list, select a Location you want to scan and with which you
wish to communicate.
4
Click on the S
ET
button. The Access window opens.
Note: The Group and Location display in the window’s status bar area.
Figure 9.4 - Access Window
5
Click on the
C
ONNECT
button to establish a connection and access the Function and
Hardware to Access
Groups.
Scanning Devices
6
From the Function group box, click on SetupHardware.
7
From the Hardware to Access group box, click on All possible.
Figure 9.5 - Scan Recorder and Status Window
8
Click on the
S
CAN
R
ECORDER
button. By default, E-Mon Energy will start scanning for
any new devices starting with IDs of 1A, 1B….. Once the new devices are detected, the grid
will display the Recorder ID and the Meter Channel Status (OK, New, Bad….)
Group and Location in status bar
Function Buttons
Connect button
Set button