14 density, 1 balance preparation with density kit, 2 solid density determinations – Ohaus Voyager Balances User Manual
Page 32
26
3.14 Density
Density determinations of solids and liquids can be made with the Voyager balance. A Density Determination Kit Part
Number 470007-010 is specifically designed to be used with Ohaus
®
Analytical Voyager balances. Illustrations in this
procedure refer to the density kit, however, you may use whatever lab apparatus will suit the requirements for density
measurements. The Voyager balance contains built in reference density tables for water and ethanol at temperatures
between 10° C and 30° C. It is not necessary to refer to any external tables to calculate density.
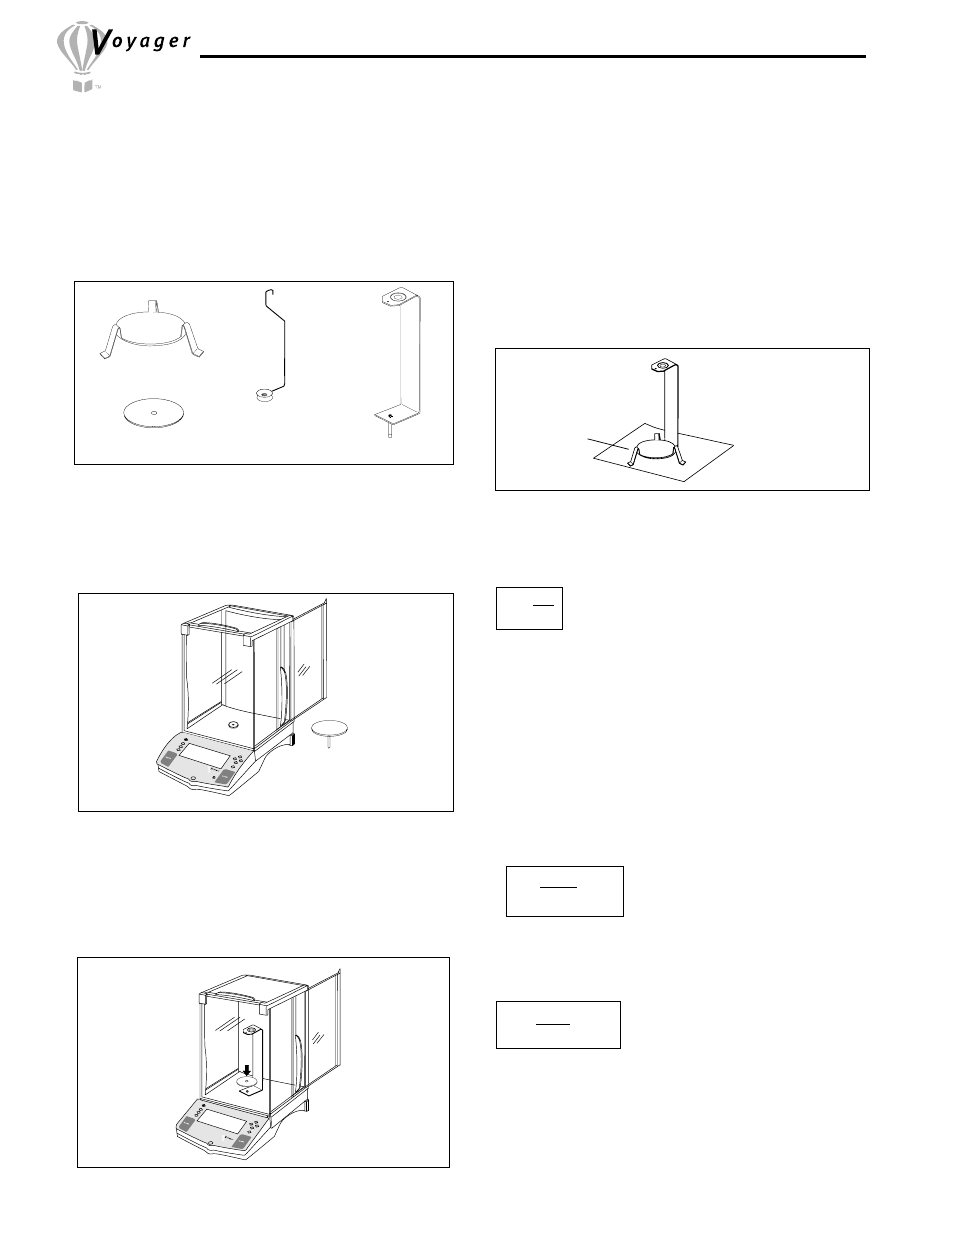
• Place the Support into position over the bracket mak-
ing sure the Support does not make contact with the
Bracket as shown in illustration.
Bracket
Support
3.14.1 Balance Preparation with Density Kit
Q
A
•
Q
0
A - B
Support Mounting
3.14.2 Solid Density Determinations
The density
Q is the quotient of the mass m and the
volume
V.
Q = Density of the solid
A = Weight of the solid in air
B = Weight of the solid in the auxilary liquid
Q
0
= Density of the auxiliary liquid at a given temperature
(this value depends on the temperature. The density
table is included in Voyager balances).
P = Buoyancy of the solid in the auxiliary liquid
(corresponds to
A - B).
A
P
Q = • Q
0
The balance allows direct determination of the
buoyancy
P (
P = A - B) and consequently the above formula can
be simplified:
Q =
m
V
Density determinations are performed by using
Archimedes' principle. This princple states that
every solid body immersed in a fluid loses weight by
an amount equal to that of the fluid it displaces.
The density of a solid is determined with the aid of a
liquid whose density Q
0
is known (water or ethanol
are usually used as auxiliary liquids). The solid is
weighed in air (
A) and then in the auxiliary liquid (B).
The density Q can be calculated from the two
weighings as follows:
• Allow the balance to warm up sufficiently before
making measurements.
• Open either the left or right side door of the balance
and remove the Pan as shown.
• Insert the Bracket into the balance where the Pan
was removed from.
• On balances which are rated over 400g, place the
Equalizing Washer on top of the Bracket as shown in
the illustration.
Go Back
Help
Enter
®
Pan
Balance Preparation
Mode
Units
Setup
Enter
Bracket and Washer Mounting
Bracket
Weigh Below Hook
Equalizing Washer
Support
Kit Components