Xerox MAX 200 User Manual
Page 63
How to make copies
61
In manual mode (continued)
Procedure
1. Ensure the MAX 200 is in manual mode. If needed press the
mode select button until the manual mode lamp is lit.
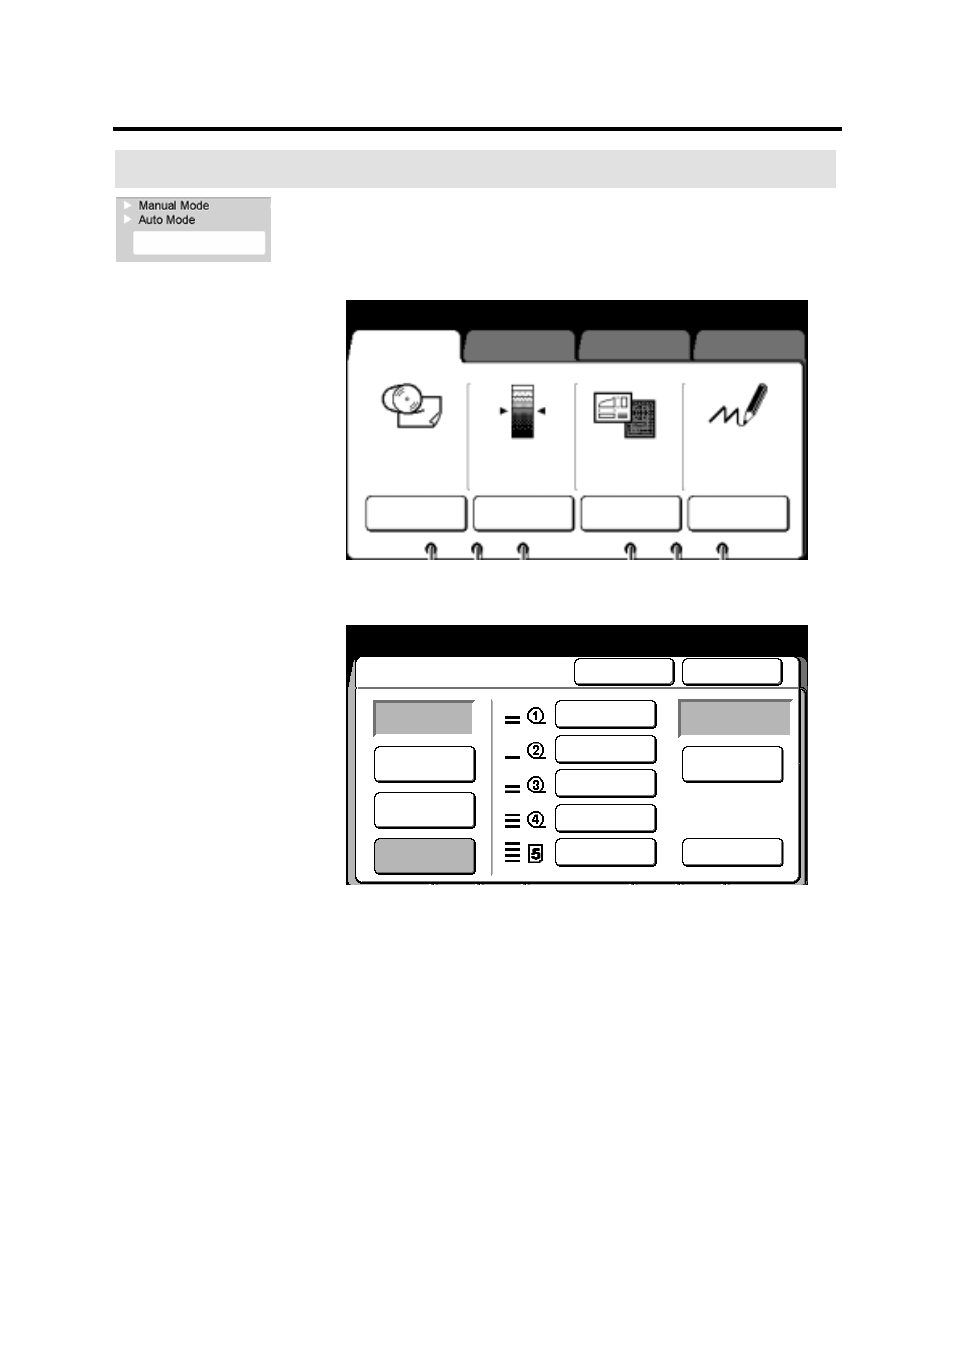
2. Select
the
basic feature group tab.
The basic feature group screen displayed.
3. Select
R/E; media; cut.
The R/E; media; cut screen is displayed.
3. If needed, select the desired R/E.
Normal R/E
One of six preset percentages may be selected,
or any percentage within the available range may
be entered.
R/E by L&W
Two different percentages may be selected, one
for the length and one width.
100.0%
Same as document.
4. Select the desired media source (roll 1 – roll 4, or tray 5).
When roll media is selected, the paper length adjustment feature
is enabled. If needed, select this button to select the desired cut
mode. For detailed information, refer to page 79.
5. Select
done.
The basic feature group screen is displayed.
Ready to copy
Load documents face down
Selected
01
Normal R/E
R/E; Media; Cut
Cancel
Done
100.0%
R/E by L&W
100.0%
36”
Bond
24”
Bond
24”
Bond
18”
Vellum
12”x18” Bond
Paper Length
Adjustment
Manual Feed
Synchronized
R/E; Media;
Cut
Image
Density
Document
Image Type
Print Color
Auto Mode
Line
Fixed
Black Only
Black
Red
Basic
Image Quality
Additional
Finishing
Ready to copy
Load documents face down
Selected
01