E-sorter (program) settings (continued) store – Xerox MAX 200 User Manual
Page 254
252
How to customize the MAX 200
How to change the storage/disk manager features
(continued)
E-sorter (program) settings (continued)
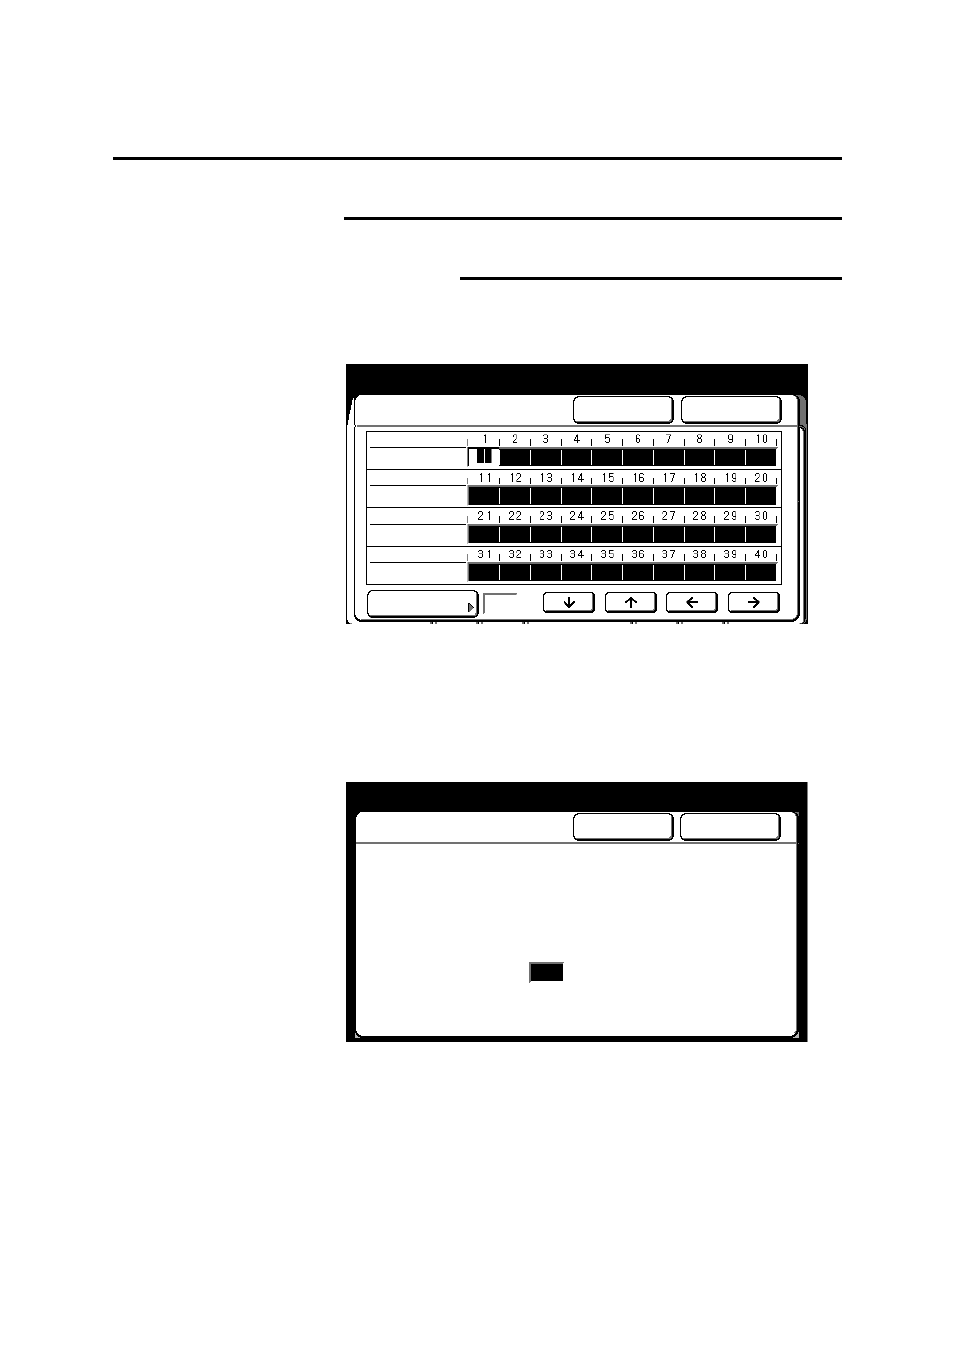
Store
The selected E-sorter program number screen is
displayed (If 5 was selected from the previous step, the
screen below would display Store: 5).
8. Use
the
arrow buttons to select the desired customer number.
9. Enter the number of desired copy sets for each desired
customer number, using the numeric keypad.
If you would like to apply the copy features from a stored job,
select the stored job no. button. Else continue to step 12.
The store screen is displayed.
10. Use the numeric keypad to enter the stored job number (the
screen above displays stored job number 7).
Only the following settings are transferred to the program, auto
mode, the cut mode, stamping setup, document feed direction
an the reduction and enlargement settings.
11. Select done.
Done
Cancel
Store: 5
Enter Stored Job Number
(number must be in the Stored Job memory)
If Stored Job feature is not required,
Press [C] on keypad to clear Stored Job Number
Enter Stored Job Number using
numeric keypad
Stored Job Number
7
Select Customer Number using arrow keys
Enter number of copies using numeric
Store: 5
Cancel
Done
Stored Job No.
Customer No.
Copy Sets
Customer No.
Copy Sets
Customer No.
Copy Sets
Customer No.
Copy Sets