Xerox MAX 200 User Manual
Page 240
238
How to customize the MAX 200
How to change the storage/disk manager features
(continued)
Stamp creation/deletion (continued)
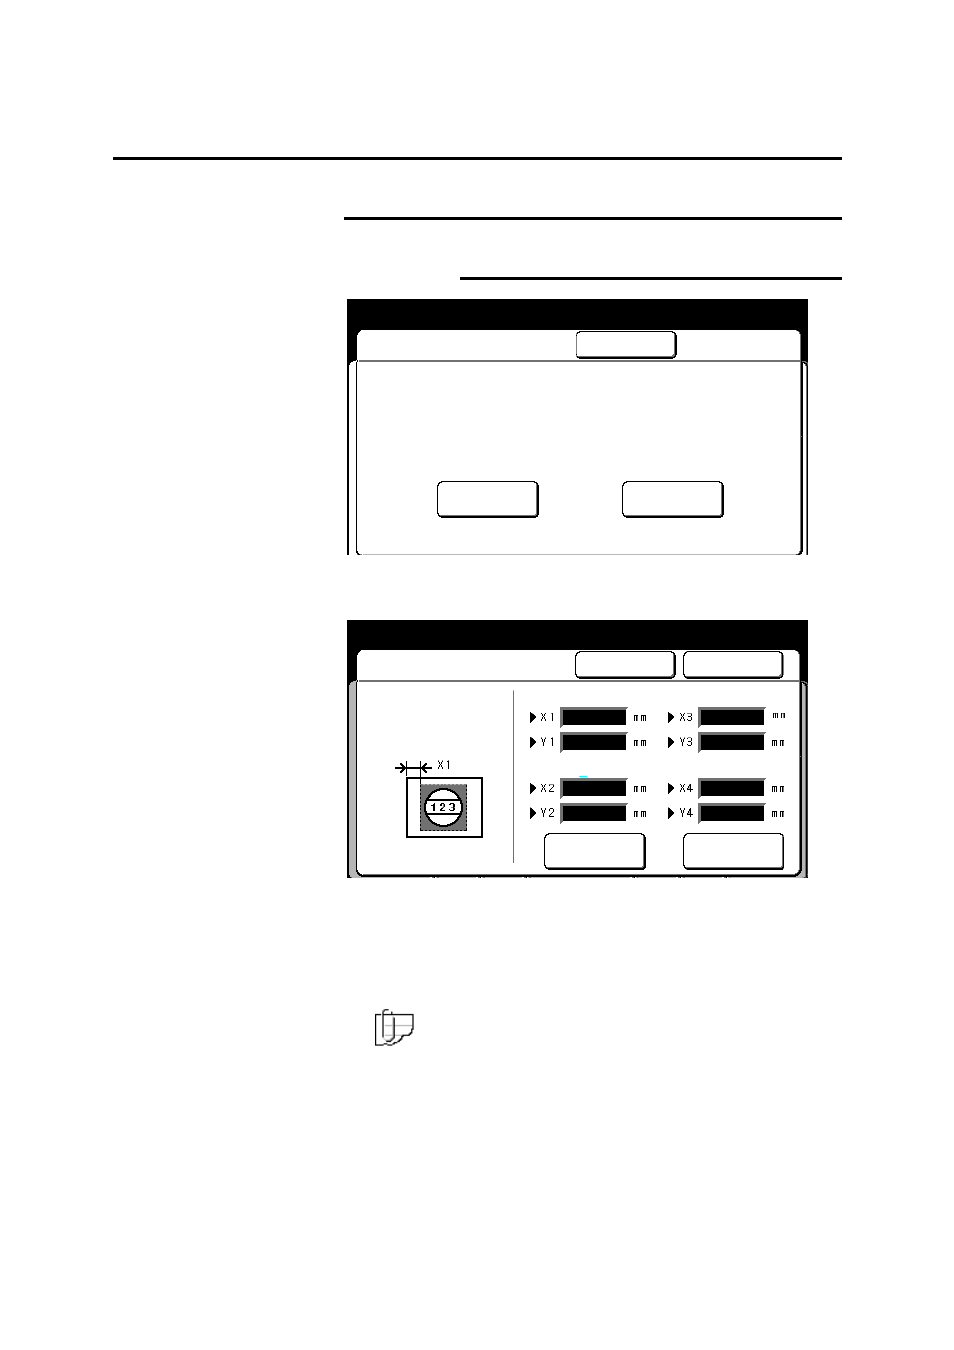
Stamp creation (continued)
5. Select
create/store.
The stamp create/store screen is displayed.
Select scroll to move to next desired field.
6. Use the keypad to enter the X1 and Y1 start position
dimensions (defines the stamp pattern starting position).
7. Use the keypad to enter the X2 and Y2 end position
dimensions (sets the width and height of the stamp pattern).
Note: All stamp patterns can not exceed 70 mm squared =
4900 mm
2
.
8. If needed, enter the X3 and Y3 position of date dimensions
(sets the position of the date stamp).
9. If needed, enter the X4 and Y4 position of number dimensions
(sets the position of the numbering stamp).
Done
Ready to store image on floppy disk
Cancel
Stamp Creation/Store
Enter Size of
Stamp Area on
Document to be
Scanned
Scanning
Setup
Scroll
Start Position
Stamp size
Position of Date
Position of Number
0
0
0
0
0
0
0
0
Custom Presets
Close
Stamp Creation/Deletion
Create/Store
Delete