Editing (continued), Coordinates editing (continued) – Xerox MAX 200 User Manual
Page 122
120
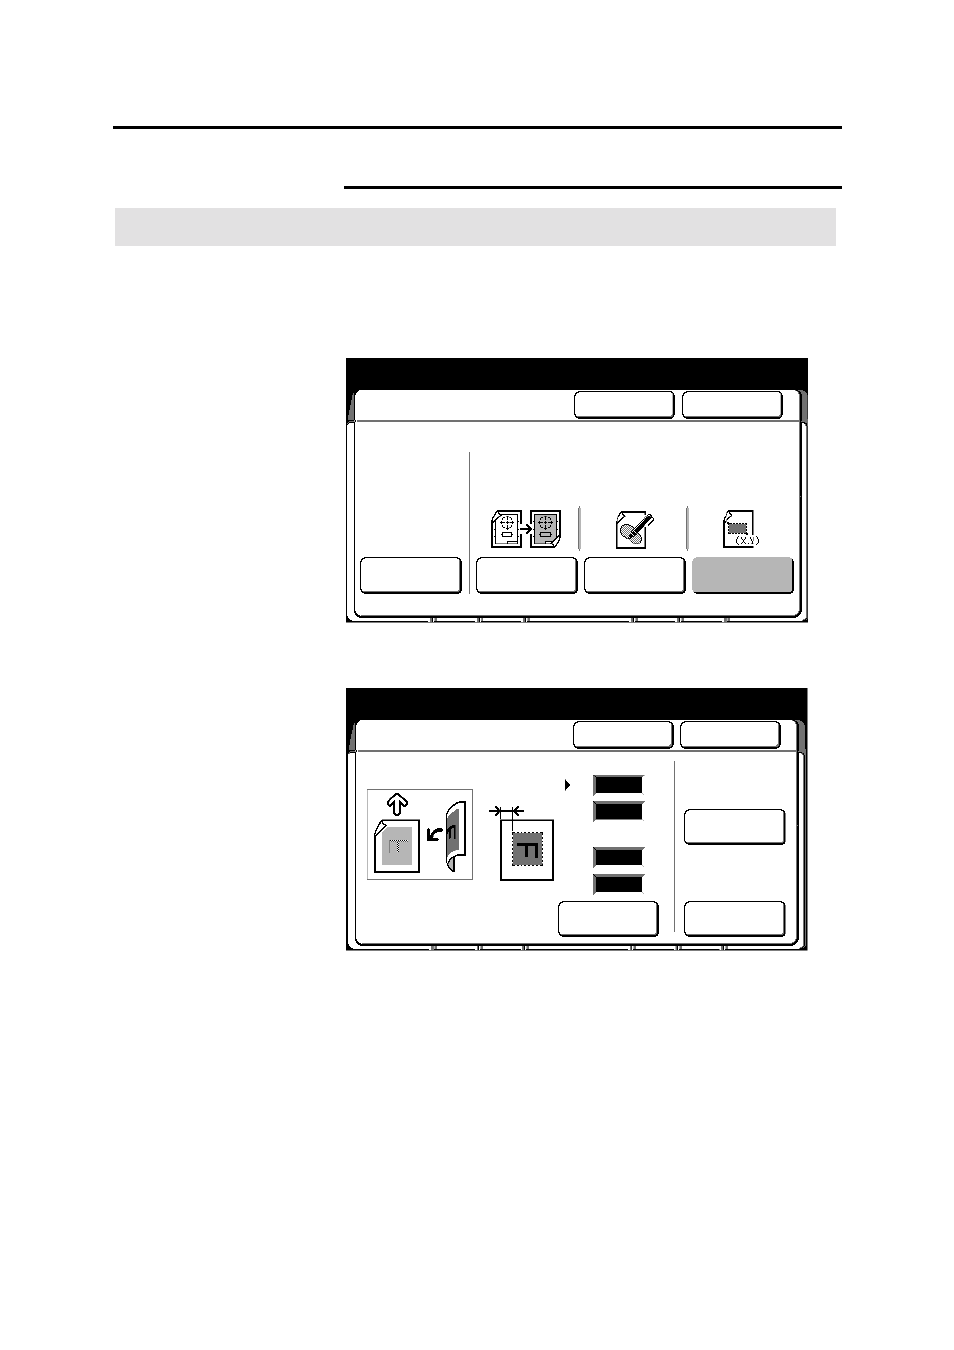
Additional touch screen features
Editing (continued)
Coordinates editing (continued)
Procedure
1. Select
the
additional feature group tab. If needed, refer to page
95.
2. Select
the
editing button, on the basic screen.
The editing screen is displayed.
3. Select
coordinates editing.
The coordinates editing screen is displayed.
4. Use the numeric keypad to enter the X and Y coordinates and
select scroll, to move to the desired field.
The icon on the screen shows you how to measure each
coordinate.
5. Select
outside or inside area.
Inside
When selected the printer edits the area outside the
marked coordinates.
Outside When selected the printer edits the area inside the
marked coordinates.
Ready to copy
Load documents face down
Selected
01
Editing
Cancel
Done
Off
Over All
Editing
Marker
Editing
Coordinates
Editing
Entire
Document
Area Editing
Area Identified by
marker or coordinates
Ready to copy
Load documents face down
Selected
01
Coordinates Editing
Cancel
Done
Scroll
Inside Area
Outside Area
mm
mm
mm
mm
X1
Y1
X2
Y2
Document
Direction
Editing End
Editing Start
X1
0
0
0
0