E 110, Editing (continued), Marker editing (continued) trimming/masking – Xerox MAX 200 User Manual
Page 112
110
Additional touch screen features
Editing (continued)
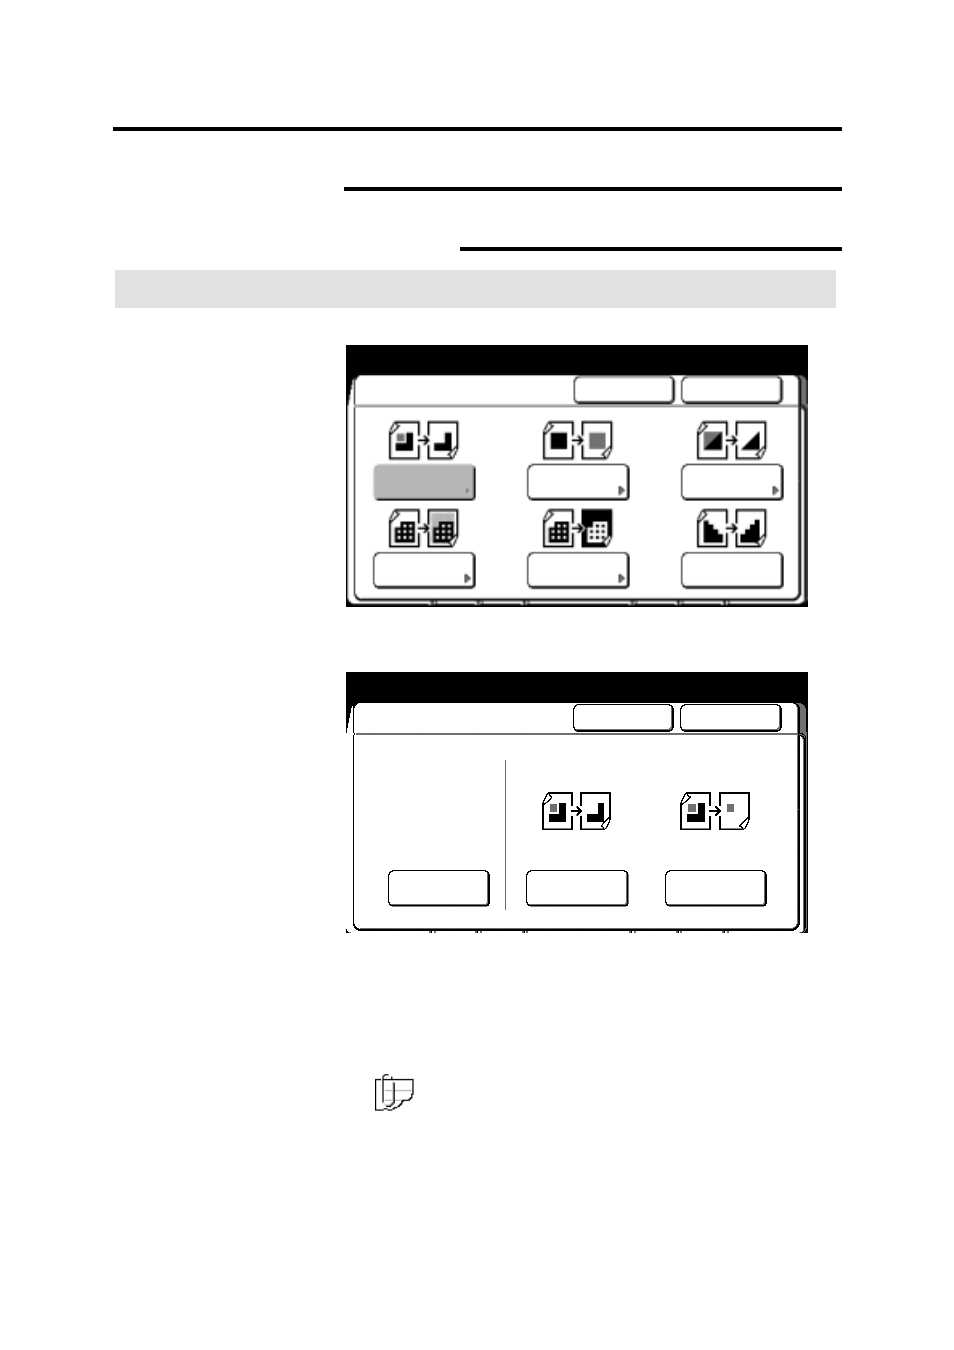
Marker editing (continued)
Trimming/masking
Procedure
The closed area (inside) screen is displayed.
1. Select
trimming/masking.
The trimming/mask screen is displayed.
2. Select
trim or mask.
Trim
The edit area is saved and everything else deleted.
Mask
The edit area is deleted and everything else saved.
3. Mark your document to specify the edit area.
Note: If closed area is selected, the marked area on your
document must be completely closed. The scanner can not
recognize an open loop.
To cancel the changes and exit from this screen, select cancel.
4. Insert the marked document to make copies, or select done as
required to select additional features.
Ready to copy
Load documents face down
Selected
01
Closed Area (Inside)
Cancel
Done
Color Drop
Mirror Image
Fill
Color
Exchange
Trimming/
Masking
Contrast
Reversal
Ready to copy
Load documents face down
Selected
01
Trim/Masking
Cancel
Done
Trim
Mask
Off
- WorkCentre M118-M118i-18317 (2 pages)
- 9200-II (2 pages)
- C75 (16 pages)
- 701P40211 (110 pages)
- C55 (1 page)
- 3600 (3 pages)
- 6135 (2 pages)
- C3545 (20 pages)
- C3545 (20 pages)
- WorkCentre 7665 (19 pages)
- WORKCENTRE 4250 (8 pages)
- WorkCentre M123-M128-6379 (3 pages)
- 5 (104 pages)
- DOCUSP 50.XX (32 pages)
- Copier (2 pages)
- C2424 (10 pages)
- WorkCentre C2424-6003 (16 pages)
- 701P47169 (308 pages)
- DCC400 (6 pages)
- WORKCENTRE M3035 MFP (4 pages)
- CopyCentre C123/C128 M123/M128 123/128 (168 pages)
- WorkCentre M118-M118i-18327 (2 pages)
- COLOR LASER PRINTER Phaser 6100 (7 pages)
- 2830 (2 pages)
- 701P28020 (80 pages)
- 320 (22 pages)
- 701P44973 (206 pages)
- COPYCENTRE PE114E 958 (2 pages)
- 7335 (1 page)
- WORKCENTRE 4260 (16 pages)
- 50 LP/ST (142 pages)
- WorkCentre 7655-7665-7675-5906 (4 pages)
- 2300 (2 pages)
- STACKER 8855/721P (11 pages)
- COPYCENTRE/WORKCENTRE 118 (2 pages)
- 9210 W/O (3 pages)
- 7328 (1 page)
- DocuColor 242-252-260 con built-in Fiery controller-18101 (1 page)
- DocuColor 3535 con Creo Spire CXP3535-18135 (1 page)
- WorkCentre M20-M20i-18306 (2 pages)
- WorkCentre M123-M128-18348 (3 pages)
- WorkCentre M118-M118i-18320 (4 pages)
- WorkCentre 7655-7665-7675-18266 (1 page)
- 4112-4127 ST con Xerox EX Print Server powered by Fiery-18152 (72 pages)