E 147, Stamper (continued), Stamp location (continued) manual – Xerox MAX 200 User Manual
Page 150
148
Finishing touch screen features
Stamper (continued)
Stamp location (continued)
Manual
Note: To cancel changes and exit from any screen, select cancel on
the touch screen.
Procedure
1. Select
the
finishing feature group tab. If needed, refer to page
129.
2. Select
the
stamper button, on the finishing screen.
The stamper screen is displayed.
3. Select
on.
4. Select
stamp location.
The stamp location screen is displayed.
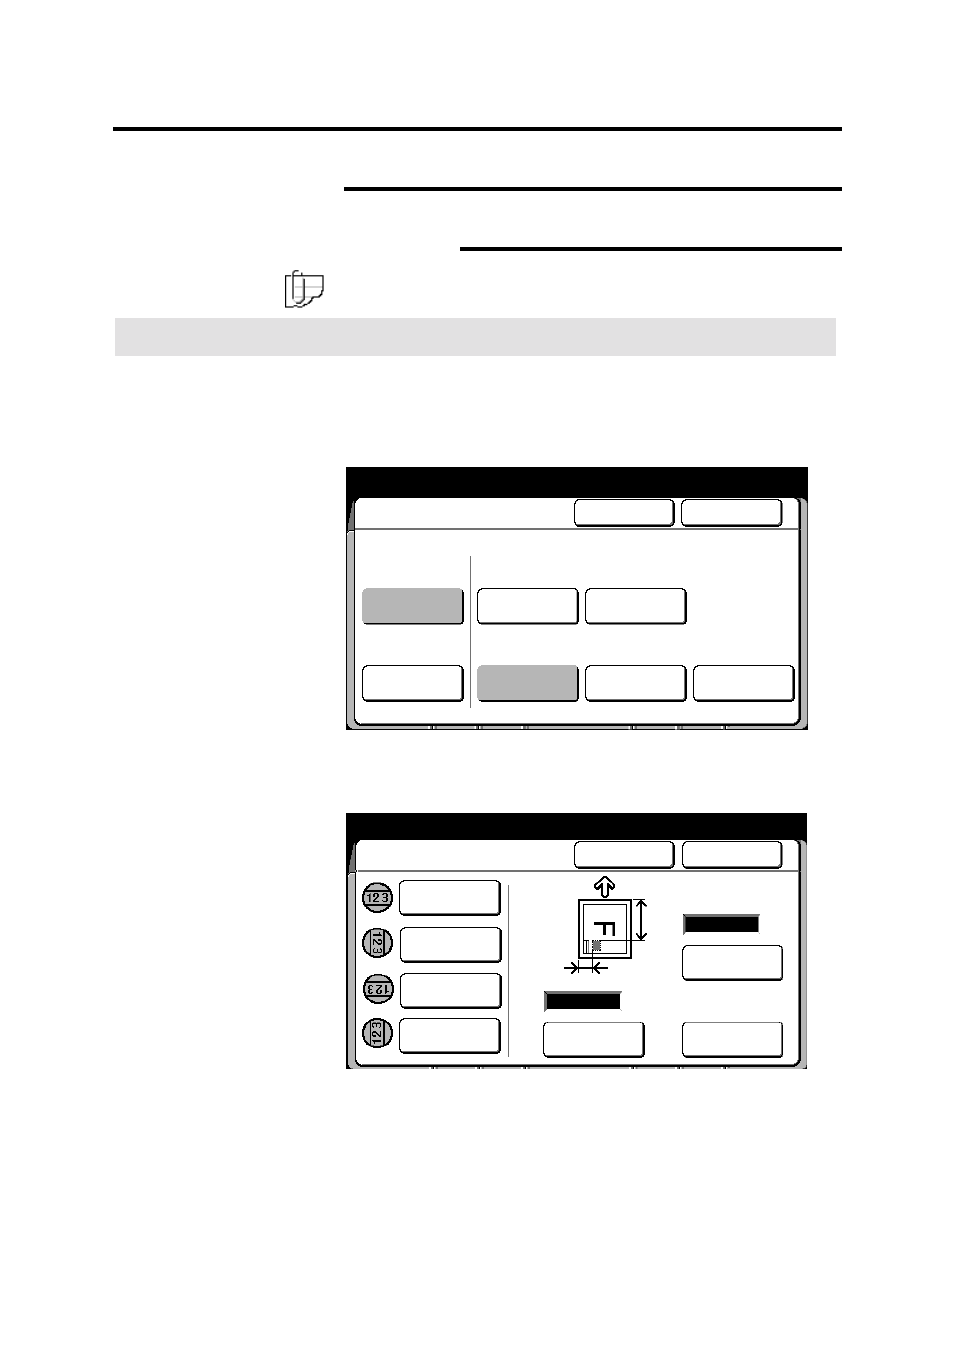
5. Select the desired stamp orientation, normal, 90
0
, 180
0
, or 270
0
.
When the stamp image is scanned (normally portrait), the
scanned position becomes the default for normal. When 90
0
,
180
0
, or 270
0
is selected, the stamp is rotated 90
0
, 180
0
, or 270
0
from the default.
Select Stamp number from
Stamp pattern screen
Selected
01
Stamper
Cancel
Done
Stamp Color
On
Off
Stamp
Location
Stamp
Pattern
Date Stamp
Numbering
No. ??
No Print
Auto
No Print
Red
Cancel
Done
Stamp Location and Orientation
Rotated 90
o
Normal
Enter X
Coordinate
Auto
Enter Y
Coordinate
(0 – 9999)
(0 – 999)
mm
mm
Y
x
Rotated 180
o
Rotated 270
o