Ge 118, Editing (continued), Marker editing (continued) color exchange – Xerox MAX 200 User Manual
Page 120
118
Additional touch screen features
Editing (continued)
Marker editing (continued)
Color exchange
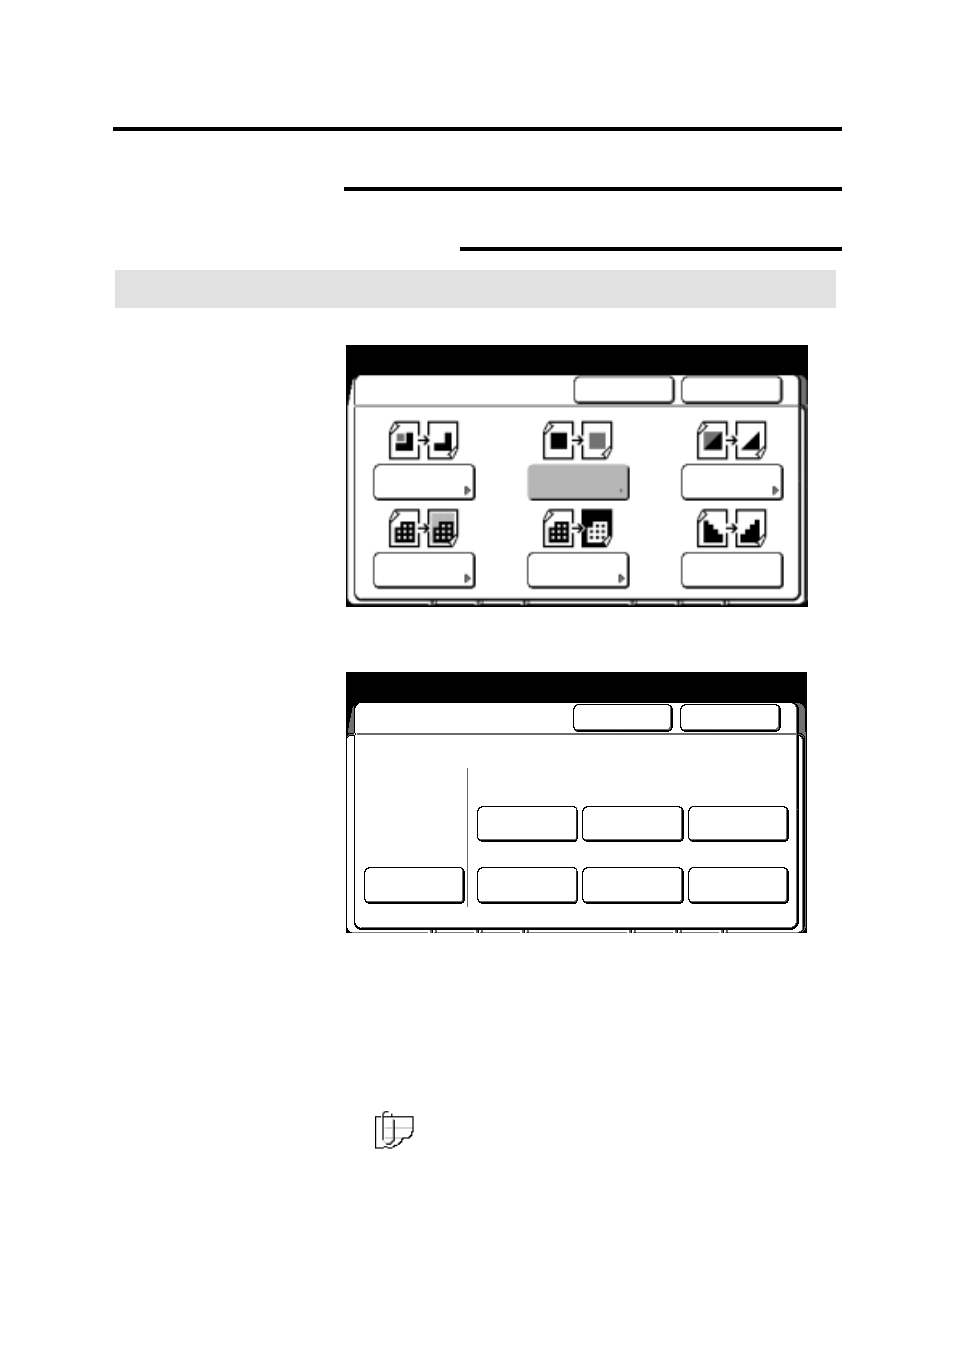
Procedure
The closed area (inside or outside) screen is displayed.
1. Select
color exchange.
The color exchange screen is displayed.
2. Select the colors you want to print in red; red, blue, green,
yellow, black or others.
•
Multiple colors can be selected. When others is selected all
colors except red, blue, green, yellow, and black are printed
in red.
To cancel the changes and exit from this screen, select cancel.
3. Mark your document to specify the edit area.
Note: If closed area is selected, the marked area on your
document must be completely closed. The scanner can not
recognize an open loop.
4. Insert the document to make copies, or select done as required
to select additional features.
Ready to copy
Load documents face down
Selected
01
Closed Area
Cancel
Done
Color Drop
Mirror Image
Fill
Color
Exchange
Trimming/
Masking
Contrast
Reversal
Ready to copy
Load documents face down
Selected
01
Color Exchange
Cancel
Done
Off
Yellow
Black
Others
Blue
Green
Red
Select color (s) to be printed in red