How to change the copy features (continued), Stamp location and orientation (continued) – Xerox MAX 200 User Manual
Page 201
How to customize the MAX 200
199
How to change the copy features (continued)
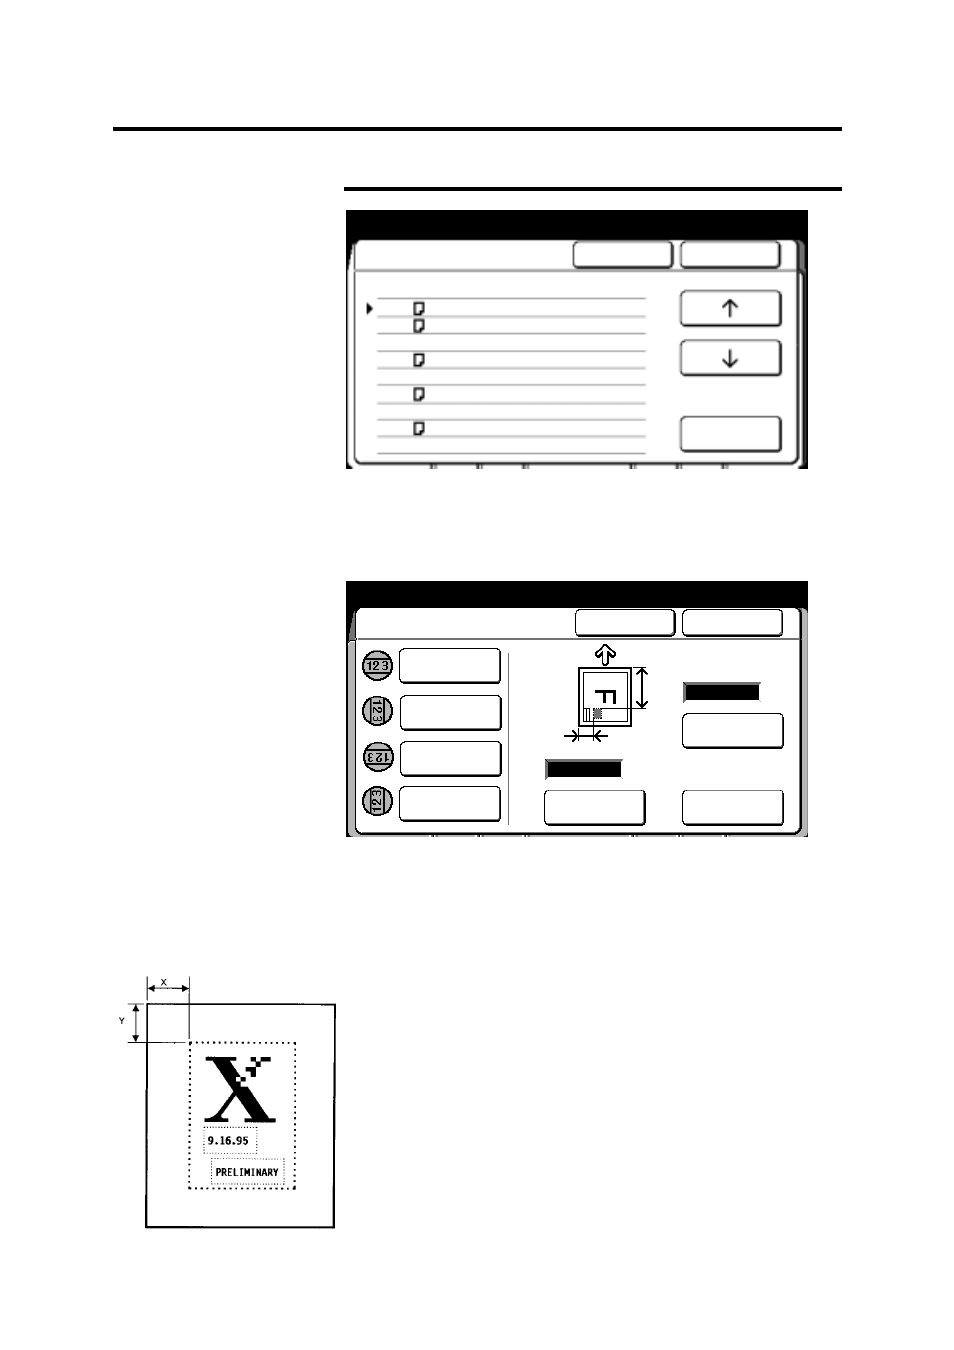
Stamp location and orientation (continued)
5. To change the stamp location, use the arrow buttons to select
the desired document size and feed direction.
6. Select
open.
The stamp location and orientation screen is displayed.
7. Select the desired stamp orientation for the normal option on
page 151; Normal, 90
0
, 180
0
, or 270
0
.
When the stamp image is scanned (normally portrait), the
scanned position becomes the default for normal. When 90
0
,
180
0
, or 270
0
is selected, the stamp is rotated 90
0
, 180
0
, or 270
0
from the default.
8. Select
enter x coordinate (you are setting up the x coordinate
of the stamp location). Enter the desired dimension using the
numeric keypad.
Measure from the left edge of the paper to the left side of the
desired stamp location.
Stamp location
and orientation
Cancel
Done
Open
Size Location Orientation
E X:5 Y:10 Normal
D X:5 Y:10 Normal
D X:5 Y:10 Normal
C X:5 Y:10 Normal
C X:5 Y:10 Normal
B X:5 Y:10 Normal
B X:5 Y:10 Normal
A X:5 Y:10 Normal
A X:5 Y:10 Normal
Custom Presets
Done
Cancel
Stamp Location and Orientation
Rotated 90
o
Normal
Enter X
Coordinated
Enter Y
Coordinated
(0 – 914)
(0 – 609)
mm
mm
Y
x
Rotated 180
o
Rotated 270
o