Pattern mode, Pattern edit] area, Straight line mode button – Panasonic WR-DA7 User Manual
Page 126: Curved line mode button
C h a p t e r 8
D A 7 U s e r s ’ G u i d e
8
-
7
8
Pan/Assign
Surround
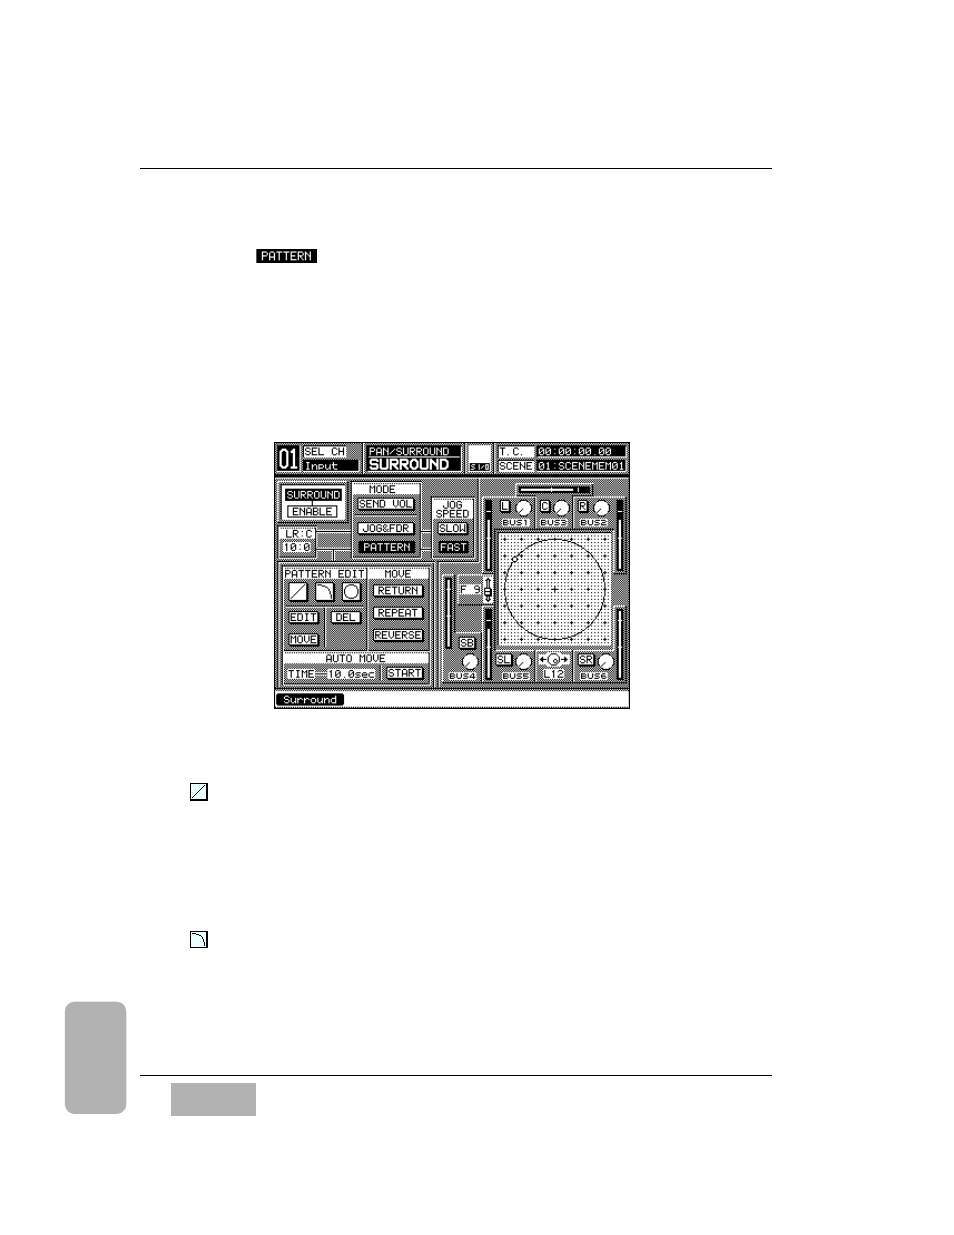
Pattern Mode
Press the
button to select the pattern mode for surround sound
placement. Three new areas _
[PATTERN EDIT], [MOVE], and [AUTO
MOVE] _ become available.
This mode lets you draw vector paths that move over time. You can combine
up to five shape elements when designing the sound path. You can make
moves occur automatically by setting the
[TIME] value in the [AUTO MOVE]
area.
Adjust the
[LR:C] parameter in the window, and set the desired output
balance adjustable from 0:10 - 10:0.
[PATTERN EDIT] Area
Straight Line Mode Button
With this button you can draw a straight line. Once selected, use the
MASTER L/R fader and the JogDial to define a placement, and press
ENTER. This control point marks the beginning of the path. Select the place
for the next control point, and press the
ENTER button to connect the
points. Alternate pressings on the
ENTER button lets you set the second
control point or reselects the mode button.
Curved Line Mode Button
With this button you can draw a curved line. The curved line can be selected
in 1/4 arc shapes. Up and down specifications can be changed by pressing
the
ENTER button and the CURSOR MODE button simultaneously. Again,
alternate pressings on the
ENTER button lets you set the second control
point or reselects the mode button.
Surround Window (Pattern Mode)