Configuration menu/selecting setup, Calibration sub-menu, L low completed ok – Hardy HI 3010 Filler/Dispenser Controller User Manual
Page 79
63
CHAPTER 5
Calibration
complete If an ERR number appears go to Chapter
7, Troubleshooting for more information.
Step 12. End of Calibration
Traditional Calibration From the Web Page
Step 1.
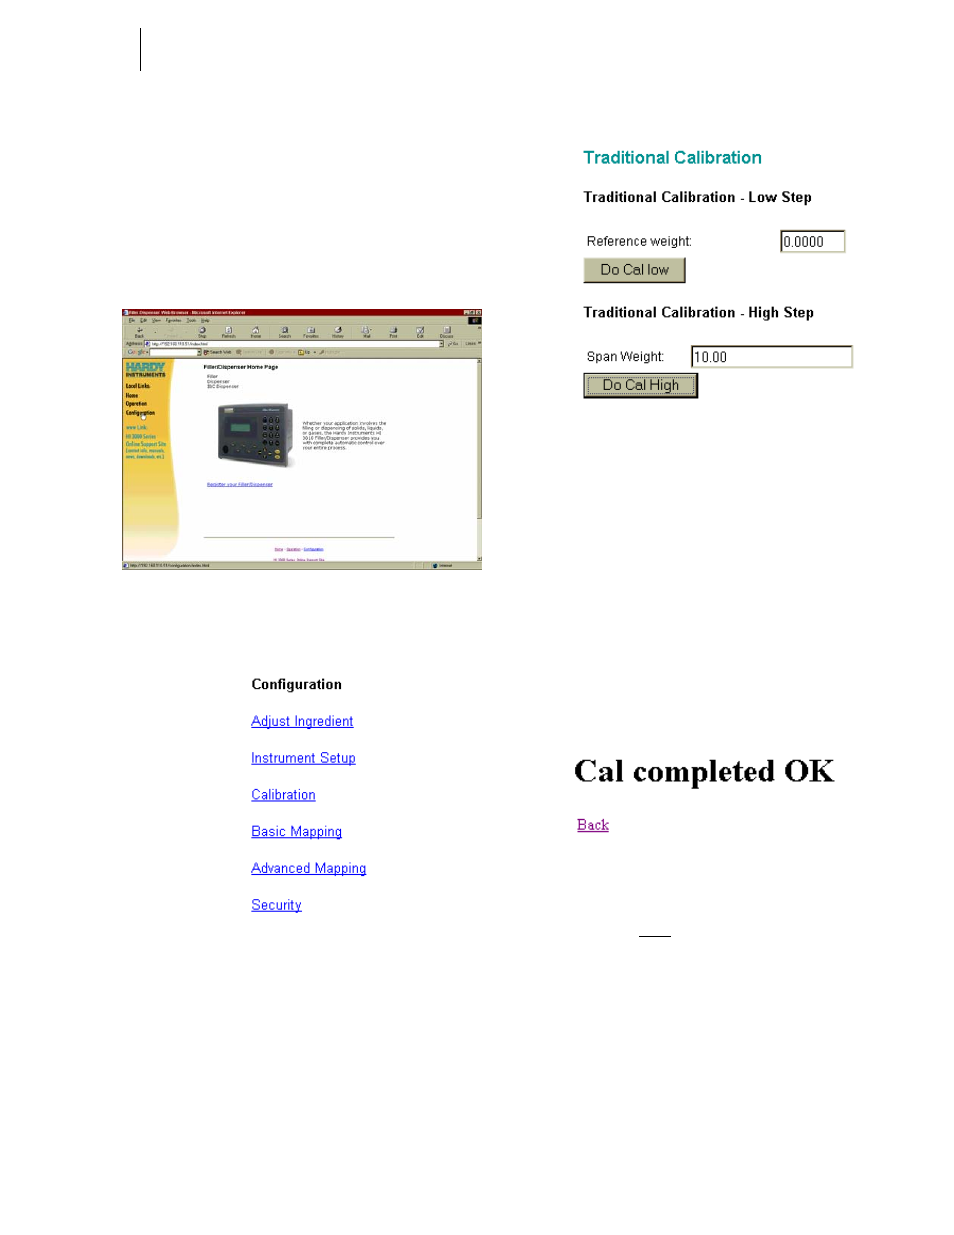
On the Filler/Dispenser Home Page Click on
Configuration. (See Fig. 5-24) The Configura-
tion page appears. (See Fig. 5-25)
FIG. 5-24 CONFIGURATION MENU/SELECTING
SETUP
FIG. 5-25 CONFIGURATION PAGE
Step 2.
Click on Calibration. The Calibration Sub-menu
appears. (See Fig. 5-25)
Step 3.
Select the Sensor type connected to this instru-
ment.
FIG. 5-26 CALIBRATION SUB-MENU
Step 4.
If the Traditional Calibration - Low Step Refer-
ence is any value other than 0.0000 go to Step 5
otherwise go to Step 10.
Step 5.
To clear the entry, move the cursor over the cur-
rent Reference Weight which highlights the
weight value.
Step 6.
Use your keyboard to type in the new 0.0000
(See Fig. 5-25)
Step 7.
Wait 12 seconds or more.
Step 8.
Click on the Do Cal Low button.
Step 9.
A page telling you that the Do Cal Low Calibra-
tion completed OK. (See Fig. 5-26)
FIG. 5-27 CAL LOW COMPLETED OK
Step 10. Click on “Back” to return to the Calibration page.
Step 11. Place a certified test weight on the scale.
Step 12. To enter the Span Weight click in the Span Weight
field. (See Fig. 5-25)
Step 13. To clear the entry, move the cursor over the current
Span Weight which highlights the weight value.
Step 14. Use you keyboard to type in the new value. In our
example we entered 10.00. (See Fig. 5-25)
Step 15. Wait 12 seconds or more.
Step 16. Click on the Do Cal High button.
Step 17. A page telling you that the Do Cal High Calibration
completed OK. (See Fig. 5-28)